Добавил:
Опубликованный материал нарушает ваши авторские права? Сообщите нам.
Вуз: Предмет: Файл:

Beginning ASP.NET 2

.0.pdf
Скачиваний:
23
Добавлен:
17.08.2013
Размер:
24.67 Mб
Скачать

E-Commerce

Figure 13-2

Figure 13-3

469

Chapter 13

4.Click Next and then click Next again on the page that asks you whether you want to save the ConnectionString to app.config (it doesn’t matter either way). From the Configure the Select Statement dialog that appears, you need to select the Products table and all of the fields contained within it, as shown in Figure 13-4.

Figure 13-4

5.Click Next. Test the query to make sure it retrieves the data and then, click Finish, which takes you back to Design View.

6.Now you need to add a second control to your page. From the Data menu of the Toolbox, select the DataList control. Click the smart tag dialog box that appears. From the Choose Data Source drop-down list option, select SqlDataSource1, as shown in Figure 13-5.

7.Click the smart tag dialog box above the DataList control and select Edit Templates. Chapter 7 looked at the process of editing an ItemTemplate if you need a quick reminder. Figure 13-6 shows your default layout.

8.This ensuing layout needs a bit of rejigging to be suitable for displaying a catalog. First delete all of the explanatory text, such as Name: and Description:, using the Backspace key. Also, you don’t need to display all of the items from the Products table; in fact, you only need a picture of the item, its price, and its name on the catalog page, as agreed upon in the design. Delete the Product ID and Description and move the Picture URL to the top. You can drag and drop the Label controls to order them correctly, as shown in Figure 13-7.

470

E-Commerce

Figure 13-5

Figure 13-6

Figure 13-7

471

Chapter 13

9.Next, delete the PictureURL label, because you want to display an image here rather than a label. Select ImageButton from the menu and drag it across to where the PictureURLLabel was. A red cross and the smart tag dialog box with the legend Edit Data Bindings should appear (see Figure 13-8). (You saw in Chapter 7 how to do this, but it delved directly into the code, whereas here you’re using the wizard.)

Figure 13-8

10.Select Edit Data bindings and then select the Custom binding radio button, and you need to amend the Code expression box so that it reads:

Eval (“PictureURL”,”ProductImages\thumb_{0}”)

Figure 13-9 shows how everything should look.

Figure 13-9

11.Click OK. Next, select the smart tag dialog box that appears next to PriceLabel and select Edit DataBindings (see Figure 13-10). This time select the Text property under Bindable properties, and select the Currency option from the Format drop-down list.

12.Click OK. You have a couple of final tasks to perform. Go to the common tasks dialog and select ‘End Template Editing’. Next click the smart tag dialog box by the DataList control and select Property builder. Set the Columns to 4 and change the Direction from Vertical to Horizontal, as shown in Figure 13-11.

472

E-Commerce

Figure 13-10

Figure 13-11

13.You’ve now finished the layout of the catalog. Run the project and view the catalog. It should look like Figure 13-12.

473

Chapter 13

Figure 13-12

How It Works

You’ve created a catalog that pretty much resembles the one on the Wrox United web site. You’ve created your images as image buttons, which will eventually act as links to the individual product item page.

If you click an image, it doesn’t take you anywhere (yet), but in all other respects it is the same as the example site. In this Try It Out two controls do the work. If you go back to Visual Web Developer and view the source for this page you will see the following code:

<asp:SqlDataSource ID=”SqlDataSource1” runat=”server” ConnectionString=”<%$ ConnectionStrings:WroxUnitedConnectionString %>” SelectCommand=”SELECT [Name], [Description], [Price], [ProductID], [PictureURL] FROM [Products]”> </asp:SqlDataSource>

<asp:DataList ID=”DataList1” runat=”server” DataKeyField=”ProductID” DataSourceID=”SqlDataSource1” RepeatColumns=”4” RepeatDirection=”Horizontal” Width=”48px”>

<ItemTemplate>

<asp:ImageButton ID=”ImageButton1” runat=”server” ImageUrl=’<%# Eval(“PictureURL”, “ProductImages\thumb_{0}”) %>’ /><br /> <asp:Label ID=”NameLabel” runat=”server” Text=’<%# Eval(“Name”)%>’> </asp:Label><br />

474

E-Commerce

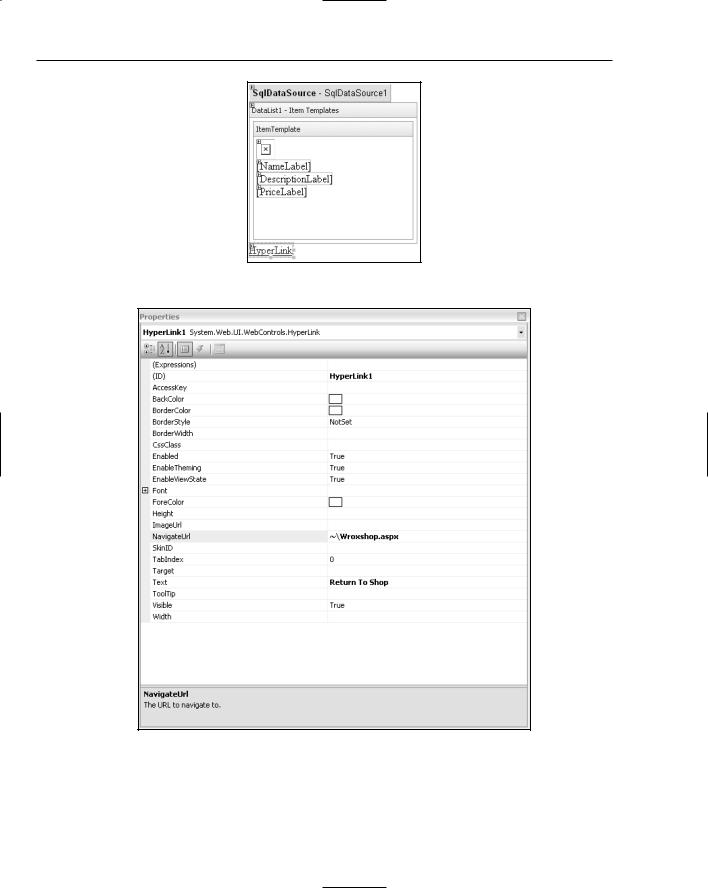
<asp:Label ID=”PriceLabel” runat=”server” Text=’<%# Eval(“Price”, “{0:C}”) %>’></asp:Label>

</ItemTemplate>

</asp:DataList>

The first control, SqlDataSource1, is the one that sources your catalog. The details of what is for sale in the Wrox United web site are stored in the Products table. It contains the connection string enabling you to connect to the database, and also a SelectCommand attribute that specifies the SQL that will pluck the Name, Description, Price, ProductID, and the URL of the image from the Products table. The SqlDataSource on its own doesn’t display anything, though; it needs the DataList to do this for it.

The DataList contains three controls as well as the formatting needed to display your catalog correctly. You started by replacing the Label control contained for PictureURL with an Image button. You did this because a label would just have displayed the text URL of the image, such as ProductImages\ Item1.gif, if you hadn’t. Secondly, you chose an ImageButton in place of an image because you needed a link to the product item page. Rather than having to move or re-create this folder of product images, we have placed it in the web site folder already, and all you’ve had to do is reference it as follows:

Eval(“PictureURL”, “ProductImages\thumb_{0}”)

The data-binding expression has two parameters: the first is the name of the field from the Products table you want to bind to your image button and the second is the contents of the field itself (indicated by {0}). You altered the second parameter so that it pointed to the ProductImages folder. Then you placed “thumb_”, which indicates that you don’t want to use a full-sized image, but instead a thumbnail of the image for the catalog.

You used labels for the other two items in the catalog, because you only needed to display text, but for your price you changed the format so that it displayed it in currency format as $0.00, rather than just 0.0000. Last, you altered the layout so that it displayed the items in a horizontal grid format, four across in each row.

The Product Item Page

In our design discussion we talked about all the possible features you might want to add to a specific product page, but settled on only really needing an enhanced description of the product. Of course your item page shouldn’t contain any less information about the product than the catalog, so you will need to display the name, image, and price in addition to the description. You add that to your web site in the following Try It Out.

Try It Out

Building a Product Page for the Catalog

1.Go to Solution Explorer, right-click the top item in it, and select Add New Item. Add a new Web Form and call it WroxShopItem.aspx.

2.Once again you need the SqlDataSource and DataList controls. In Design View, drag a SqlDataSource control from the Data section of the Toolbox.

3.Click the Configure Data Source flyout and select the WroxUnitedConnectionString from the drop-down list in the Choose your Data Connection dialog that appears.

4.Click Next and, as with the previous Try It Out, select the Products table and select each of the items within it, as shown in Figure 13-13.

475

Chapter 13

Figure 13-13

5.This time click WHERE. You will be presented with the screen depicted in Figure 13-14. Select ProductID from the Column drop-down list; select QueryString from the Source drop-down list; and type in ProductID to the QueryString field, leaving the Default value blank. This step allows you to hone in on your single selected product. You use the filter clause to match the product ID of the selected product and therefore only show details about that particular product. Click Add.

6.Click OK, and then Next and Finish to return to Design View.

7.Add a DataList control and click Configure DataSource and select SqlDataSource1 from the Choose Data Source drop-down list.

8.Next, click Edit Templates from the list, and once again delete all the text alongside the labels. Move the PictureURL label to the top. This time only remove the product ID label, so that it now looks like Figure 13-15.

9.Right-click PictureURLLabel and select Properties. Change the Visible property to false. You’re going to need the URL, but you don’t want it displayed on the screen. The PictureURLLabel is used to provide the URL of where to find the image of your product, however you don’t want the actual URL text displayed, but rather the image itself.

10.Next, in Design View add an Image control from the Standard section of the Toolbox.

11.Click the smart tag dialog box next to the Image control and select Edit Data Bindings.

12.In the dialog that appears, click Custom bindings and amend the text so that it reads (slightly differently from the last Try It Out, because you want a full-sized version of the image, not a thumbnail) as follows:

Eval(“PictureURL”, “ProductImages\{0}”)

476

E-Commerce

Figure 13-14

Figure 13-15

13.Click OK, and then go to Price Label and select the Edit Data Bindings option from the menu that appears when you click the black arrow. Enter the following code in the Custom bindings drop-down list box:

Eval(“Price”, “{0:##0.00}”)

This is slightly different from before, because you want to use the currency format, but currency format adds a $ symbol, and you want to use this value in your code later, so you don’t want to include the $ symbol in the label.

14.Click OK. In Design View, select Hyperlink from the Standard section of the Toolbox menu and place it below the DataList control, as shown in Figure 13-16.

15.Right-click HyperLink and select the Properties option. Change the Text property so it reads

Return to Shop, and change the NavigateURL property so that it reads ~/WroxShop.aspx, as shown in Figure 13-17. Alternately, the reader can click the ellipsis button in the NavigateURL property box and choose wroxshop from there.

477

Chapter 13

Figure 13-16

Figure 13-17

16.Close the Properties window, and go to Design View in the first page you created (WroxShop.aspx).

478