

AutoCAD & AutoCAD LT All-In-One Desk Reference For Dummies (2006)
.pdf552 Taking Drawings to the Internet
Figure 4-2:
Publishing content with Publish to Web for viewing on the Internet.
4.On the Create Web Page page, enter the name of the Web page you are creating, the location where you want the files created, and a description to display on the published file. Click Next.
You can use the Create Web Page page to capture basic configuration information (see Figure 4-3).
Figure 4-3:
Configuring the Publish to Web file.
5.On the Select Image Type page, specify the type of image to create and its size. Click Next.
The Select Image Type page is used to specify the output format for the drawing layouts when they are published. There are three image type options to chose from: DWF, JPEG, and PNG. The image size is available when you specify JPEG and PNG. You can choose from four sizes: Small, Medium, Large, and Extra Large.

Taking Drawings to the Internet 553
6.On the Select Template page, select the template for the desired layout from the Templates list box. Click Next.
The Select Template page is used to specify the basic layout of the images and text on the Web page when the final output is published (see Figure 4-4). You can choose from four templates: Array of Thumbnails, Array plus Summary, List of Drawings, and List plus Summary.
Figure 4-4:
Organizing the content of the Web page.
7.On the Apply Theme page, specify the color theme for the Web page by selecting it from the drop-down list. Click Next.
The Apply Theme page is used to add some color to the Web page. If you know HTML, you can change the colors later for the Web page beyond the total of seven themes that AutoCAD provides.
8.On the Enable i-drop page, specify whether i-drop should be enabled on the Web page. Click Next.
The Enable i-drop page is used to enable i-drop for the thumbnails that are generated during the publish process. This allows users of the Web
page to drag and drop associated drawing files from the Web page into the drawing window.
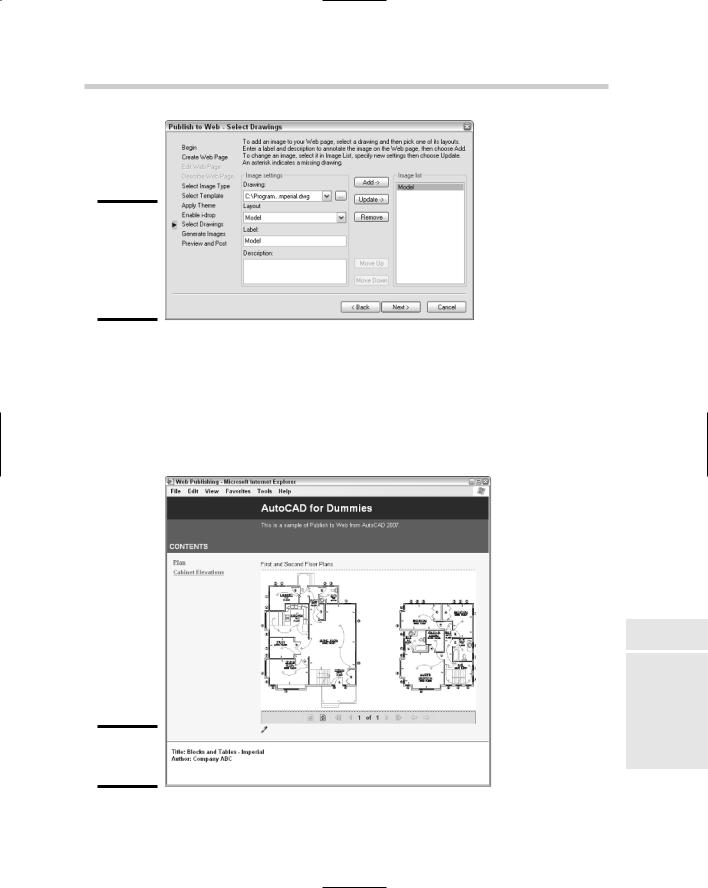
9.On the Select Drawings page, specify the layouts from the current drawing file or select a different file. Each layout can have its own label and description. Click Add after a layout has been specified, along with a label and description for it.
The Select Drawings page is used to specify the layouts you want to add to the final published Web page (see Figure 4-5). You work with one drawing at a time and add each layout that you want to the drawing set to be processed. Each layout added to the Web page is displayed under the Image list.
10. Click Next when you finish adding different layouts.
Book VIII
Chapter 4
SharingElectronic
Files
554 Taking Drawings to the Internet
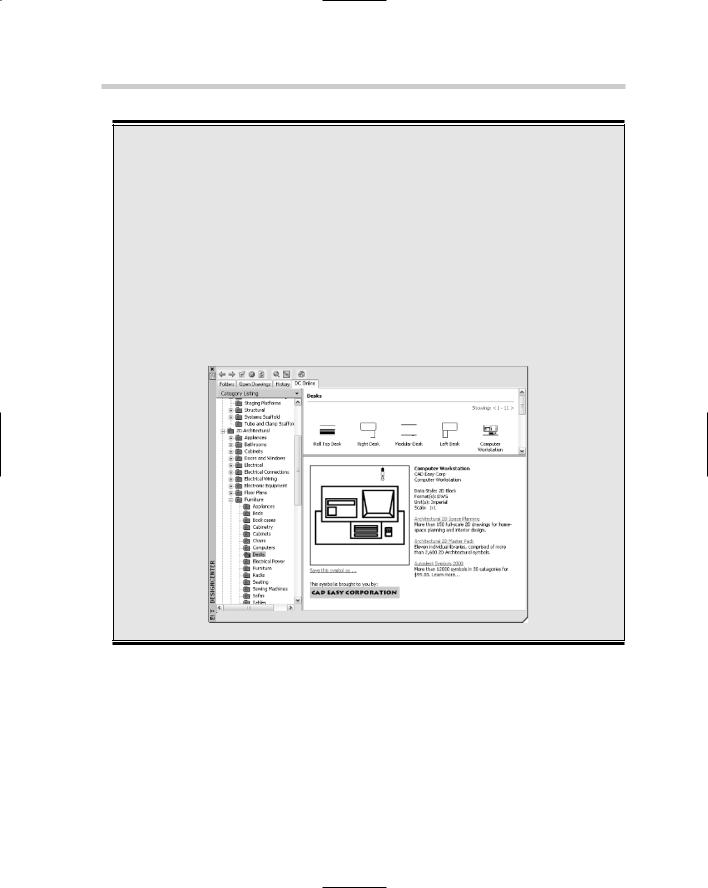
Autodesk i-drop
Autodesk i-drop is a technology that allows for content to be dragged-and-dropped from a Web page. There are two parts to i-drop. One part is used on a Web page to indicate where the content is stored and access it from the page. The second part is built into AutoCAD and picks up when content from an i-drop–enabled Web page is dropped into the drawing window. The AutoCAD side downloads the content to the local drive. The downloaded content usually contains a drawing file that is to be inserted as a block but can also contain things
like company spec guides or marketing material. The following figure shows an image of the DC Online tab of DesignCenter; this tab utilizes i-drop technology.
To use an i-drop–enabled image such as the ones found in DesignCenter, you place the cursor over the image. If the image supports i- drop, an eye dropper icon appears. Click and hold down the mouse button over the image, and then drag and drop the content over the drawing window.
There is now a limit to the number of layouts that can be specified.
11.On the Generate Images page, specify what files should be regenerated: only those files that have been changed or all drawing files. Click Next.
The Generate Images page gives you some control over how long the republishing of a Web page will take. Based on the number of layouts and the size of drawing files, you may want to regenerate the output for changed drawing files only. AutoCAD starts processing the images for output.
Taking Drawings to the Internet 555
Figure 4-5:
Specifying drawings that should be part of the Web page.
12.On the Preview and Post page, you can preview the results that have been published to the output directory or post them directly to a specific location. Click Preview.
The Preview and Post page lets you view what work the feature has done (see Figure 4-6) and allows you to step back and make any necessary changes.
Figure 4-6:
Publish to
Web results.
Book VIII
Chapter 4
SharingElectronic
Files
556 Taking Drawings to the Internet
Using Web-based project sites
As the Internet becomes more content-enriched and users become more accustomed to using it, software companies are expanding its possibilities for business use. Some software companies, like Autodesk, are building project-based collaboration sites that allow their customers to share and post drawing files for members of project teams to access.
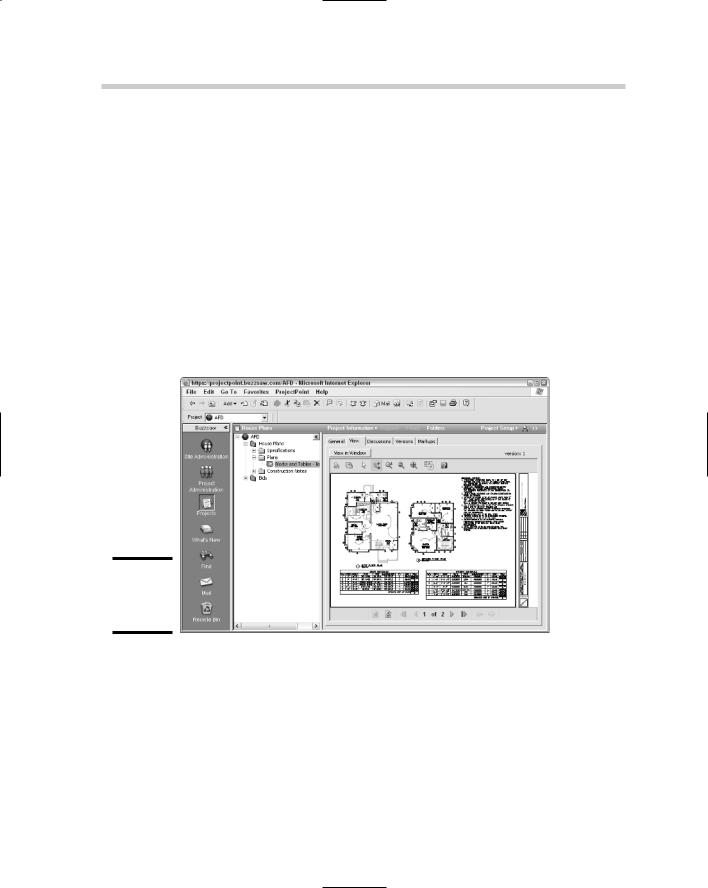
Autodesk Buzzsaw is a project collaboration site designed around the AEC community (see Figure 4-7). There is even a quick way to access Autodesk Buzzsaw from the file navigation dialog boxes found in AutoCAD for opening or saving a drawing file. The project site allows you to define who is part of the project and what types of rights they have. The site is not just for placing drawing files but any kind of file that might be used for a project. The site works very similar to that of a standard file browser application with built-in revision tracking and file viewing.
Figure 4-7:
Autodesk Buzzsaw project site.
Autodesk Buzzsaw has a sister (or brother) site called Autodesk Streamline that is targeted at manufacturers instead of the AEC community. You can use Autodesk Buzzsaw for any type of project, but Autodesk Streamline is optimized to work with the supply chain and suppliers.
The following steps assume that a project site has already been created on Autodesk Buzzsaw. The steps use the File menu to start the OPEN command and open a drawing.
Taking Drawings to the Internet 557
1.Choose File Open.
The Select File dialog box appears.
2.In the Select File dialog box, click Buzzsaw from the list of locations located on the left side of the dialog box.
The list box in the center of the dialog box displays a listing of the project site shortcuts that have already been created. You can use one of these shortcuts if the project site you want to access is listed.
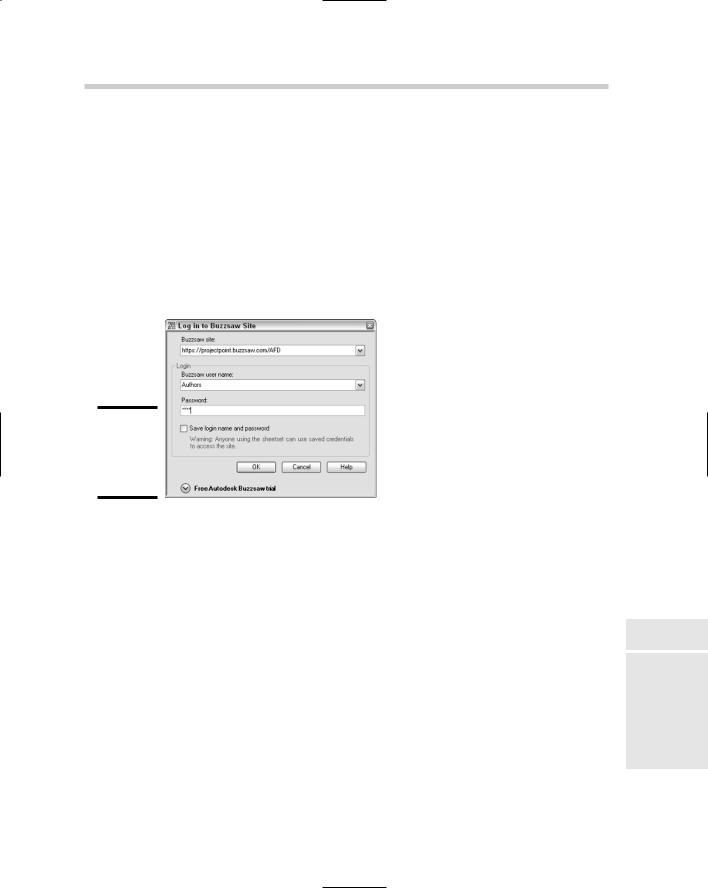
3.Double-click the Add a Buzzsaw location shortcut in the list.
The Log in to Buzzsaw Site dialog box appears (see Figure 4-8).
Figure 4-8:
Logging into an Autodesk Buzzsaw project site.
4.In the Log in to Buzzsaw Site dialog box, enter the URL to the project site in the Buzzsaw Site text field. Then enter your assigned user name and password in the Buzzsaw User Name and Password text fields.
The log-in information can be retained by selecting the Save Login Name and Password check box.
5.Click OK.
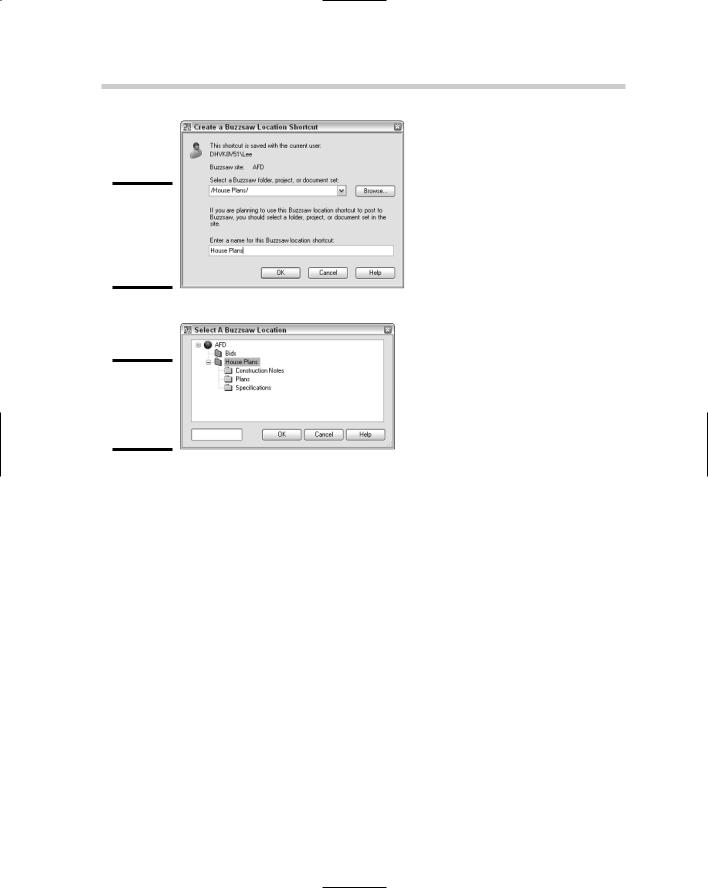
The Create a Buzzsaw Location Shortcut dialog box appears (see Figure 4-9).
6.In the Create a Buzzsaw Location Shortcut dialog box, specify the path under the project site to the project folder you want to access. Also enter a name for the shortcut as you want it to appear in the list box after it is created. Click OK.
If you are not sure of the path to the project folder, click the Browse button and a dialog box with a tree view appears so that you can select a folder (see Figure 4-10). After you click OK in the Create a Buzzsaw Location Shortcut dialog box, you are returned to the Select File dia-
log box.
Book VIII
Chapter 4
SharingElectronic
Files
558 Emulating Paper Digitally
Figure 4-9:
Finalizing the shortcut for the Select File dialog box.
Figure 4-10:
Selecting a folder on the Buzzsaw site.
7.In the Select File dialog box, open the new shortcut to the Buzzsaw project and select the file you want to open. Click Open.
The Select File dialog box closes, and the selected file opens in the drawing window.
Emulating Paper Digitally
The concept of our society using less and less paper when the Internet was born was just a great vision, and well, we are still waiting for it to happen. The design industry is starting to make the shift of relying on electronic file sharing and delivering content in this form, but having a paper copy is still nice. The downside to using lots of paper is higher costs when compared to using a combination of paper and electronic file sharing.
Paper drawing sets have the following costs behind them:
Paper. Paper doesn’t simply grow on trees; well, in a way it does, but it costs money to print drawing files out on any size of paper.

Emulating Paper Digitally 559
Delivery. Someone has to deliver your printed drawing files to your client, and that usually leads to paying out money to a delivery service. This cost can quickly grow based on the number of drawing sets sent out to how much they weigh.
Time. It can cost time and money just having to wait for the set of drawings to be delivered by a delivery service to your client’s doorstep, and then you have to wait for a set of drawings to be marked up and returned.
Hardware maintenance. The more you plot out to hard copy, the more frequently your plotters and printers will need to be serviced. This can cost downtime and money to keep the hardware going.
By no means is going completely electronic the answer either, but based on the phase and size of the project, you might find that speed of delivery and lower costs are nicely associated with using electronic files. There are two common electronic file formats that are often used for sharing drawing files. These two file formats are Design Web Format (DWF) and Portable Document Format (PDF).
AutoCAD and AutoCAD LT now come with a Plotter Configuration file that allows you to create a PDF file from a drawing without purchasing any additional software.
Design Web Format (DWF)
DWF is Autodesk’s solution to a paperless representation of a drawing file or a set of drawing files in a lightweight file format. This means it doesn’t include all of the object properties that are in a drawing file, but rather it contains just enough information to display the drawing accurately on-screen. DWF files, just like DWG files, are vector-based files instead of raster. This allows for them to be loaded faster and allows for you to manipulate certain aspects of the file as if you were viewing the original drawing file.
DWF files have grown in popularity over the last few years with more AutoCAD users using them with their clients. Autodesk has kept on increasing the efficiency and features that DWF supports. It all started with the support of 2D objects in a single sheet file to what it is today with support for 2D/3D objects, metadata, real-time shading and viewing, and multi-sheet support.
Most of the products that Autodesk develops for the design community are able to produce DWF files through devices that work with PLOT or PUBLISH or as a system printer such as the Autodesk DWF Writer. Autodesk DWF Writer can be used to print a Word document to a DWF file. Autodesk offers two DWF file viewers: a free viewer called Autodesk DWF Viewer, and one that must be purchased called Autodesk DWF Composer.
Book VIII
Chapter 4
SharingElectronic
Files

560 Emulating Paper Digitally
Portable Document File (PDF)
PDF is Adobe’s solution to a paperless representation of a drawing file or any other document that can be printed. There are a number of PDF drivers on the market, so when we refer to PDF, we are referring to it as a file format. Some of the different drivers don’t take advantage of all the features equally. If you want to take full advantage of the file format, use an application like Acrobat Professional from Adobe. A PDF file can be viewed by using a free view from Adobe, which is called Adobe Acrobat Reader.
Unlike DWF, PDF is a much more widely used file format because it has been around for a longer period of time and is more commonly used for nonengineering type file formats, such as Word documents and spreadsheets. PDF over recent years has gone through some transformations to help improve the type of data that can be stored in the files so it is much more useful to the design community. PDF files offer security options in the form of password protection and digital signatures.
The ability to produce a PDF file from inside AutoCAD out of the box has been on the wish list for many years now. AutoCAD 2007 comes with its own plotting device to output to a PDF file format. This driver is called “DWG to PDF.pc3” and is available through the PLOT or PUBLISH command.
Head-to-head comparison
Both DWF and PDF files have their places in the design community; it just depends on what your needs are and whom you are working with. It all comes down to what the client wants, but that may not always be the case. Below is an overview of a comparison between the two file formats.
Sharing. DWF files are much smaller than PDF files, which is partly because of the optimization of the viewer engine. DWF was originally designed for design data and PDF was designed for Word documents. However, most clients most likely have Adobe Acrobat Reader on their computer versus either Autodesk DWF Viewer or Autodesk DWF Composer used to view the files.
Efficiency. Both DWF and PDF files can be created from AutoCAD without any additional software to download and install. This once was a problem since AutoCAD only shipped with support for creating DWF files.
Viewing. Both viewers support panning and zooming of a file, but Autodesk supports a much wider range of resolutions. This allows you to zoom in on a small area of a DWF file and have it still look crisp and clear. Both file formats support 3D objects, but due to the nature of the design of DWF, it does display 3D geometry better.
Printing. No surprises here, since they are both document files that can be printed using both standard and large paper formats.

Working with DWFs 561
Markups. The markup process is smoother between DWF and AutoCAD because of integrated tools. If you need to do markups, Autodesk DWF Composer will cost you less than Adobe Acrobat.
Speed. The same drawing file takes less time to create a DWF file when compared to a PDF file. This is due to the way the two files are generated.
Compatibility. Each version of AutoCAD starting with AutoCAD 2000 has shipped with the ability to create DWF files. AutoCAD 2007 is the first to support PDF, so if you have other releases of AutoCAD in your office, you need to obtain a PDF print driver from Adobe or a third-party provider. Some of the third-party utilities and even Adobe’s Acrobat might not always support the latest version of AutoCAD, so it is nice to have a PDF drive ship with AutoCAD.
Security. Both DWF and PDF file formats support password protection, but PDF goes beyond that with support for digital signatures.
Working with DWFs
Creating a DWF file is pretty straightforward through either the PLOT or PUBLISH command, but what happens once the file has been created? After you create the file, you can share it, and based on whom you are sharing it with, they will need a viewer. Autodesk offers two DWF viewers, Autodesk DWF Viewer and Autodesk DWF Composer. Autodesk DWF Viewer is a basic application that allows you to view and print DWF files to a system printer. Autodesk DWF Composer is used to do the same tasks as Autodesk DWF Viewer but also supports the ability to merge DWF files, markups, and measuring from point to point in a file.
So which DWF viewer is right for you? Table 4-1 shows some key differences between Autodesk DWF Viewer and Autodesk DWF Composer.
Table 4-1 |
Autodesk DWF Viewer versus Autodesk DWF Composer |
||
|
|
Autodesk |
Autodesk |
Feature |
|
DWF Viewer |
DWF Composer |
|
|
|
|
View 2D and 3D objects |
X |
X |
|
|
|
|
|
Printing and plotting |
|
X |
X |
|
|
|
|
Measure from point to point accurately |
|
X |
|
|
|
|
|
Create and track markups for revisions |
|
X |
|
|
|
|
|
Create DWF files from drawing files |
|
X |
|
|
|
|
|
Ships with AutoCAD |
|
X |
|
|
|
|
|
Cost |
|
Free |
Around $200 |
|
|
|
|
Book VIII
Chapter 4
SharingElectronic
Files