

ASP.NET 2.0 Visual Web Developer 2005 Express Edition Starter Kit (2006)
.pdfChapter 8
On the final step, we used the user control created in Chapter 7 to display the cart items. The totals were shown using an ObjectDataSource and a Details view, but in read-only mode, with a templated column to customize the display of the sales tax.
For the final step, we handled an event that is run when the Finish button is clicked, and we inserted the order and order items into the database. This code used a combination of exception handling and ransactions to ensure that the database remained consistent, and that the user received appropriate messages.
Now it’s time to have a look at security and personalization, so see how we can protect the Admin page (created in Chapter 6) and the View Orders page (created in this chapter) from prying eyes.
264

9
Security and Deployment
In Chapter 6, we created an administration page, allowing a user to update the menu items, and in Chapter 8, we created the checkout page. We don’t want everyone to be able to run the administration page, so we need to lock them out somehow. For the checkout, it would be good to recognize members of the site and give them the option of having their order added to their account, instead of paying by cash or credit card.
The aim is to have a site where users can log in, and have functionality change depending upon whom they are.
In this chapter, we will look at the following:
How security works, and how to configure it
How to add users and roles to a site
How to secure pages
How to change the menu system so that secured pages are not shown on the menu
We will also look at the topic of what to do once you’ve created your first site, and how you can copy this to a service provider to make the site public. Let’s start with the security aspects.
Configuring Security
Security revolves around the two concepts: authentication and authorization. Authentication is the process of identifying users of a Web site, and authorization is checking that the user is allowed
to access the page he or she is trying to access. Each of these requires configuration, the first to determine who the users are and the second to define which pages they are allowed access to.
In ASP.NET, you manage authentication with the Membership service, which allows definition of the members of a site. There are many places to store the membership details, including a text file, a database, or even the Windows user accounts store. We’ll be using a database, but won’t be storing the users in the PPQ database. Instead, we’ll use the database that ASP.NET automatically creates for us.
Chapter 9
You can configure authorization either on a user-by-user basis or by roles, using the Role Manager service. Roles are a way to make configuration easier because you set the configuration for the role and then you add users to the role. This way, if you add or remove users, you only have to add them to the role, rather than changing the configuration. You’ll see this in action as we go through the exercises.
The configuration of the authorization is done in the Web configuration file, web.config, where we will define which pages users can access. Let’s give this a go, starting with creating the users.
Try It Out |
Configuring Security |
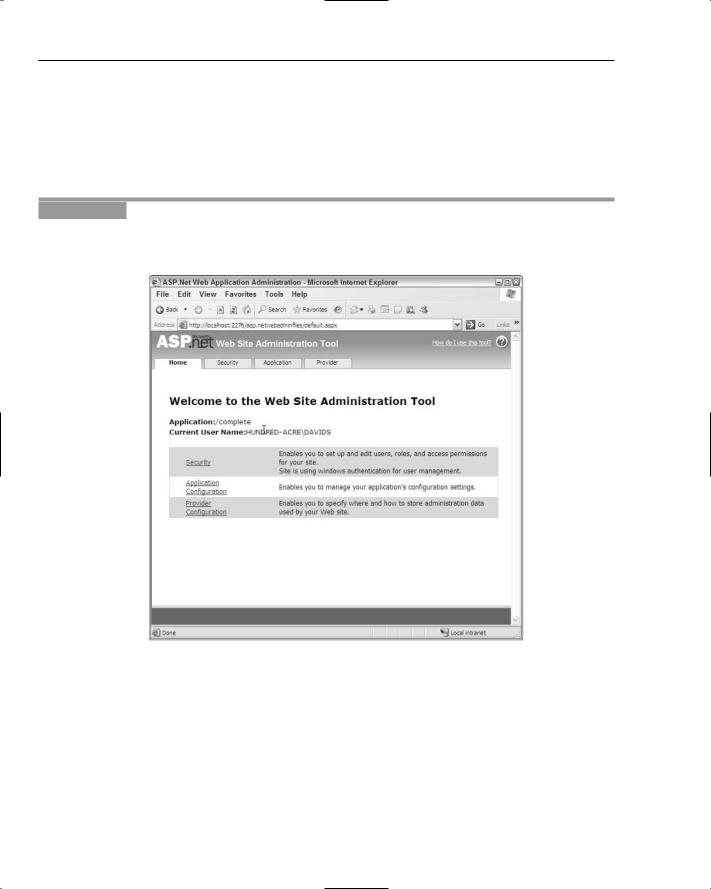
1.In VWD, select the Website menu, and then select the ASP.NET Configuration item. This will launch the Web Site Administration Tool (see Figure 9-1).
Figure 9-1: The Web Site Administration Tool
2.Select the Security tab, and click the “Use the security Setup Wizard to configure security step by step” link. Step 1 is the welcome step, so click Next.
3.On step 2, select the “From the Internet” option, and click Next.
4.Step 3 tells you that the application is configured to use advanced provider settings, so select Next.
5.Step 4 allows the definition of Roles, so tick the “Enable roles for this Web site” option, and click Next.
266
Security and Deployment
6.You now have an option to define the roles. In the New Role Name text box, type Admin and click the Add Role button. No more roles are required, so click the Next button.
7.Step 5 allows creation of users, so use the following to create a new user. Make sure that the Active User box is ticked, because that ensures the user is active on the site. When you’ve entered the details, click the Create User button:
Field |
Text to Enter |
|
|
User Name |
Dave |
Password |
dave@123 |
Confirm Password |
dave@123 |
dave@ppq.org |
|
Security Question |
Favorite Pizza |
Security Answer |
Margerhita |
|
|
8.When the account is created, click the Continue button, and use the following to add another user:
Field |
Text to Enter |
|
|
User Name |
Alex |
Password |
alex@123 |
Confirm Password |
alex@123 |
alex@ppq.org |
|
Security Question |
Favorite Pizza |
Security Answer |
Three Cheeses |
|
|
9.When the second user has been created, click the Next button.
10.Step 6 allows you to add new access rules, restricting pages to selected users. This allows security to be added only to folders, but we want individual pages, and we’ll do this manually later, so click the Next button.
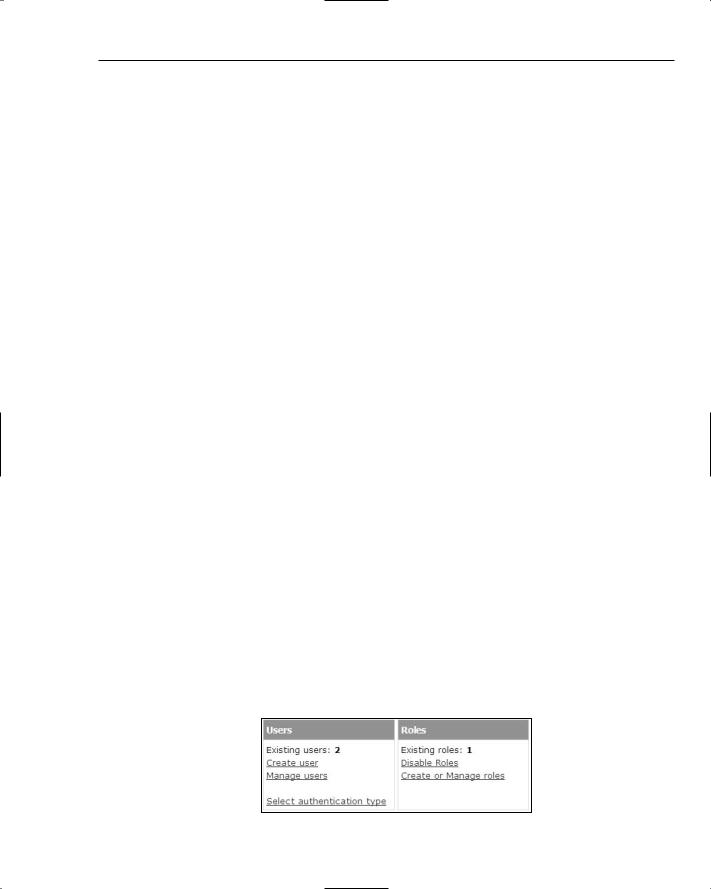
11.Step 7 is the Complete step and tells you that the wizard has been successful, so click the Finish button, which will return you to the Security tab, now with the number of users and roles shown (see Figure 9-2).
Figure 9-2: The user and role configuration options
267

Chapter 9
12.Click the “Create or Manage roles” link, and select the Manage link alongside the Admin role.
13.On the Search for Users page, click the A link to show users whose name begins with “A.” Tick the User Is In Role option (see Figure 9-3).
Figure 9-3: Adding a user to a role
14.The users and roles creation is now complete, so close the Web Site Administration Tool.
How It Works
All of this work is done by ASP.NET and the Web Site Configuration Tool, so there is no code to examine. However, you must understand what this tool has done, so we’ll start by looking at what additional files the tool has added to the site. In the Solution Explorer, if you select the App_Data folder, and click the Refresh button, you’ll see that a new database file base been added, ASPNETDB.MDF (see Figure 9-4).
Figure 9-4: The ASP.NET User and Roles File
This is the database that contains the users and roles, as well as details of which users are in which roles. We’re not going to look at this database, because you don’t really need to know anything about it, just that it works — ASP.NET handles everything to do with this database for us.
You can see the other changes in the Web configuration file, web.config, where the following have been added:
<roleManager enabled=”true” /> <authentication mode=”Forms” />
The first of these, roleManager, simply enables the Role Manager service, so that when users log in, they have roles associated with them. If this option is disabled, none of the role-based features will work.
268
Security and Deployment
You created two users, Dave and Alex, and Alex was given the Admin role. You’ll soon see how we configure the site so that only users in certain roles can access certain pages.
The second addition, authentication, sets the mode of authenticating users. This is set to Forms, which means that a Web form will supply the user credentials (that is, typed by the user on a page). Another common value for this is Windows, which means the user does not have to explicitly enter a user name and password. Instead, the user name used to log in to Windows is used. For a public Web site, you should use Forms authentication.
At this stage, you have only created the users and defined the authentication scheme. Now it’s time to configure the authorization.
Try It Out |
Securing Pages |
1.Run the PPQ application, and when it is displayed in the browser, click the Home link on the menu.
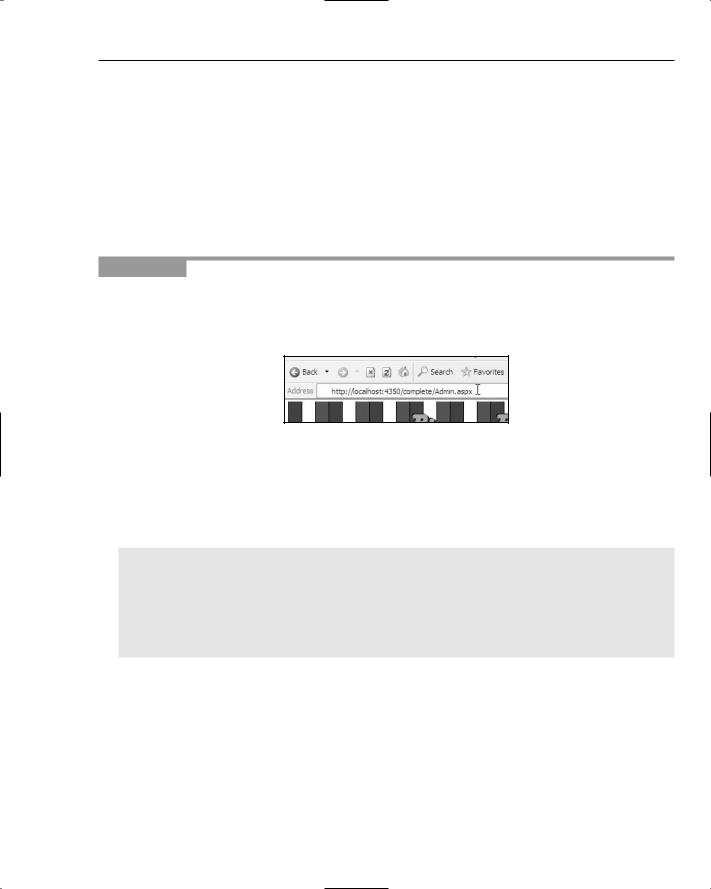
2.In the browser address bar, replace Default.aspx with Admin.aspx (see Figure 9-5) and press Return to view the administration page.
Figure 9-5: Directly navigating to the Admin page
3.Notice that you haven’t logged in, but that you can navigate directly to this page, even though it doesn’t appear on the menu. Close the browser window.
4.Open web.config, and move to the end of the file.
5.Between the </system.web> and </configuration> elements, add the following:
<location path=”Admin.aspx”> <system.web>
<authorization>
<allow roles=”Admin” />
<deny users=”*” /> </authorization>
</system.web>
</location>
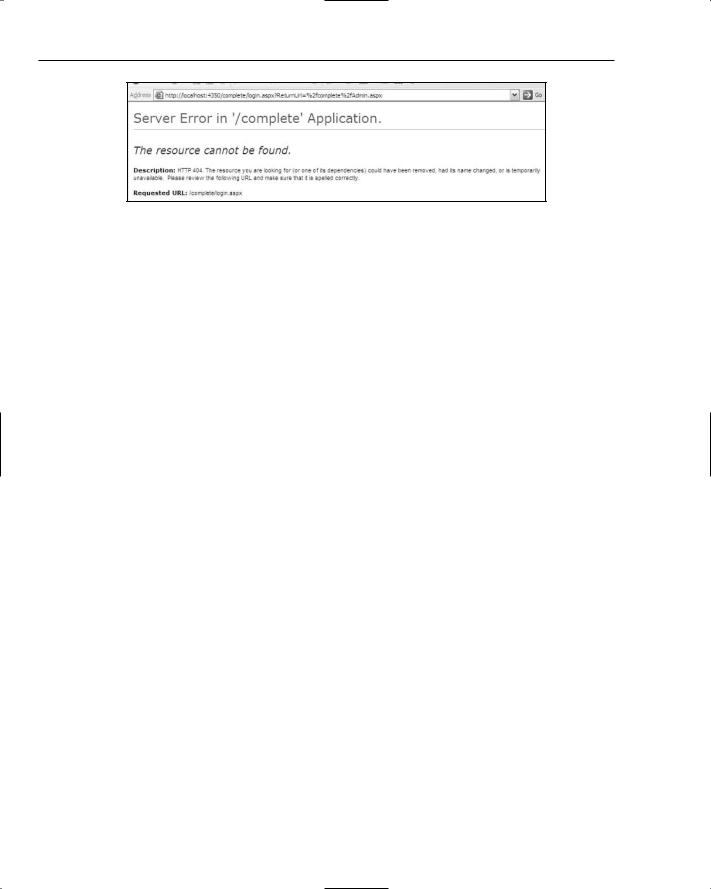
6.Save the file, and switch to Admin.aspx. From the right mouse menu, select View in Browser, and notice this time that you don’t see the admin page, you see an error message (see Figure 9-6).
269
Chapter 9
Figure 9-6: Navigating to an unauthorized page
7.Close the browser window, and return to VWD.
How It Works
The bulk of the work for securing the admin page is done by the Membership service, but that service needs to know what pages users are allowed to access. By default, all users are allowed to access all pages, so you locked down the security by adding a location element. The location element defines a page by using the path attribute, and it is this page that further configuration is applied to:
<location path=”Admin.aspx”>
Within the location element, you added a system.web section, which identifies Web site settings (there are other settings, but you don’t need to know about them for this example).
<system.web>
Within the system.web section, you added an authorization section, which details which users you allow access to the Admin.aspx page.
<authorization>
The first part of the authorization is to allow users who belong to the Admin role, using the allow element (this grants permission to the file). The roles attribute defines the roles to be allowed.
<allow roles=”Admin” />
Next, you must stop all other users accessing the page, so you used the deny element. The users attribute can be a comma-delimited list of users, but you want all users, so the special symbol * is used (this matches any user).
<deny users=”*” />
Finally, all of the open elements were closed:
</authorization>
</system.web>
</location>
270

Security and Deployment
So, the process of authorization is to deny all users but then allow selected users or roles. We mentioned earlier that roles are the best way to do this because you only have to configure the security for the role once. For example, the user Alex is a member of the Admin role, so Alex would have access to the Admin.aspx page, but Dave, who isn’t in the Admin role, wouldn’t be able to access the page. To allow Dave access, all you have to do is add him to the role; you don’t have to change the configuration.
The syntax of the allow and deny elements can take several forms (they are both the same, so we’ll show only allow in the following table:
Configuration |
Meaning |
|
|
<allow users=”?” /> |
Allow all anonymous users. An anonymous user is |
|
one who hasn’t logged in. |
<allow users=”*” /> |
Allow all users. |
<allow users=”Alex, Dave” /> |
Allow only the users Alex and Dave. |
<allow roles=”Admin” /> |
Allow only users who are in the Admin role. |
|
|
You can see that there is quite a degree in flexibility, and to add to that flexibility, you can configure authorization added at three levels:
For the entire Web site, by using an authorization element in the main Web configuration file
For a folder, by placing a Web configuration file in the folder and setting the authorization element
For individual files, by using location elements
You used the latter, but the other two methods follow the same rules.
What we now need to do is allow users to log in to the site, so that the administrator (or more accurately, users who are in the Admin role) can access the admin page. Users can belong to more than one role, but as long as one of those roles is Admin, the user will be allowed access to the page.
Try It Out |
Creating the Login Page |
1.In the web.config file, change the authentication section so that it looks like the following:
<authentication mode=”Forms”> <forms loginUrl=”Login.aspx” />
</authentication>
2.Save the configuration file and close it.
3.Create a new Web form called Login.aspx, remembering to place the code in a separate file, and select the PPQ.master master page.
4.Switch the page to Design view, and open the Login section of the Toolbox. Drag a Login control, and drop it into the Content area. Select the Auto Format . . . option from the Login Tasks, and select the Simple scheme, before clicking OK to format the control (see Figure 9-7).
271

Chapter 9
Figure 9-7: The formatted Login control
5.Save the file, and switch to Admin.aspx. From the right mouse menu, select View in Browser, and notice that instead of the error message, you now see the login page.
6.For the user, enter Dave, and for the password enter dave@123 and press the Login button. You are returned straight to the login page. Enter Alex for the user, and alex@123 for the password. Press Login and you will see the administration page.
Let’s see how this works.
How It Works
The first thing you did was to change the authentication section in web.config. Instead of just defining the mode as Forms, you added a forms element, with the loginUrl attribute set to
Login.aspx.
<authentication mode=”Forms”> <forms loginUrl=”Login.aspx” />
</authentication>
The loginUrl defines the login page, and ASP.NET will show this page whenever you try to access a page for which you are unauthorized — it’s giving you the opportunity to log in with user credentials that are allowed to access the page.
When you tried to log in as the user Dave, you weren’t allowed access to Admin.aspx because Dave isn’t a member of the Admin role. Remember, in the earlier exercise you set the authentication, and allowed access only to members of the Admin role. Alex is a member of the Admin role, so when you logged in as Alex, you were allowed access to the page.
You can see how simple security is, because all you have to do is run the Web Site Administration Tool to set the initial configuration, and add users and roles. You then set a few options in the Web configuration file, and ASP.NET handles everything else for you.
272
Security and Deployment
Modifying the Menu
One thing that still needs work on the site is usability — you don’t want to force the administrators to type in the Admin.aspx page name. It would be much simpler if the Admin option appeared on the menu, but this means that all users would be able to see it. Let’s see how we can add Admin to the menu but have it visible only to authorized users.
Try It Out |
Configuring the Menu |
1.Close any browser windows, and return to VWD.
2.Open Web.sitemap, and move to the end of the file. Underneath the Contact node, add the following:
<siteMapNode url=”Admin.aspx” title=”Admin” description=”Edit Pizzas” />
3.Save the file and close it.
4.Open PPQ.master, and switch to Design view.
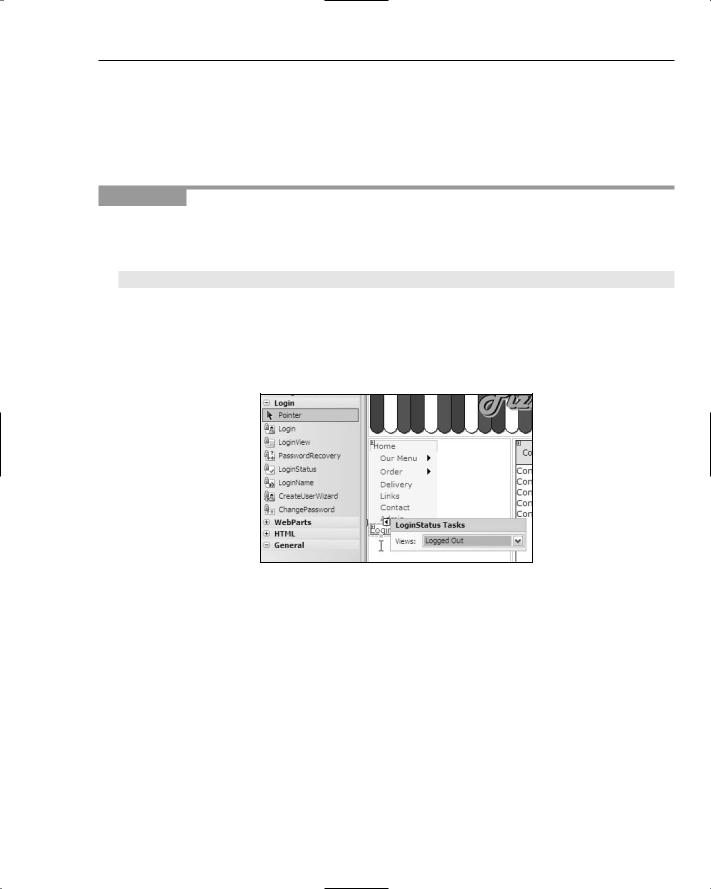
5.From the Login section of the Toolbox, drag a LoginStatus control, and drop it underneath the menu (see Figure 9-8).
Figure 9-8: Adding a LoginView control to the page
6.Save the page and run the application. Notice that there is now a Login link under the menu. Click the link, and you are taken to the login page. Log in as Dave (the password is dave@123), and see how the Login link now says Logout. Also notice that the menu shows the Admin item, even though Dave is not authorized to access the page.
7.Click the Admin link on the menu, and notice how the login page is shown once more.
8.Close the browser window, and return to VWD.
273