

ASP.NET 2.0 Everyday Apps for Dummies
.pdfChapter 7: Building a Product Maintenance Application 267
2 SqlDataSource2_Updated: This method is similar to the SqlDataSource2_Deleted method. It’s called when a row has been updated. Again, both the AffectedRows and the Exception properties are checked to see whether an error occurred.
3 SqlDataSource2_Inserted: This method is called when a row has been inserted. If the AffectedRows or Exception properties indicate that an error has occurred, an appropriate error message is displayed. Otherwise what shows up is a message indicating that the product has been inserted; then the page is re-bound.
Listing 7-9: The code-behind file for the Catalog Maintenance page (VB)
Partial Class ProdMaint |
|
Inherits System.Web.UI.Page |
|
Protected Sub SqlDataSource2_Deleted( _ |
1 |
ByVal sender As Object, _ |
|
ByVal e As System.Web.UI.WebControls. _ |
|
SqlDataSourceStatusEventArgs) _ |
|
Handles SqlDataSource2.Deleted |
|
If e.AffectedRows = 0 _ |
|
Or Not e.Exception Is Nothing Then |
|
lblMessage.Text = “<br />Product could not “ _ |
|
+ “be deleted. Please try again.” |
|
e.ExceptionHandled = True |
|
Else |
|
lblMessage.Text = “<br />Product deleted.” |
|
GridView1.SelectedIndex = -1 |
|
Me.DataBind() |
|
End If |
|
End Sub |
|
Protected Sub SqlDataSource2_Updated( _ |
2 |
ByVal sender As Object, _ |
|
ByVal e As System.Web.UI. _ |
|
WebControls.SqlDataSourceStatusEventArgs) _ |
|
Handles SqlDataSource2.Updated |
|
If e.AffectedRows = 0 _ |
|
Or Not e.Exception Is Nothing Then |
|
lblMessage.Text = “Product could not “ _ |
|
+ “be updated. Please try again.” |
|
e.ExceptionHandled = True |
|
Else |
|
lblMessage.Text = “<br />Product updated.” |
|
GridView1.SelectedIndex = -1 |
|
Me.DataBind() |
|
End If |
|
End Sub |
|
|
|
(continued)

268 Part IV: Building Back-End Applications
Listing 7-9 (continued)
Protected Sub SqlDataSource2_Inserted( _ |
3 |
ByVal sender As Object, _
ByVal e As System.Web.UI.WebControls. _ SqlDataSourceStatusEventArgs) _ Handles SqlDataSource2.Inserted
If e.AffectedRows = 0 _
Or Not e.Exception Is Nothing Then lblMessage.Text = “<br />Product could not “ _
+ “be inserted. Please try again.”
e.ExceptionHandled = True Else
lblMessage.Text = “<br />Product inserted.” GridView1.SelectedIndex = -1
Me.DataBind() End If
End Sub End Class

Chapter 8
Building a Report Application
In This Chapter
Designing the Order Listing application
Creating the database for the Order Listing application
Building the Order Listing application’s Web pages
Report applications are an important part of almost all but the most trivial Web applications. Report applications extract data from a database and
present it in a meaningful form for the users. In some cases, the Report page includes a link to a printable version of the page that doesn’t have banner graphics or other distractions.
This chapter presents a simple report application — called the Order Listing application — that lists orders entered by users. The Order Listing application works in a way that’s consistent with the other applications in this book:
It uses the same database as the Shopping Cart application in Chapter 6.
It lets the user select an order in the Orders table, and then displays an invoice for the order.
It includes a link to a printable version of the invoice.
270 Part IV: Building Back-End Applications
The Application’s User Interface
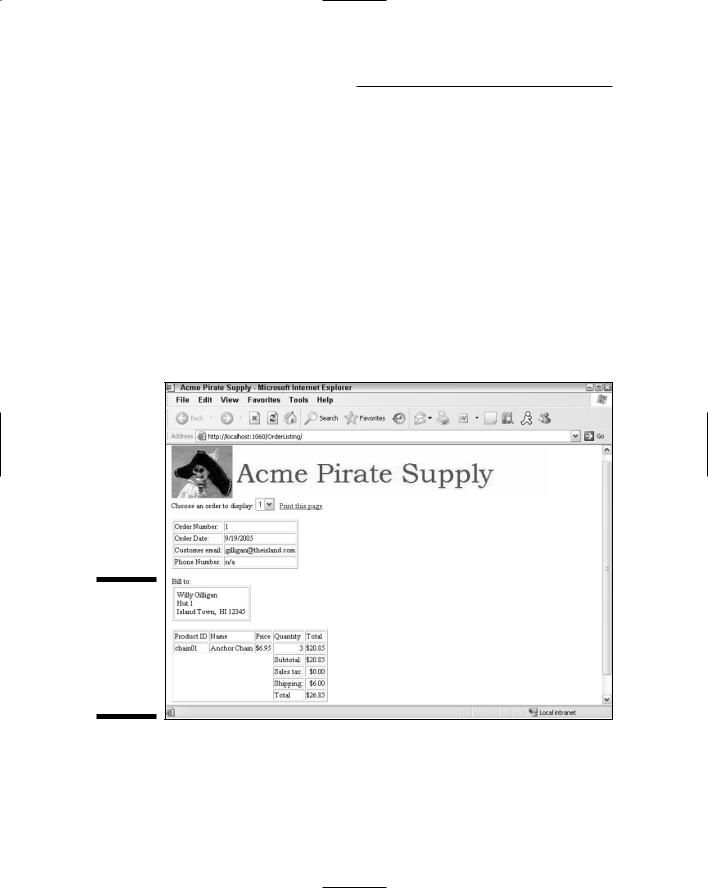
This application has a simple user interface that consists of just two pages: the main page and the Master Page. The main page (Default.aspx), shown in Figure 8-1, is the equivalent of a home page for the application. After the banner image that’s displayed by the Master Page, a drop-down list lets the user choose the order to be displayed. Then the details for the selected order are displayed in nicely formatted tables.
Notice the Print this page link near the top of the page. If the user clicks this link, the PrintOrder.aspx page shown in Figure 8-2 is displayed. This page is almost identical to the page shown in Figure 8-1, with two differences: (1) the banner image isn’t displayed and (2) the Print this page link is omitted. Then the user can use the browser’s File Print command to print a copy of the page.
Figure 8-1:
The Orders application displays information for the selected order.

Chapter 8: Building a Report Application 271
Figure 8-2:
The Print
Order page.
Designing the Application
Even though this application is simple, there are several important design decisions that should be made before you begin writing the application’s code. These decisions are described in the following paragraphs:
You’ll need to decide the details of how the database will store the data to be shown in the report. Because this application uses the same database as the Shopping Cart application presented in Chapter 6, the database design decisions have already been made. For more information, refer to Chapter 6.
There are several ways to create reports in ASP.NET. If you have a professional edition of Visual Studio, you can use Crystal Reports to create the reports. Visual Web Developer Express Edition doesn’t include Crystal Reports, however, so the application that’s the subject of this chapter uses standard ASP.NET controls to build its report.
The invoice report shown in the main application page and the Print Order page should be identical. You could simply duplicate the code used to create the report in both pages, but that would be inefficient. A better way is to create a user control that displays the printable data for an order. Then you simply include the user control in both the

272 Part IV: Building Back-End Applications
Default.aspx page and the PrintOrder.aspx page. That’s the technique used in this application.
You’ll need a way to tell the user control which order to display. There are, of course, several ways you can do that. For this application, a session variable named ordernum is used. When the user uses the drop-down list to select an order in the Default.aspx page, the application saves the order number in the ordernum session variable. Then the user control retrieves this session state variable to determine which order to display.
Building the Database
First things first: Before you can use the Order Listing application, you must create the database it uses. The following sections explain how to do that.
Designing the database
The Order Listing application uses the same database design that was used in the Shopping Cart application presented in Chapter 6. I won’t review all the details of this database design here. (If necessary, refer to Chapter 6 to catch up on those details.)
To save you some page-flipping, though, Tables 8-1 through 8-3 list the columns defined for the three database tables used by the Order Listing application: Customers, Orders, and OrderItems.
Although the design of the database is the same, this application doesn’t use the same physical database as the one presented in Chapter 6. That database was named Cart. This application uses a database named Orders.
Table 8-1 |
The Customers Table |
|
Column name |
Type |
Description |
VARCHAR(50) |
The customer’s e-mail address. This |
|
|
|
column also serves as the table’s pri- |
|
|
mary key. |
|
|
|
lastname |
VARCHAR(50) |
The customer’s last name. |
|
|
|
firstname |
VARCHAR(50) |
The customer’s first name. |
|
|
|
address |
VARCHAR(50) |
The customer’s street address. |
|
|
|
city |
VARCHAR(50) |
The customer’s city. |
|
|
|

Chapter 8: Building a Report Application 273
Column name |
Type |
Description |
state |
VARCHAR(2) |
The customer’s two-character state |
|
|
code. |
|
|
|
zipcode |
VARCHAR(9) |
The customer’s Zip code, up to nine |
|
|
characters. |
phone |
VARCHAR(20) |
The customer’s phone number. |
|
|
|
Table 8-2 |
The Orders Table |
|
Column name |
Type |
Description |
ordernum |
INT |
This column uniquely identifies each |
|
|
order and serves as the the table’s |
|
|
primary key. |
orderdate |
SMALLDATETIME |
The date the order was placed. |
|
|
|
custemail |
VARCHAR(50) |
The customer’s e-mail address. This |
|
|
serves as a foreign key that relates |
|
|
the order to a particular row in the |
|
|
Customers table. |
subtotal |
MONEY |
The sum of the totals for each item |
|
|
associated with the order. |
|
|
|
salestax |
MONEY |
The sales tax for the order. |
|
|
|
shipping |
MONEY |
The shipping charges for the order. |
|
|
|
total |
n/a |
The order total. This field is calcu- |
|
|
lated by adding the subtotal, |
|
|
salestax, and shipping fields. |
Table 8-3 |
The OrderItems Table |
|
Column name |
Type |
Description |
ordernum |
INT |
The order number for the order this |
|
|
item is associated with. |
|
|
|
productid |
VARCHAR(10) |
The ID for the product represented |
|
|
by this item. Note that this column |
along with the ordernum columns comprise the primary key for this table.

274 Part IV: Building Back-End Applications
Table 8-3 (continued)
Column name |
Type |
Description |
name |
VARCHAR(50) |
The product’s name. |
|
|
|
price |
MONEY |
The product’s price. |
|
|
|
quantity |
SMALLINT |
The quantity ordered. |
|
|
|
total |
n/a |
The total for the item, calculated by |
|
|
multiplying the price by the quantity. |
Creating the database
The CD that comes with this book includes a script named CreateOrdersDB. sql that you can use to create this database. To run this script, open a command-prompt window and change to the directory that contains the script. Then enter this command:
sqlcmd -S localhost\SQLExpress -i CreateOrdersDB.sql
Note that this command assumes you’re running SQL Server Express on your own computer. If you’re using SQL Server on a different server, you’ll need to change localhost\SQLExpress to the correct name.
If you’re curious about the contents of this script, refer to Listing 6-1 in Chapter 6. The only difference between that script and the CreateOrdersDB.sql script is the name of the database that’s created. Otherwise the scripts are identical.
Adding test data
You can add some useful test data to the Orders database by running the InsertOrdersData.sql script that’s included on this book’s companion CD. In addition to adding category and product data to the database, it also creates two customers (Willy Gilligan and Jonas Grumby), each with an order in the Orders table. The test data is simple, but enough to test the application.
To run the InsertData.sql script, open a command window, change to the directory that contains the script, and run this command:
sqlcmd -S localhost\SQLExpress -i InsertData.sql

Chapter 8: Building a Report Application 275
Again, you’ll need to change the server instance name if it is other than
SQLExpress.
SQL statements to retrieve the order data
The Order Listing application uses three SQL SELECT statements to retrieve data from the Customers, Orders, and OrderItems tables. These SQL statements are described in the following paragraphs:
The following SELECT statement fills the drop-down list with order numbers:
SELECT [ordernum]
FROM [orders] ORDER BY [ordernum]
The SELECT statement used to retrieve a specific order requires a join to retrieve data from both the Orders table and the Customers table:
SELECT Orders.ordernum,
Orders.orderdate,
Orders.custemail,
Orders.subtotal,
Orders.salestax,
Orders.shipping,
Orders.total,
Customers.lastname,
Customers.firstname,
Customers.address,
Customers.city,
Customers.state,
Customers.zipcode,
Customers.phone
FROM Orders
INNER JOIN Customers
ON Orders.custemail = Customers.email
WHERE Orders.ordernum = @ordernum
ORDER BY Orders.ordernum”
The following statement retrieves the items for a given order:
SELECT [productid], [name], [price], [quantity], [total], [ordernum]
FROM [OrderItems]
WHERE ([ordernum] = @ordernum) ORDER BY [productid]”

276 Part IV: Building Back-End Applications
Connecting to the database
The connection string for the Order Listing application is stored in the web.config file, like this:
<connectionStrings>
<add name=”ConnectionString” connectionString=”Data
Source=localhost\SQLExpress;
Initial Catalog=Orders;Integrated Security=True”/> </connectionStrings>
You’ll need to change this connection string if your server isn’t named localhost\SQLExpress or if you want to run the application against a different database.
Building the Master Page
Listing 8-1 shows the Master Page (MasterPage.master), which displays a banner at the top of each page.
Listing 8-1: The Master Page (MasterPage.master)
<%@ Master Language=”C#” |
1 |
AutoEventWireup=”true” |
|
CodeFile=”MasterPage.master.cs” |
|
Inherits=”MasterPage” %> |
|
<!DOCTYPE html PUBLIC “-//W3C//DTD XHTML 1.1//EN” |
|
“http://www.w3.org/TR/xhtml11/DTD/xhtml11.dtd”> |
|
<html xmlns=”http://www.w3.org/1999/xhtml” > |
|
<head runat=”server”> |
|
<title>Acme Pirate Store</title> |
|
</head> |
|
<body> |
|
<form id=”form1” runat=”server”> |
|
<div> |
|
<img src=”Images/Banner.jpg” /><br /> |
2 |
<asp:contentplaceholder |
3 |
id=”ContentPlaceHolder1”
runat=”server”>
</asp:contentplaceholder> <br /><br />
</div>
</form>
</body>
</html>