

ASP Programming for the Absolute Beginner
.pdf216
ASP Programming for the Absolute Beginner
As you know, Active Server Pages is a Microsoft convention. That said, it should come as no surprise that other Microsoft products extensively incorporate ASP functionality. One of those products is FrontPage 2000, the very popular HTML editing application that, because of its functionality and ease of use, is popular with both beginning and advanced Web developers. Although I want you to avoid using an application like FrontPage for this book (to get a more effective, hands-on tutorial of ASP programming), you should be aware of the tremendous time-saving attributes of programming with an HTML editor such as this. When you are comfortable with the foundations of programming, by hand-coding everything yourself, you can move to an HTML editor to help with much of the grunt work or otherwise routine tasks of Web development.
Y ever, in addition to the usual Windows folders,Lyou can apply other properties to a
Building a FrontPage Web
A FrontPage Web is a folder for storing all your Web pages and related elements. How-
FrontPage Web as you allow the contents of the Web to be accessed (via a Web server, such as the Personal Web Server or Internet Information Server) using a browser.
If FrontPage isn’t running on your machine, start it now.
You should think of building a Web as step Numero Uno because you can, from the |
||
|
|
F |
start, keep everything organized. Now you will start a deeper exploration of FrontPage |
||
by building a Web. |
|
M |
|
|
|
|
A |
|
Naming a FrontPage Web |
||
|
E |
|
|
T |
|
When the application starts, follow these steps to create your first FrontPage Web:
1.From the File menu, select New, Web (see Figure 10.1).
2.You are now presented with the New dialog box (see Figure 10.2). For now, select One Page Web, but don’t click OK just yet.
3.Take a look in Figure 10.2 at the drop-down menu under Specify the Location of the New Web in the Options section. Depending on your machine (and on whether you are connected to a network or have used a previous version of FrontPage on your machine before upgrading to FrontPage 2000), the options presented here can differ. However, you want to create your Web in the home directory of either the Personal Web Server (PWS) or Internet Information Server (IIS), whichever you have running on your computer.
FIGURE 10.1
Beginning the new
FrontPage Web
creation process.
Team-Fly®
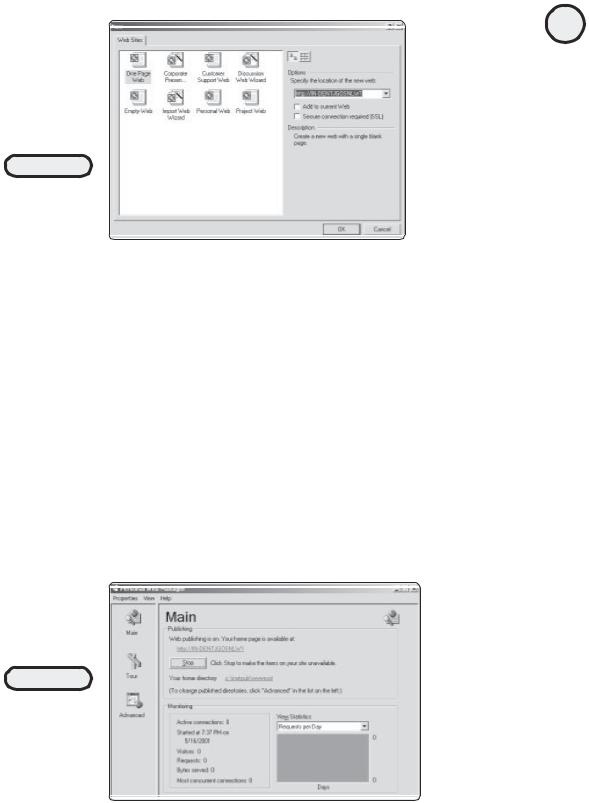
FIGURE 10.2
Selecting One Page
Web. Take note of
the location of the
new Web.
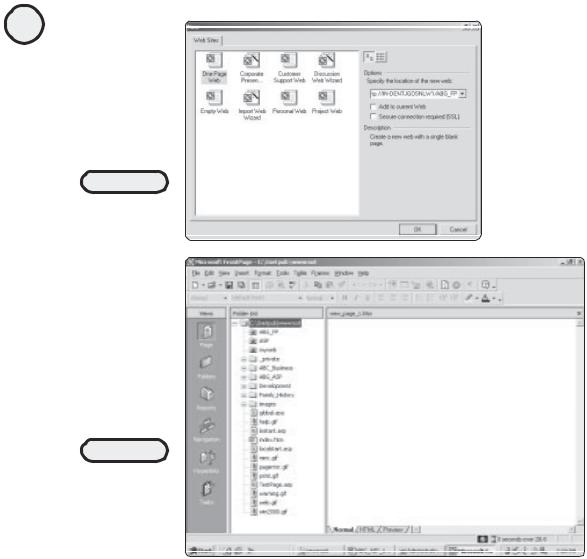
4.What’s the home directory of your server? You can find the address of your home page via the Personal Web Manager opening dialog box (see Figure 10.3).
5.After you select your home page URL from the drop-down menu, click the dropdown menu field, and add the following to the home URL:
/ABG_FP
The New dialog box should now look like Figure 10.4.
6.Click OK. You should see the Create New Web dialog as your new Web is created, in the location you specified.
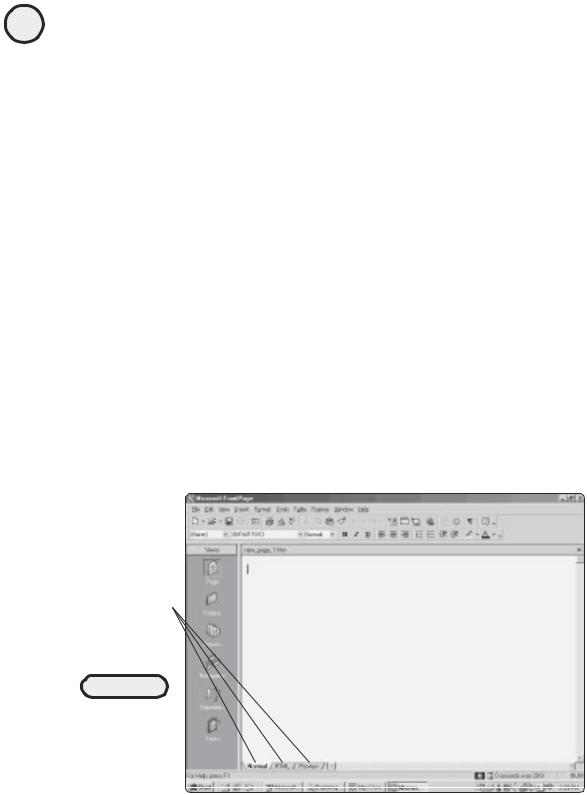
7.Congratulations! You’ve just created your first FrontPage Web. You should now be looking at the FrontPage editor in Page view, with the Folder List pane displaying your new Web (see Figure 10.5).
217
C h a p te r
10
A S P
a n d
H T M L
S c r i pt i n g
w i t h
F ro n t P a g e
2 0 0 0
FIGURE 10.3
You can see the URL of the PWS home page, as well as your home directory, from the Personal Web Manager home page.
218
ASP Programming for the Absolute Beginner
FIGURE 10.4
Specifying the exact
location of your new
FrontPage Web.
FIGURE 10.5
Your newly created FrontPage Web. If you don’t see the folders, select Folders from the View menu.
Adding New Pages to Your Web
Now that you have a brand-spanking-new FrontPage Web, you need to add some Web pages. Adding a new Web page to a FrontPage Web is done in exactly the same fashion as creating a new page that is placed in another folder on your computer (or on a floppy disk, ZIP drive, and so on) rather than inside a Web.
When your new Web was created, a blank Web page was also created. Save this page into your Web, giving it a name in the process:
1.From the File menu, select Save As. This opens the Save As dialog box (see Figure 10.6).

FIGURE 10.6
Setting the
parameters for
saving a page into
your Web.
2.In the File Name field, type Home. Also, take a moment to notice in which directory you are saving this page; the Save In drop-down menu should be displaying your newly created Web.
3.For now, leave the Save as Type field set to the default Web Pages option.
4.Click Save. Your page is saved into your Web directory (in this case, ABG_FP) with the name you specified (in this example, Home).
TRICK |
You will notice that the default extension that FrontPage adds to all Web pages |
|
|
|
(when you try to save them) is .htm. Obviously, you know by this point that you need |
|
to store your Active Server Pages with the .asp extension. However, for straight |
|
HTML pages, you can also save them with the usual .html extension (in other words, |
|
there is no functional difference between .htm and .html ). The main point here is to |
|
pay close attention to what you are naming your pages, not just in regard to the |
|
extension but the actual name, too (the more descriptive the name, the better: just |
|
try—for simplicity’s sake—to keep the names of your pages as small as possible). |
NETSCAPE NAVIGATOR OR INTERNET EXPLORER?
In case you haven’t noticed, FrontPage 2000 is a Microsoft product. You need to be aware that although the application is extremely powerful and easy to use, the Web pages you develop within FrontPage are intended (well, intended by Microsoft, anyway) to be displayed using Microsoft’s Web browser, Internet Explorer.
Now, this doesn’t mean that Netscape Navigator won’t display pages created in FrontPage. In fact, nothing could be further from the truth. However, as you move through the functions and features of FrontPage, you need to know that some of the nifty effects you can add to your Web pages (from within FrontPage, that is) will display only if your visitors are using Internet Explorer as their browser.
Fortunately, most of these features are simply window dressing. In other words, you don’t have to be concerned that you will lose major functionality if Netscape Navigator is your customers’ browser of choice. For example, you can still database-enable your Webs without worrying about this browser conundrum.
219
C h a p te r
10
A S P
a n d
H T M L
S c r i pt i n g
w i t h
F ro n t P a g e
2 0 0 0
220
ASP Programming for the Absolute Beginner
FrontPage 2000 Basics
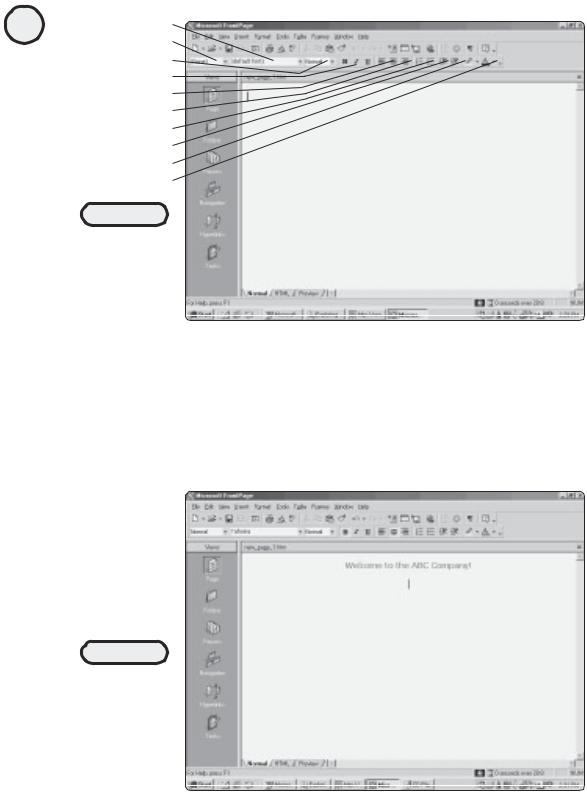
To understand FrontPage 2000 best, take a moment to review its general interface, illustrated in Figure 10.7.
When FrontPage opens, you are immediately placed in Page view. What are the different views, and what do they mean?
Take another look at Figure 10.7, along the left side of the screen. The icons running horizontally (Page, Folders, Reports) represent the different views you can work in within FrontPage:
•Page view. This is the default view in which FrontPage places you upon first launching the program. Like a blank Word document, Page view represents a blank Web page. You can think of the large white space as your Web canvas because you can place Web elements (form elements, text, and so on) right into this space.
There are three specific view tabs within Page view: Normal, HTML, and Preview. Just take note of them now, because I discuss these in more detail when you create your first Web page.
•Folders view. As you create Webs in FrontPage, you organize the Web pages that make up the site into folders. The Folders view allows you to get a snapshot of this organization, including the (file) size of your Web pages, the date they were last modified, and so on.
•Reports view. This gives a more specific analysis of your Web site’s content, from an administrative viewpoint. For example, from within Reports view, you can take note of Web pages that don’t have any hyperlinks to them, pages that are slow(er) to load in a Web browser, and other related functions.
View tabs
FIGURE 10.7
The FrontPage 2000 interface. Like all Office applications, it has a common menu bar (File, Edit, View, and so on).

•Navigation view. This view allows you to add navigation elements quickly to the various Web pages within your site.
•Hyperlinks view. Just as you wouldn’t think of taking a cross-country trip without a good map or atlas, you shouldn’t have to design your Web site without a way of seeing, at a glance, its overall structure. In this view, you can see all the hyperlinks between your pages. This picture of your Web site is presented graphically, which makes it easy to see which pages link to other pages.
•Tasks view. Usually, building a Web site is a team effort because several individuals with different areas of expertise are called on to design one or more features or areas of the Web site. FrontPage is equipped with this functionality to assign and track tasks to specific individuals, to facilitate a team effort approach in building a Web site. The Tasks view displays this type of information, including to whom a specific task was assigned, its priority, and when it is due to be completed. Because you are flying solo here in your Web development endeavors, I won’t discuss Tasks view in much detail.
Feeling confused about all these views? Don’t let the view conundrum concern you. The vast majority of the time, you will be working exclusively in Page view. As a matter of fact, think of the other views as administrative views (which in reality they are), placed within FrontPage to help you quickly view your site’s organizational structure.
Creating Your First Web Page
Because you have FrontPage open, you might as well create your first Web page, right?
For this exercise, you are going to construct a basic home page for a fictitious company. Don’t worry if, after completing this section, your work doesn’t quite, ah, make the grade. The point of this session is to get you comfortable working within the FrontPage environment, as well as with the toolsets available to you for Web page creation.
Placing and Formatting Text
If you have FrontPage running now on your computer (if you don’t, start the application so that you can follow along with the discussion), you will note that the formatting toolbar is very similar to what you see in other Office applications (see Figure 10.8).
TRICK |
Can’t see the formatting toolbar? It might be hidden. From the FrontPage menu, click |
|
|
|
View, and select the Toolbars option. On the list of toolbars that appears, make sure |
|
that Formatting is selected. |
To familiarize yourself with formatting text in FrontPage, here is a simple formatting exercise:
1.The first text you want to appear on the page is the name of your company. You want to center the name of your company, so click the center icon on the formatting toolbar. Notice how the cursor moves to the center of the page.
2.Change the font and font size. From the font menu, select a style that appeals to you. For the font size, select 14 point.
221
C h a p te r
10
A S P
a n d
H T M L
S c r i pt i n g
w i t h
F ro n t P a g e
2 0 0 0
222
ASP Programming for the Absolute Beginner
Font
Style
Font size
Formatting toolbar
Text alignment
Numbering
Bullets
Text indent
Highlight color
Font color
FIGURE 10.8
The formatting
toolbar within
FrontPage is similar
to that found in
other Office
applications.
3.To give your company name more emphasis, bold the text you are about to type by clicking the bold icon. Also, select a color for the text by clicking the font color icon.
4.Type the name of your company (see Figure 10.9). Take some time to experiment with different font styles, sizes, and colors.
FIGURE 10.9
An example of some simple formatting. In this example, I’ve chosen the Tahoma font style, 14 point, bold, centered, and with a font color
of green.

Got the idea with formatting text? If you’ve done any work within Microsoft Word (or any other word processing application), formatting text is probably second nature. FrontPage is no different.
Inserting Graphics
The most visually appealing Web sites are the ones that make good use of graphics.
However, you must temper your desire to go wild with graphic placement, keeping the following important tips in mind:
•Most importantly, graphics (as compared to text) can take a longer time to download. You’ve probably surfed the Web and come across a site that seemed to take forever to download to your browser because of an excessive use of graphics. Keep this in mind when using graphics on your site: If a site takes a long time to load, visitors will move on. Don’t let this happen to your Web site because you’ve placed too many graphics in your pages.
•Be savvy when choosing graphics because they can give your site a very professional or, if chosen poorly, a very sloppy look. When choosing graphics, keep in mind the general tone you are attempting to set with your Web site. If, for example, you are creating a Web site for a daycare center, it would be perfectly appropriate to have graphics of cartoon children, animals, and so on, on your site. However, these types of graphics would be inappropriate (and give the wrong impression) if the business is not a daycare. Choose wisely.
•Finally (and perhaps most importantly, especially if you are not an artist), don’t frustrate yourself—and waste valuable time—by trying to design your own graphics. Literally millions of graphics, ranging from static images to animated GIFs, are available for your free use. Some of these can be found on your own computer in the form of clip art, and others can be downloaded from the Web. Take advantage of this valuable creative resource.
TRAP
As I’ve said, all Web designers learn from studying the work of others. This is one of the great community aspects of the Web. However, if you are going to use a graphic (or any Web element, for that matter) designed or programmed by others, be sure that you have their permission to do so, and cite them as the creator of the work if they require it.
Now, why don’t you experiment with adding some graphics to your Web page. FrontPage has several options for inserting available graphics, so you will explore a few of them here:
1.From the preceding exercise, you should have the name of your company nicely formatted at the center of your page. (If you don’t, that’s okay. All these early exercises are designed just to get your virtual feet wet with the FrontPage interface.) Now, place your cursor below the text of your company name, and click the center icon again on the formatting toolbar (if your cursor is not already centered).
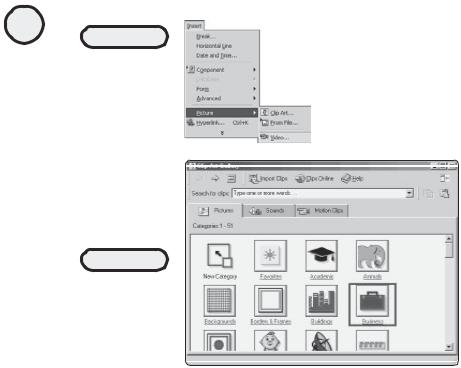
2.From the Insert menu, click Picture (see Figure 10.10). When the option menu slides out to the right, hold your mouse button over the down arrow at the bottom of this menu so that you can see all the options available to you.
223
C h a p te r
10
A S P
a n d
H T M L
S c r i pt i n g
w i t h
F ro n t P a g e
2 0 0 0
224
ASP Programming for the Absolute Beginner
FIGURE 10.10
You can insert a picture from clip art or from a file. Note that you can also insert video into your Web pages.
FIGURE 10.11
The Clip Art Gallery dialog box allows you to insert graphics, video, and sound easily into your Web pages.
3.Click the Clip Art option. This opens the Clip Art Gallery dialog box (see Figure 10.11).
Take a closer look at this dialog box:
•Note the three tabs: Pictures, Sounds, and Motion Clips.
•The Clip Art Gallery dialog box has a handy search feature, so if you’re looking for a specific type of graphic, you can do a search for it.
•Note the two icons at the top: Import Clips and Clips Online. Import Clips allows you to insert different graphics you have collected on your own into the clip art collection. This is useful for organizational purposes; you can keep all your graphics in one place. Clips Online is a special service that Microsoft has established, where you can download new and interesting clip art directly into FrontPage.
4.With the Pictures tab selected, click the Business icon, which displays all the current clip art on your machine that has been placed into this category. Find a graphic that appeals to you, and click it once. This displays a special pop-up menu (see Figure 10.12).
5.If you click the first icon in the pop-up menu, the selected graphic is inserted directly into your Web page. If you click the second icon, you get a preview of the graphic. This is useful for seeing the entire graphic before you insert it into your page.
6.For now, click the Insert Clip icon. The graphic is then placed into your Web page (see Figure 10.13).
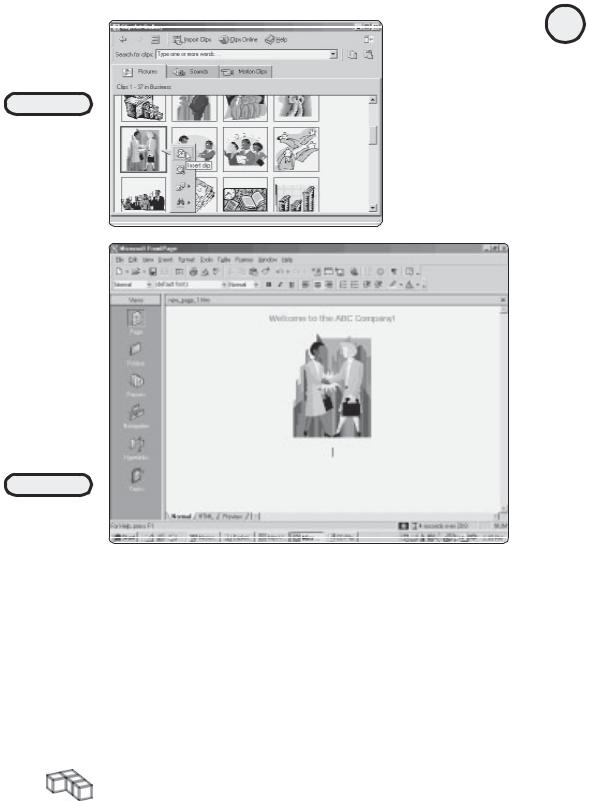
FIGURE 10.12
When you singleclick a clip art graphic, a special pop-up menu gives you options for what you’d like to do with the graphic.
FIGURE 10.13
A clip art graphic
inserted into the
Web page.
7.When the graphic is in your page, you can manipulate it in various ways. Click the graphic once. This causes the graphic to be outlined and also the Pictures toolbar to appear at the bottom of your screen (see Figure 10.14).
8.By clicking one of the squares outlining your graphic and then dragging your mouse, you can change the size and shape of your graphic. Also, take some time now to experiment with the Pictures toolbar. If you hover your cursor over the icons in the Pictures toolbar, a ToolTip appears, informing you of which action the specific icon executes. Go ahead and experiment with some of the icons in the Pictures toolbar, paying close attention to how they affect your picture.
TRICK |
If the Pictures toolbar disappears, you’ve probably deselected your graphic. Simply |
|
|
|
click your graphic once to bring the Pictures toolbar back to your screen. |
225
C h a p te r
10
A S P
a n d
H T M L
S c r i pt i n g
w i t h
F ro n t P a g e
2 0 0 0