Pro CSharp 2008 And The .NET 3.5 Platform [eng]
.pdf852 CHAPTER 24 ■ PROGRAMMING WITH THE LINQ APIS
The Strongly Typed DataContext
The final aspect of the sqlmetal.exe-generated code to be aware of is the DataContext-derived type. Like the AutoLotDatabase class we authored in the previous example, each table is represented by a Table<T>-compatible property. As well, this class has a series of constructors, one of which takes an object implementing IDbConnection, which represents an ADO.NET connection object (remember, LINQ to SQL and ADO.NET types can be intermixed within a single application).
As well, this DataContext-derived class is how we are able to interact with the stored procedures defined by the database. Given the fact that we supplied the /sprocs flag as part of our sqlmetal.exe command set, we find a method named GetPetName():
[Function(Name="dbo.GetPetName")] [return: Parameter(DbType="Int")]
public int GetPetName([Parameter(DbType="Int")] System.Nullable<int> carID, [Parameter(DbType="Char(10)")] ref string petName)
{
IExecuteResult result = this.ExecuteMethodCall(this, ((MethodInfo)(MethodInfo.GetCurrentMethod())), carID, petName);
petName = ((string)(result.GetParameterValue(1))); return ((int)(result.ReturnValue));
}
Notice that the GetPetName() method is marked with the [Function] attributes and [return:] attribute qualifier, while each parameter is marked with the [Parameter] attribute. The implementation makes use of the inherited ExecuteMethodCall() method (and a bit of reflection services) to take care of the details of invoking the stored proc and returning the result to the caller.
Programming Against the Generated Types
Now that you have a better idea regarding the code authored by sqlmetal.exe, consider the following implementation of the Program type, which invokes our stored procedure:
class Program
{
const string cnStr =
@"Data Source=(local)\SQLEXPRESS;Initial Catalog=AutoLot;" + "Integrated Security=True";
static void Main(string[] args)
{
Console.WriteLine("***** More Fun with LINQ to SQL *****\n");
AutoLot carsDB = new AutoLot(cnStr); InvokeStoredProc(carsDB); Console.ReadLine();
}
private static void InvokeStoredProc(AutoLot carsDB)
{
int carID = 0; string petName = "";
Console.Write("Enter ID: ");
carID = int.Parse(Console.ReadLine());
// Invoke stored proc and print out the petname. carsDB.GetPetName(carID, ref petName);
854 CHAPTER 24 ■ PROGRAMMING WITH THE LINQ APIS
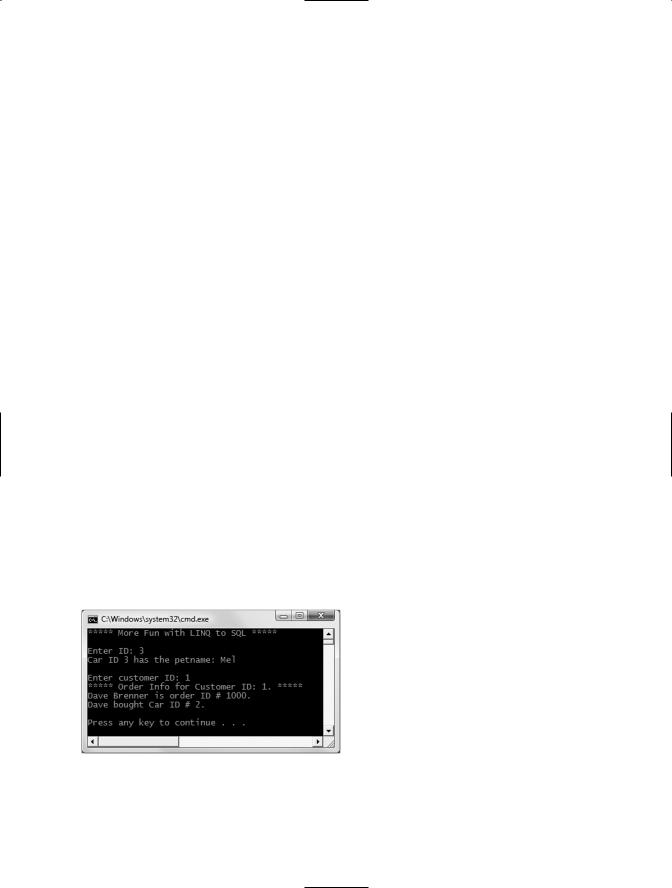
Again, the benefit of LINQ to SQL is that we are able to interact with relational databases using a consistent, object-based model. Just to shed some more light on our LINQ query expression, add the following code statement at the end of your PrintOrderForCustomer() method:
Console.WriteLine("\ncustomerOrders as a string: {0}", customerOrders);
When you run your program once again, you may be surprised to find that the stringified value of your query expression reveals the underlying SQL query:
SELECT [t0].[FirstName], [t0].[LastName], [t0].[CustID], [t1].[OrderID], [t1].[CarID], [t1].[CustID] AS [CustID2]
FROM [Customers] AS [t0], [Orders] AS [t1]
WHERE ([t0].[CustID] = @p0) AND ([t1].[CustID] = [t0].[CustID])
■Source Code The LinqWithSqlMetalGenedCode example can be found under the Chapter 24 subdirectory.
Building Entity Classes Using Visual Studio 2008
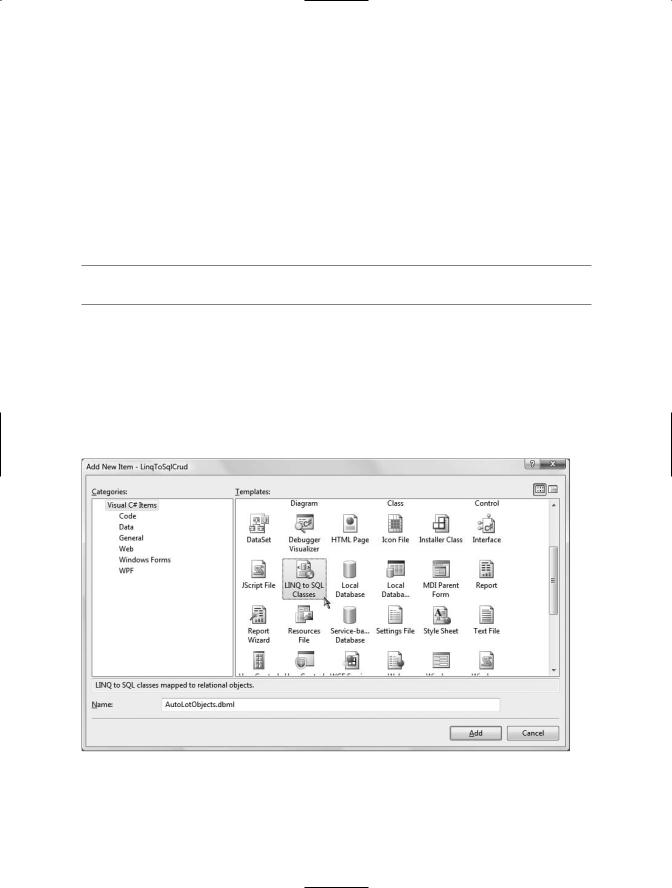
To wrap up our look at LINQ to SQL, create a new Console Application named LinqToSqlCrud and reference the System.Data.Linq.dll assembly. This time, rather than running sqlmetal.exe to generate our entity classes, we will allow Visual Studio 2008 to do the grunt work. To do so, select Project Add New Item, and add a new LINQ to SQL Classes item named AutoLotObjects (see Figure 24-6).
Figure 24-6. The LINQ to SQL Classes item performs the same duties as sqlmetal.exe.
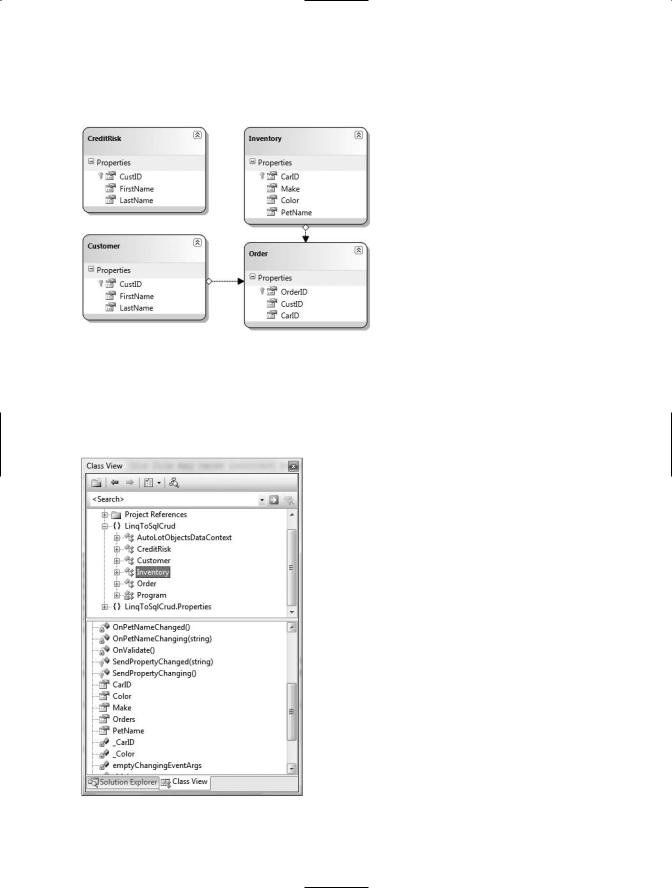
Open the Server Explorer, and ensure you have an active connection to the AutoLot database (if not, right-click the Data Connections icon and select Add Connection). At this point, select each

856 CHAPTER 24 ■ PROGRAMMING WITH THE LINQ APIS
Now that all the generated types are accounted for, here is a Program class that illustrates inserting, updating, and deleting data on the Inventory table.
Inserting New Items
Adding new items to a relational database is as simple as creating a new instance of a given entity class, adding into the Table<T> type maintained by the DataContext and calling SubmitChanges(). The following InsertNewCars() method adds two new listings to the Inventory table. The first approach directly sets each field of the Inventory entity class, while the second approach makes use of the more compact object initialization syntax:
static void InsertNewCars(AutoLotObjectsDataContext ctx)
{
Console.WriteLine("***** Adding 2 Cars *****");
int newCarID = 0; Console.Write("Enter ID for Betty: ");
newCarID = int.Parse(Console.ReadLine());
// Add a new row using "longhand" notation.
Inventory newCar = new Inventory(); newCar.Make = "Yugo";
newCar.Color = "Pink"; newCar.PetName = "Betty"; newCar.CarID = newCarID;
ctx.Inventories.InsertOnSubmit(newCar);
ctx.SubmitChanges();
Console.Write("Enter ID for Henry: "); newCarID = int.Parse(Console.ReadLine());
// Add another row using "shorthand" object init syntax. newCar = new Inventory { Make = "BMW", Color = "Silver",
PetName = "Henry", CarID = newCarID };
ctx.Inventories.InsertOnSubmit(newCar);
ctx.SubmitChanges();
}
Updating Existing Items
Updating an item is also very straightforward. Based on your LINQ query, extract the first item that meets the search criteria. Once you update the object’s state, once again call SubmitChanges().
static void UpdateCar(AutoLotObjectsDataContext ctx)
{
Console.WriteLine("***** Updating color of 'Betty' *****");
// Update Betty's color to light pink. var betty = (from c in ctx.Inventories where c.PetName == "Betty"
select c).First(); betty.Color = "Green"; ctx.SubmitChanges();
}

CHAPTER 24 ■ PROGRAMMING WITH THE LINQ APIS |
857 |
Deleting Existing Items
And finally, if you wish to delete an item from the relational database table, simply build a LINQ query to locate the item you are no longer interested in, and remove it from the correct Table<T> member variable of the DataContext using the DeleteOnSubmit() method. Once you have done so, again call SubmitChanges():
static void DeleteCar(AutoLotObjectsDataContext ctx)
{
int carToDelete = 0;
Console.Write("Enter ID of car to delete: "); carToDelete = int.Parse(Console.ReadLine());
// Remove specified car. ctx.Inventories.DeleteOnSubmit((from c in ctx.Inventories
where c.CarID == carToDelete select c).First());
ctx.SubmitChanges();
}
At this point you can call each method from within Main() to verify the output:
static void Main(string[] args)
{
Console.WriteLine("***** CRUD with LINQ to SQL *****\n");
const string cnStr =
@"Data Source=(local)\SQLEXPRESS;Initial Catalog=AutoLot;" + "Integrated Security=True";
AutoLotObjectsDataContext ctx = new AutoLotObjectsDataContext(cnStr); InsertNewCars(ctx);
UpdateCar(ctx);
DeleteCar(ctx);
Console.ReadLine();
}
That wraps up our look at LINQ to SQL. Obviously, there is much more to the story than you have seen here; however, hopefully at this point you feel you are better equipped to dive into further details as you see fit.
■Source Code The LinqToSqlCrud example can be found under the Chapter 24 subdirectory.
Manipulating XML Documents Using LINQ to XML
The final section of this chapter is to introduce you to the role of LINQ to XML, which as you recall allows you to apply LINQ query expressions against XML documents. Although this edition of this book does not provide a chapter solely dedicated to programming with .NET’s XML APIs, by now you have probably picked up on the fact of how deeply XML data representation has been integrated into the .NET Framework.
Application and web-based configuration files store data as XML. ADO.NET DataSets can easily save out (or load in) data as XML. Windows Presentation Foundation makes use of an XML-based grammar (XAML) to represent desktop UIs and Windows Communication Foundation (as well as the original .NET remoting APIs) also store numerous settings as the well-formatted string we call XML.

CHAPTER 24 ■ PROGRAMMING WITH THE LINQ APIS |
859 |
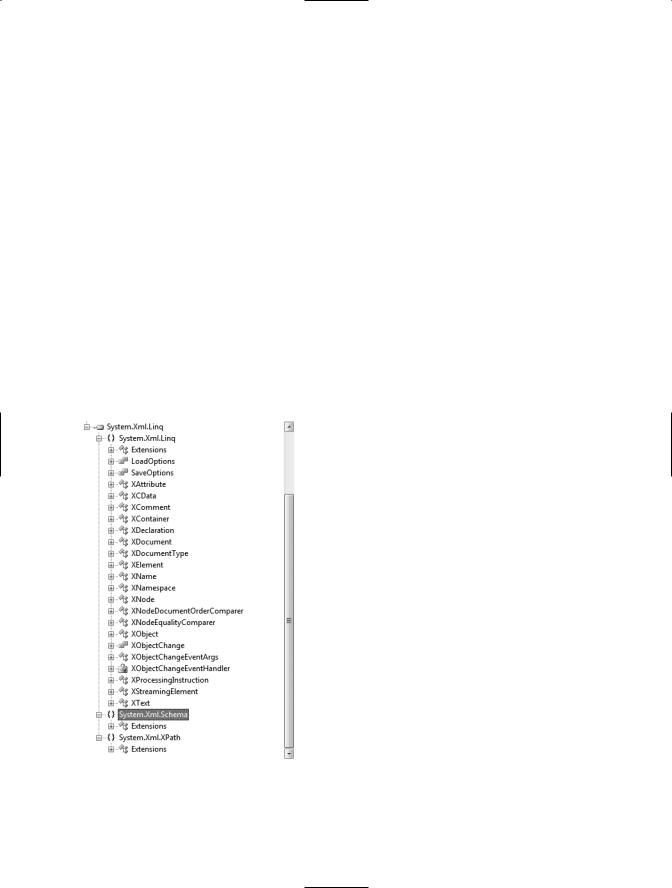
The core namespace, System.Xml.Linq, contains a very manageable set of types that represents various aspects of an XML document (its elements and their attributes, XML namespaces, XML comments, and processing instructions, etc.). Table 24-3 documents the core members of
System.Xml.Linq.
Table 24-3. Select Members of the System.Xml.Linq Namespace
Member of System.Xml.Linq |
Meaning in Life |
XAttribute |
Represents an XML attribute on a given XML element |
XComment |
Represents an XML comment |
XDeclaration |
Represents the opening declaration of an XML document |
XDocument |
Represents the entirety of an XML document |
XElement |
Represents a given element within an XML document |
XName/XNamespace |
Provide a very simple manner to define and reference XML |
|
namespaces |
|
|
To begin our investigation of these (and other) types, create a new Console Application named LinqToXmlBasics and import the System.Xml.Linq namespace in your initial code file.
Programmatically Creating XML Documents
Unlike the original .NET XML programming model (à la System.Xml.dll), manipulating an XML document using LINQ can be achieved in a functional manner. Thus, rather than building a document in memory using the very verbose DOM API, LINQ to XML allows you to do go “DOM free” if you so choose.
Not only does this greatly reduce the amount of required code, but the programming model maps almost directly to the format of well-formed XML data. To illustrate, add a method to your
Program class named CreateFunctionalXmlElement(), implemented as follows:
static void CreateFunctionalXmlElement()
{
//A "functional" approach to build an
//XML element in memory.
XElement inventory =
new XElement("Inventory",
new XElement("Car", new XAttribute("ID", "1"), new XElement("Color", "Green"),
new XElement("Make", "BMW"), new XElement("PetName", "Stan")
)
);
// Call ToString() on our XElement.
Console.WriteLine(inventory);
}
Here, notice that the constructor of the inventory XElement object is in fact a tree of additional XElements and XAttributes. Also note that by mindfully indenting our code statements, our code base has a similar look and feel to the XML document itself. If we call our method from within Main(), we find the output shown in Figure 24-10.

860 CHAPTER 24 ■ PROGRAMMING WITH THE LINQ APIS
Figure 24-10. A functional approach to XML document creation
To create an entire XML document in memory (with comments, processing instructions, opening declarations, etc.), you can load the object tree into the constructor of an XDocument type. Consider the following CreateFunctionalXmlDoc() method, which first creates an in-memory document and then saves it to a local file:
static void CreateFunctionalXmlDoc()
{
XDocument inventoryDoc = new XDocument(
new XDeclaration("1.0", "utf-8", "yes"),
new XComment("Current Inventory of AutoLot"), new XElement("Inventory",
new XElement("Car", new XAttribute("ID", "1"), new XElement("Color", "Green"),
new XElement("Make", "BMW"), new XElement("PetName", "Stan")
),
new XElement("Car", new XAttribute("ID", "2"), new XElement("Color", "Pink"),
new XElement("Make", "Yugo"), new XElement("PetName", "Melvin")
)
)
);
// Display the document and save to disk.
Console.WriteLine(inventoryDoc);
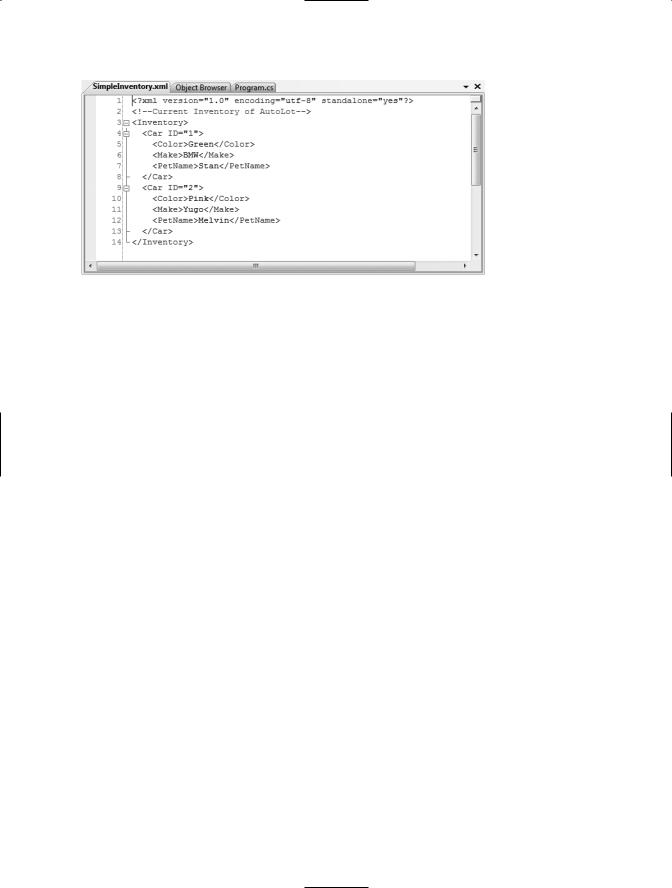
inventoryDoc.Save("SimpleInventory.xml");
}
Figure 24-11 shows the SimpleInventory.xml file opened within Visual Studio 2008.
As you can see, the XElement and XDocument types each define a constructor that takes an XName as the first parameter and a parameter array of objects as the second. The XName type is used in LINQ to SQL to represent (obviously) the name of the item you are creating, while the parameter array of objects can consist of any number of additional LINQ to XML types (XComment,
XProcessingInstruction, XElement, XAttribute, etc.), as well as simple strings (for element content) or an object implementing IEnumerable.