

Pro CSharp 2008 And The .NET 3.5 Platform [eng]
.pdf

504 CHAPTER 15 ■ INTRODUCING .NET ASSEMBLIES
If you right-click the VbNetCarClient node and activate the Properties page, you will notice a text field located at the bottom of the dialog box where you can enter the values to be assigned to the privatePath attribute. Just for testing purposes, enter a subdirectory named TestDir (see Figure 15-16).
Figure 15-16. Configuring a private probing path graphically
Once you click the OK button, you can examine the VbNetCarClient\bin\Debug directory and find that the *.config file has been updated with the correct <probing> element.
■Note As you may guess, you can copy the XML content generated by the .NET Framework Configuration utility into a Visual Studio App.config file for further editing. Using this approach, you can certainly decrease your typing burden by allowing the tool to generate the initial content.
Understanding Shared Assemblies
Now that you understand how to deploy and configure a private assembly, you can begin to examine the role of a shared assembly. Like a private assembly, a shared assembly is a collection of types and (optional) resources. The most obvious difference between shared and private assemblies is the fact that a single copy of a shared assembly can be used by several applications on a single machine.
Consider all the applications created in this text that required you to set a reference to System. Windows.Forms.dll. If you were to look in the application directory of each of these clients, you would not find a private copy of this .NET assembly. The reason is that System.Windows.Forms.dll has been deployed as a shared assembly. Clearly, if you need to create a machinewide class library, this is the way to go.
As suggested in the previous paragraph, a shared assembly is not deployed within the same directory as the application making use of it. Rather, shared assemblies are installed into the GAC.

CHAPTER 15 ■ INTRODUCING .NET ASSEMBLIES |
505 |
The GAC is located under a subdirectory of your Windows directory named Assembly (e.g., C:\Windows\Assembly), as shown in Figure 15-17.
Figure 15-17. The global assembly cache
■Note You cannot install executable assemblies (*.exe) into the GAC. Only assemblies that take the *.dll file extension can be deployed as a shared assembly.
Understanding Strong Names
Before you can deploy an assembly to the GAC, you must assign it a strong name, which is used to uniquely identify the publisher of a given .NET binary. Understand that a “publisher” could be an individual programmer, a department within a given company, or an entire company at large.
In some ways, a strong name is the modern day .NET equivalent of the COM globally unique identifier (GUID) identification scheme. If you have a COM background, you may recall that AppIDs are GUIDs that identify a particular COM application. Unlike COM GUID values (which are nothing more than 128-bit numbers), strong names are based (in part) on two cryptographically related keys (termed the public key and the private key), which are much more unique and resistant to tampering than a simple GUID.
Formally, a strong name is composed of a set of related data, much of which is specified using assembly-level attributes:
•The friendly name of the assembly (which you recall is the name of the assembly minus the file extension)
•The version number of the assembly (assigned using the [AssemblyVersion] attribute)
•The public key value (assigned using the [AssemblyKeyFile] attribute)
•An optional culture identity value for localization purposes (assigned using the
[AssemblyCulture] attribute)
•An embedded digital signature created using a hash of the assembly’s contents and the private key value

506 CHAPTER 15 ■ INTRODUCING .NET ASSEMBLIES
To provide a strong name for an assembly, your first step is to generate public/private key data using the .NET Framework 3.5 SDK’s sn.exe utility (which you’ll do momentarily). The sn.exe utility responds by generating a file (typically ending with the *.snk [Strong Name Key] file extension) that contains data for two distinct but mathematically related keys, the “public” key and the “private” key. Once the C# compiler is made aware of the location for your *.snk file, it will record the full public key value in the assembly manifest using the .publickey token at the time of compilation.
The C# compiler will also generate a hash code based on the contents of the entire assembly (CIL code, metadata, and so forth). As you recall from Chapter 6, a hash code is a numerical value that is statistically unique for a fixed input. Thus, if you modify any aspect of a .NET assembly (even a single character in a string literal) the compiler yields a different hash code. This hash code is combined with the private key data within the *.snk file to yield a digital signature embedded within the assembly’s CLR header data. The process of strongly naming an assembly is illustrated in Figure 15-18.
Figure 15-18. At compile time, a digital signature is generated and embedded into the assembly based in part on public and private key data.
Understand that the actual private key data is not listed anywhere within the manifest, but is used only to digitally sign the contents of the assembly (in conjunction with the generated hash code). Again, the whole idea of making use of public/private key data is to ensure that no two companies, departments, or individuals have the same identity in the .NET universe. In any case, once the process of assigning a strong name is complete, the assembly may be installed into the GAC.
■Note Strong names also provide a level of protection against potential evildoers tampering with your assembly’s contents. Given this point, it is considered a .NET best practice to strongly name every assembly (including *.exe assemblies) regardless of whether it is deployed to the GAC.

CHAPTER 15 ■ INTRODUCING .NET ASSEMBLIES |
507 |
Strongly Naming CarLibrary.dll
Let’s walk through the process of assigning a strong name to the CarLibrary assembly created earlier in this chapter. The first order of business is to generate the required key data using the sn.exe utility. Although this tool has numerous command-line options, all you need to concern yourself with for the moment is the -k flag, which instructs the tool to generate a new file containing the public/private key information. Create a new folder on your C drive named MyTestKeyPair and change to that directory using the Visual Studio 2008 command prompt. Next, issue the following command to generate a file named MyTestKeyPair.snk:
sn -k MyTestKeyPair.snk
Now that you have your key data, you need to inform the C# compiler exactly where MyTestKeyPair.snk is located. When you create any new C# project workspace using Visual Studio 2008, you will notice that one of your initial project files (located under the Properties node of Solution Explorer) is named AssemblyInfo.cs. This file contains a number of attributes that describe the assembly itself. The [AssemblyKeyFile] assembly-level attribute can be used to inform the compiler of the location of a valid *.snk file. Simply specify the path as a string parameter, for example:
[assembly: AssemblyKeyFile(@"C:\MyTestKeyPair\MyTestKeyPair.snk")]
■Note When you manually specify the [AssemblyKeyFile] attribute, Visual Studio 2008 will generate a warning informing you to make use of the /keyfile option of csc.exe or establish the key file via the Visual Studio 2008 Properties window. You’ll use the IDE to do so in just a moment (so feel free to ignore the generated warning).
Given that the version of a shared assembly is one aspect of a strong name, selecting a version number for CarLibrary.dll is a necessary detail. In the AssemblyInfo.cs file, you will find another attribute named [AssemblyVersion]. Initially the value is set to 1.0.0.0:
[assembly: AssemblyVersion("1.0.0.0")]
A .NET version number is composed of the four parts (<major>.<minor>.<build>.<revision>). While specifying a version number is entirely up to you, you can instruct Visual Studio 2008 to automatically increment the build and revision numbers as part of each compilation using the wildcard token, rather than with a specific build and revision value. We have no need to do so for this example; however, consider the following:
//Format: <Major number>.<Minor number>.<Build number>.<Revision number>
//Valid values for each part of the version number are between 0 and 65535.
[assembly: AssemblyVersion("1.0.*")]
At this point, the C# compiler has all the information needed to generate strong name data (as you are not specifying a unique culture value via the [AssemblyCulture] attribute, you “inherit” the culture of your current machine, which in my case would be US English). Compile your CarLibrary code library and open the manifest using ildasm.exe. You will now see a new .publickey tag is used to document the full public key information, while the .ver token records the version specified via the [AssemblyVersion] attribute (see Figure 15-19).


CHAPTER 15 ■ INTRODUCING .NET ASSEMBLIES |
509 |
Installing/Removing Shared Assemblies to/from the GAC
The final step is to install the (now strongly named) CarLibrary.dll into the GAC. The simplest way to install a shared assembly into the GAC is to drag and drop the assembly to C:\Windows\Assembly using Windows Explorer (which is ideal for a quick test). Do be aware that copying/pasting the assembly into the GAC window will not work. You must literally drag and drop the *.dll from one window into the GAC window.
While dragging and dropping an assembly is just fine for local testing, the .NET Framework 3.5 SDK provides a command-line utility named gacutil.exe that allows you to administer the contents of the GAC. Table 15-1 documents some relevant options of gacutil.exe (specify the /? flag to see each option).
Table 15-1. Various Options of gacutil.exe
Option |
Meaning in Life |
/i |
Installs a strongly named assembly into the GAC |
/u |
Uninstalls an assembly from the GAC |
/l |
Displays the assemblies (or a specific assembly) in the GAC |
|
|
Using either technique, deploy CarLibrary.dll to the GAC. Once you’ve finished, you should see your library present and accounted for (see Figure 15-21).
Figure 15-21. The strongly named, shared CarLibrary (version 1.0.0.0)
■Note You may right-click any assembly icon to pull up its Properties page, and you may also uninstall a specific version of an assembly altogether from the right-click context menu (the GUI equivalent of supplying the /u flag to gacutil.exe).
510 CHAPTER 15 ■ INTRODUCING .NET ASSEMBLIES
Consuming a Shared Assembly
When you are building applications that make use of a shared assembly, the only difference from consuming a private assembly is in how you reference the library using Visual Studio 2008. In reality, there is no difference as far as the tool is concerned (you still make use of the Add Reference dialog box). What you must understand is that this dialog box will not allow you to reference the assembly by browsing to the C:\Windows\Assembly folder. Any efforts to do so will be in vain, as you cannot reference the assembly you have highlighted.
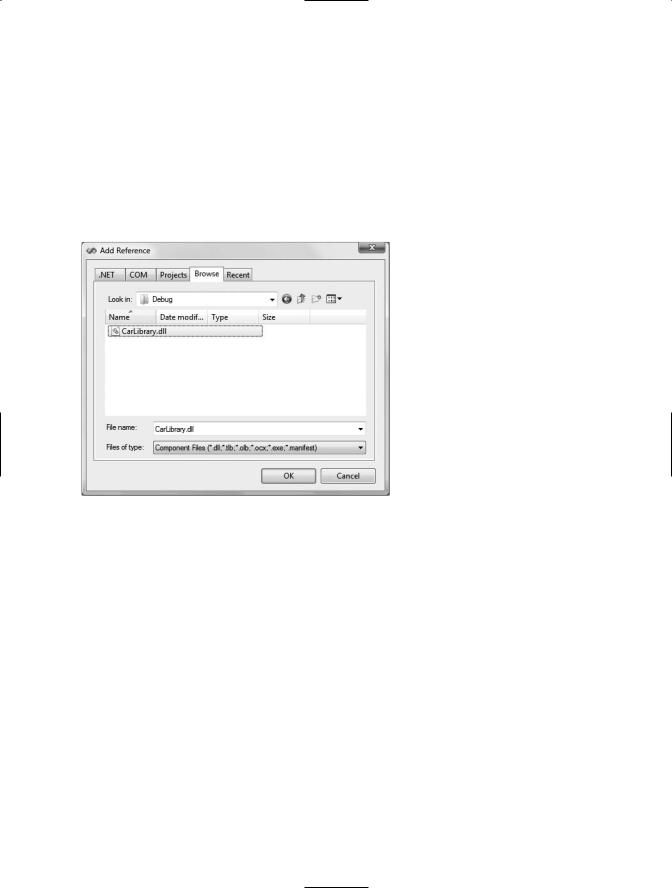
When you need to reference an assembly that has been deployed to the GAC, you will need to browse to the \bin\Debug directory of the original project via the Browse tab (see Figure 15-22).
Figure 15-22. You must reference shared assemblies by navigating to the project’s \bin\Debug directory.
This (somewhat annoying) fact aside, create a new C# Console Application named SharedCarLibClient and exercise your types as you wish:
using CarLibrary;
namespace SharedCarLibClient
{
class Program
{
static void Main(string[] args)
{
Console.WriteLine("***** Shared Assembly Client *****");
SportsCar c = new SportsCar(); c.TurboBoost(); Console.ReadLine();
}
}
}
