

Beginning Visual C++ 2005 (2006) [eng]-1
.pdfWindows Programming with the Microsoft Foundation Classes
Option |
Description |
|
|
Standard |
This option adds a toolbar to the application window that provides a |
docking toolbar |
standard range of buttons that are alternatives to using the standard menu |
|
items. A toolbar is provided by default. A docking toolbar can be dragged |
|
to the sides or the bottom of the application window, so you can put it |
|
wherever is most convenient. You’ll see how to add buttons to the toolbar |
|
in Chapter 13. |
Browser style |
This adds an Internet Explorer-style toolbar to the application windows. |
toolbar |
|
|
|
There are a couple of features under the Advanced Features set of options of which you need to be aware. One is Printing and print preview, which is selected by default, and the other is Contextsensitive help, which you get if you check the box. Printing and print preview adds the standard Page Setup, Print Preview, and Print items to the File menu and the Application wizard also provides code to support these functions. Enabling the Context-sensitive help option results in a basic set of facilities to support context-sensitive help. You’ll obviously need to add the specific contents of the help files if you want to use this feature.
If you select the Generated Classes option in the MFC Application Wizard dialog box, you’ll see a list of the classes that the Application wizard generates in your program code, as shown in Figure 12-7.
Figure 12-7
659

Chapter 12
You can highlight any class in the list by clicking it and the boxes below show the name given to the class, the name of the header file in which the definition will be stored, the base class used, and the name of the file containing the implementation of member functions in the class. The class definition is always contained in a .h file, and the member function source code is always included in a .cpp file.
In the case of the class CTextEditorDoc, you can alter everything except the base class; however, if you select CTextEditorApp the only thing that you can alter is the class name. Try clicking the other classes in the list. For CMainFrame you can alter everything except the base class and for the CTextEditorView class shown in Figure 12-7 you can change the base class as well. Click the down arrow to display the list of other classes that you can have as a base class; the list appears in Figure 12-7. The capability built into your view class depends on which base class you select:
Base Class |
View Class Capability |
|
|
CEditView |
Provides simple multiline text-editing capability, including find and |
|
replace and printing. |
CFormView |
Provides a view that is a form; a form is a dialog box that can contain con- |
|
trols for displaying data and for user input. This is essentially the same |
|
functionality as provided by a form in a Windows Forms application for |
|
the CLR that you will explore in Chapter 21. |
CHtmlEditView |
This class extends CHtmlView class and adds the ability to edit HTML |
|
pages. |
CHtmlView |
Provides a view in which Web pages and local HTML documents can be |
|
displayed. |
CListView |
Enables you to use the document-view architecture with list controls. |
CRichEditView |
Provides the capability to display and edit documents containing rich edit |
|
text. |
CScrollView |
Provides a view that automatically adds scrollbars when the data that is |
|
displayed requires them. |
CTreeView |
Provides the capability to use the document-view architecture with tree |
|
controls. |
CView |
Provides the basic capability for viewing a document. |
|
|
Because we’ve called the application TextEditor, with the notion that it is able to edit text, choose CEditView to get basic editing capability provided automatically.
You can now click Finish to have the program files for a fully working base program generated by MFC Application wizard, using the options you’ve chosen.
The Output from the MFC Application Wizard
All the program files generated by the Application wizard are stored in the TextEditor project folder which is a sub-folder to the solution folder with the same name. There are also resource files in the res sub-folder to the project folder. The IDE provides several ways for you to view the information relating to your project:
660

Windows Programming with the Microsoft Foundation Classes
Tab/Pane |
Contents |
|
|
Solution Explorer |
Shows the files included in your project. The files are categorized in virtual |
|
folders with the names Header Files, Resource Files and Source |
|
Files. |
Class View |
Class View displays the classes you have in your project and their mem- |
|
bers. It also shows any global entities you have defined. The classes are |
|
shown in the upper pane and the lower pane displays the members for the |
|
class selected in the upper pane. By right-clicking entities in the Class View, |
|
you can display a menu that you can use to view the definition of the entity |
|
or where it is referenced. |
Resource View |
This displays the resources such as menu items and toolbar buttons used |
|
by your project. Right-clicking a resource displays a menu, enabling you to |
|
edit the resource or add new resources. |
Property Pages |
This displays the versions you can build for your project. The debug ver- |
|
sion includes extra facilities to make debugging your code easier. The |
|
release version results in a smaller executable, and you build this version |
|
when your code is fully tested for production use. By right-clicking a |
|
version — either Debug or Release — you can display a context menu |
|
where you can add a property sheet or display the properties currently |
|
set for that version. A property sheet enables you to set options for the |
|
compiler and linker. |
|
|
If you right-click TextEditor in the Solution Explorer pane and select Properties from the pop-up, the project properties window is displayed as shown in Figure 12-8.
Figure 12-8
661

Chapter 12
The left pane shows the property groups you can select to be displayed in the right pane. Currently the General group of properties is displayed and you can change the value for a property in the right pane by clicking it and selecting a new value from the drop-down list box to the right of the property name or in some cases by entering a new value.
At the top of the property pages window, you can see the current project configuration and the target platform when the project is built. You can change these by selecting from the drop-down list for each.
Viewing Project Files
If you select the Solution Explorer tab and expand the list by clicking the + for TextEditor files and then click the + for each of the Source Files, Header Files and Resource Files folders, you’ll see the complete list of files for the project, as shown in Figure 12-9.
Figure 12-9
Figure 12-9 show the pane as a floating window to make the complete list of files visible at one time; you can arrange for any of the tabbed panes to be floating by clicking the down arrow at the top of the pane and selecting from the list of possible positions. As you can see, there are a total of 17 files in the project. You can view the contents of any of the files simply by double-clicking the filename. The contents of the file selected are displayed in the Editor window. Try it out with the ReadMe.txt file. You’ll see that it contains a brief explanation of the contents of each of the files that make up the project. I won’t repeat the descriptions of the files here, because they are very clearly summarized in ReadMe.txt.
662

Windows Programming with the Microsoft Foundation Classes
Viewing Classes
The access to your project presented by the Class View tab is often much more convenient than that of Solution Explorer because classes are the basis for the organization of the application. When you want to look at the code, it’s typically the definition of a class or the implementation of a member function you’ll want to look at, and from Class View you can go directly to either. On occasions, however, Solution Explorer comes in handy. If you want to check the #include directives in a .cpp file, using Solution Explorer you can open the file you’re interested in directly.
In the Class View pane, you can expand the TextEditor classes item to show the classes defined for the application. Clicking the name of any class shows the members of that class in the lower pane. In the Class View pane shown in Figure 12-10, the CTextEditorDoc class has been selected.
Figure 12-10
Figure 12-10 shows the Class View pane in its docked state. The icons code the various kinds of things that you can display and you will find a key to what each icon indicates if you look at the Class View documentation.
You can see that we have the four classes I discussed earlier that are fundamental to an MFC application: CTextEditorApp for the application, CMainFrame for the application frame window, CTextEditorDoc for the document and CTextEditorView for the view. We also have a class CAboutDlg that defines objects that support the dialog box that appears when you select the menu item Help > About in the application. If you highlight Global Functions and Variables, you’ll see that it contains two definition: the application object theApp and indicators that is an array of indicators recording the status of caps lock, num lock and scroll lock that are displayed in the status bar.
663

Chapter 12
To view the code for a class definition in the Editor pane you just double-click the class name in the tree in Class View. Similarly to view the code for a member function, double-click the function name. Note that you can drag the edges of any of the panes in a IDE window to view its contents or your code more easily. You can hide or show the Solution Explorer set of panes by clicking the Autohide button at the right end of the pane title bar.
The Class Definitions
I won’t go into the classes in complete detail here — you’ll just get a feel for how they look and I’ll highlight a few important aspects. If you double-click the name of a class in the Class View, the code defining the class is displayed. Take a look at the application class, CTextEditorApp first. The definition for this class is shown below:
// TextEditor.h : main header file for the TextEditor application
//
#pragma once
#ifndef __AFXWIN_H__
#error “include ‘stdafx.h’ before including this file for PCH” #endif
#include “resource.h” |
// main symbols |
//CTextEditorApp:
//See TextEditor.cpp for the implementation of this class
class CTextEditorApp : public CWinApp
{
public:
CTextEditorApp();
//Overrides public:
virtual BOOL InitInstance();
//Implementation
afx_msg void OnAppAbout(); DECLARE_MESSAGE_MAP()
};
extern CTextEditorApp theApp;
The CTextEditorApp class derived from CWinApp and includes a constructor, a virtual function
InitInstance(), a function OnAppAbout(), and a macro DECLARE_MESSAGE_MAP().
A macro is not C++ code. It’s a name defined by a #define pre-processor directive that will be replaced by some text that will normally be C++ code, but could also be constants or symbols of some kind.
The DECLARE_MESSAGE_MAP() macro is concerned with defining which Windows messages are handled by which function members of the class. The macro appears in the definition of any class that may process Windows messages. Of course, our application class inherits a lot of functions and data members
664

Windows Programming with the Microsoft Foundation Classes
from the base class, and you will be looking further into these as you expand the program examples. If you take a look at the beginning of the code for the class definition, you will notice that the #pragma once directive prevents the file being included more than once. Following that is a group of preprocessor directives that ensure that the stdafx.h file is included before this file.
The application frame window for our SDI program is created by an object of the class CMainFrame, which is defined by the code shown here:
class CMainFrame : public CFrameWnd
{
protected: // create from serialization only CMainFrame(); DECLARE_DYNCREATE(CMainFrame)
//Attributes public:
//Operations public:
//Overrides public:
virtual BOOL PreCreateWindow(CREATESTRUCT& cs);
//Implementation
public:
virtual ~CMainFrame(); #ifdef _DEBUG
virtual void AssertValid() const;
virtual void Dump(CDumpContext& dc) const; #endif
protected: // control bar embedded members CStatusBar m_wndStatusBar;
CToolBar m_wndToolBar;
// Generated message map functions protected:
afx_msg int OnCreate(LPCREATESTRUCT lpCreateStruct); DECLARE_MESSAGE_MAP()
};
This class is derived from CFrameWnd, which provides most of the functionality required for our application frame window. The derived class includes two protected data members, m_wndStatusBar and m_wndToolBar, that are instances of the MFC classes CStatusBar and CToolBar respectively. These objects create and manage the status bar that appears at the bottom of the application window, and the toolbar that provides buttons to access standard menu functions.
The definition of the CTextEditorDoc class that was supplied by the MFC Application wizard is:
class CTextEditorDoc : public CDocument
{
protected: // create from serialization only
665

Chapter 12
CTextEditorDoc();
DECLARE_DYNCREATE(CTextEditorDoc)
//Attributes public:
//Operations public:
//Overrides public:
virtual BOOL OnNewDocument(); virtual void Serialize(CArchive& ar);
//Implementation
public:
virtual ~CTextEditorDoc(); #ifdef _DEBUG
virtual void AssertValid() const;
virtual void Dump(CDumpContext& dc) const; #endif
protected:
// Generated message map functions protected:
DECLARE_MESSAGE_MAP()
};
As in the case of the previous classes, most of the meat comes from the base class and is therefore not apparent here. The macro DECLARE_DYNCREATE() that appears after the constructor (and was also used in the CMainFrame class) enables an object of the class to be created dynamically by synthesizing it from data read from a file. When you save an SDI document object, the frame window that contains the view is saved along with your data. This allows everything to be restored when you read it back. Reading and writing a document object to a file is supported by a process called serialization. You will see how to write our own documents to file using serialization and then reconstruct them from the file data in the examples we will develop.
The document class also includes the macro DECLARE_MESSAGE_MAP() in its definition to enable Windows messages to be handled by class member functions if necessary.
The view class in our SDI application is defined as:
class CTextEditorView : public CEditView
{
protected: // create from serialization only CTextEditorView();
DECLARE_DYNCREATE(CTextEditorView)
// Attributes public:
666

Windows Programming with the Microsoft Foundation Classes
CTextEditorDoc* GetDocument() const;
//Operations public:
//Overrides public:
virtual BOOL PreCreateWindow(CREATESTRUCT& cs); protected:
virtual BOOL OnPreparePrinting(CPrintInfo* pInfo); virtual void OnBeginPrinting(CDC* pDC, CPrintInfo* pInfo); virtual void OnEndPrinting(CDC* pDC, CPrintInfo* pInfo);
// Implementation public:
virtual ~CTextEditorView();
#ifdef _DEBUG
virtual void AssertValid() const;
virtual void Dump(CDumpContext& dc) const; #endif
protected:
// Generated message map functions protected:
DECLARE_MESSAGE_MAP()
};
#ifndef _DEBUG // debug version in TextEditorView.cpp inline CTextEditorDoc* CTextEditorView::GetDocument() const
{ return reinterpret_cast<CTextEditorDoc*>(m_pDocument); } #endif
As you specified in the Application Wizard dialog box, the view class is derived from the class CEditView, which already includes basic text handling facilities. The GetDocument() function returns a pointer to the document object corresponding to the view, and you will be using this to access data in the document object when you add your own extensions to the view class.
Creating an Executable Module
To compile and link the program, click Build > Build Solution, press Ctrl+Shift+B, or click the Build icon in the toolbar.
There are two implementations of the CTextEditorView class member function GetDocument() in the code generated by Application wizard. The one in the .cpp file for the CEditView class is used for the debug version of the program. You will normally use this during program development because it provides validation of the pointer value stored for the document. (This is stored in the inherited data member m_pDocument in the view class.) The version that applies to the release version of your program you can find after the class definition in the TextEditorView.h file. This version is declared as inline and it does not validate the document pointer. The GetDocument() function just provides a link to the document object. You can call any of the functions in the interface to the document class using the pointer to the document that the function returns.
667
Chapter 12
By default, you have debug capability included in your program. As well as the special version of GetDocument(), there are lots of checks in the MFC code that are included in this case. If you want to change this, you can use the drop-down list box in the Build toolbar to choose the release configuration, which doesn’t contain all the debug code.
When compiling your program with debug switched on, the compiler doesn’t detect uninitialized variables, so it can be helpful to do the occasional release build even while you are still testing your program.
Precompiled Header Files
The first time you compile and link a program, it will take some time. The second and subsequent times it should be quite a bit faster because of a feature of Visual C++ 2005 called precompiled headers. During the initial compilation, the compiler saves the output from compiling header files in a special file with the extension .pch. On subsequent builds, this file is reused if the source in the headers has not changed, thus saving the compilation time for the headers.
You can determine whether or not precompiled headers are used and control how they are handled through the Properties tab. Right-click TextEditor and select Properties from the menu that is displayed. If you expand the C/C++ node in the dialog box displayed, you can select Precompiled Headers to set this property.
Running the Program
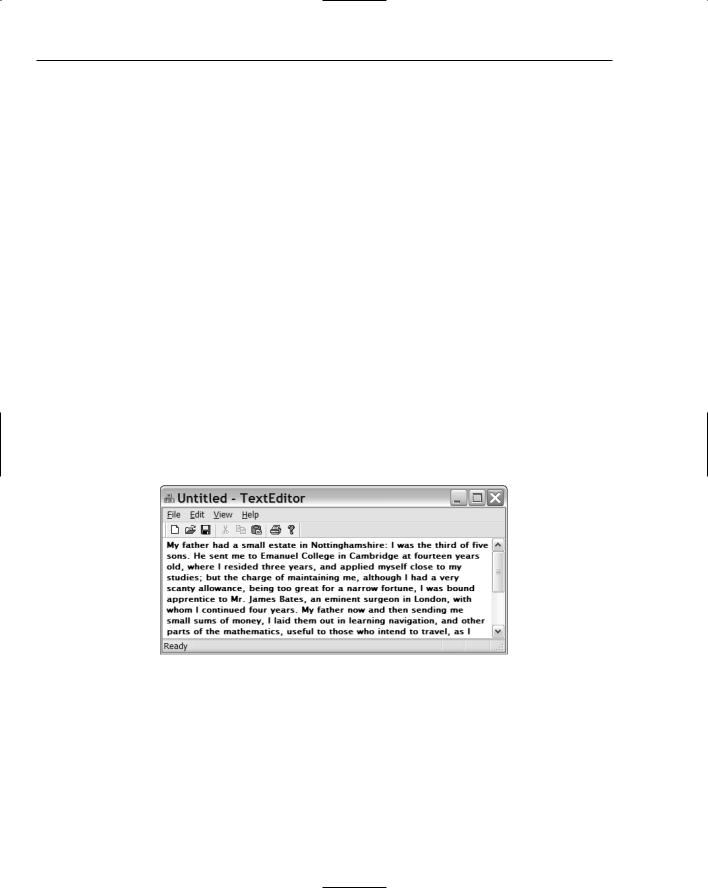
To execute the program, press Ctrl+F5. Because you chose CEditView as the base class for the CTextEditorView class, the program is a fully functioning, simple text editor. You can enter text in the window as shown in Figure 12-11.
Figure 12-11
Note that the application has scroll bars for viewing text outside the visible area within the window, and of course you can resize the window by dragging the boundaries. All the items under all menus are fully operational so you can save and retrieve files, you can cut and paste text, and you can print the text in the window — and all that without writing a single line of code! As you move the cursor over the toolbar buttons or the menu options, prompts appear in the status bar describing the function that are invoked, and if you let the cursor linger on a toolbar button, a tooltip is displayed showing its purpose. (You’ll learn about tooltips in more detail in Chapter 13.)
668