


TYPE & RUN 2
Guess the Number!
This is the second Type & Run. Remember, you’ll find a number of Type & Run sections throughout this book. These sections present a listing that is a little longer than the listings within the daily lessons. The purpose of these listings is to give you a program to type in and run. The listings might contain elements not yet explained in the book.
Two listings are provided in this Type & Run. The first does something a little more fun and a little less practical. The second does the same thing; however, it is done within a windows form.
Today’s program is a number-guessing game. It enables you to enter a number from 0 to 10,000. You then are told whether the number is higher or lower. You should try to guess the number in as few tries as possible.
I suggest that you type in and run these programs. You can also copy them from the book’s CD or download them. Regardless of how you start, take the time to experiment and play with the code. Make changes, recompile, and then rerun the programs. See what happens.

146 |
Type & Run 2 |
As with all of the Type & Runs, there isn’t an explanation on how the code works. Don’t fret, though. By the time you complete this book, you should understand everything within these listings. In the meantime, you will have had the chance to enter and run some listings that are a little more fun or practical.
The Guess Type & Run
Enter and compile the following program. If you get any errors, make sure you entered the program correctly.
LISTING T&R 2.1 Guess.cs
1:// Guess.cs - Pick a Number
2://-------------------------------------------------------
4:using System;
5:using System.Drawing;
6:using System.Text;
8:public class Guess
9:{
10:
11:
12:private static int getRandomNumber( int nbr )
13:{
14:if ( nbr > 0 )
15:{
16:Random Rnd = new Random();
17:return (Rnd.Next(0, nbr));
18:}
19:else
20:{
21:return 0;
22:}
23:}
24:
25:private static void WriteStats(string Guess, int nbr, string err )
26:{
27:Console.WriteLine(“\n==============================”);
28:Console.WriteLine(“Current Guess: {0}”, Guess);
29:Console.WriteLine(“Number of Guesses: {0}”, nbr);
30:if (err != “”)
31:Console.WriteLine( err );
32:Console.WriteLine(“Enter a number from 1 to 10000”);
33:Console.WriteLine(“==============================”);
34:
35:return;

Guess the Number! |
147 |
LISTING T&R 2.1 continued
36: } 37:
38:
39:public static void Main( string[] args )
40:{
41: |
int |
WinningNumber = Guess.getRandomNumber( 10000 ); |
42: |
int |
Guesses = 0; |
43:string Curr = “”;
44: |
int |
val = 0; |
45: |
string errMsg; |
|
46: |
|
|
47: |
bool cont = true; |
|
48: |
|
|
49: |
WriteStats(Curr, Guesses, (string) “”); |
|
50: |
|
|
51: |
|
|
52:while( cont == true)
53:{
54:
55:Console.Write(“\nEnter Guess: “);
56:Curr = Console.ReadLine();
57: |
|
58: |
try // try, catch, and finally are covered on Day 9 |
59:{
60:val = Convert.ToInt32(Curr);
62:// If a number was not entered, an exception will be
63:// throw. Program flow will go to catch statement below
65: |
Guesses += 1; |
// Add one to Guesses |
66: |
|
|
67:if( val < 0 || val > 10000 )
68:{
69:// bad value entered
70:errMsg = “Number is out of range...Try again.”;
71:WriteStats(Curr, Guesses, errMsg);
72:}
73:else
74:{
75:if ( val < WinningNumber )
76:{
77:errMsg = “You guessed low... Try again.”;
78:WriteStats(Curr, Guesses, errMsg);
79:}
80:else
81:if ( val > WinningNumber )
82:{
83:errMsg = “You guessed high... Try again.”;
84:WriteStats(Curr, Guesses, errMsg);
85:}

148 |
Type & Run 2 |
LISTING T&R 2.1 continued
86:else
87:{
88:Console.WriteLine(“\n\nCurrent Guess: {0}\n”, val);
89:Console.WriteLine(“Number of Guesses: {0}\n”, Guesses);
90:Console.WriteLine(“You guessed correctly!!”);
91:cont = false;
92:}
93:}
94:}
95:// Catch format errors....
96:catch( FormatException )
97:{
98:errMsg = “Please enter a valid number...”;
99:WriteStats(Curr, Guesses, errMsg);
100:}
101:}
102:}
103:}
Enter the previous listing and compile it. If you need to, refer to Day 1, “Getting Started with C#,” for the steps to enter, compile, and run a listing. When this program executes, it displays the following to the screen:
==============================
OUTPUT Current Guess: Number of Guesses: 0
Enter a number from 1 to 10000
==============================
Enter Guess:
You can enter a number between 0 and 10,000. You’ll then be told that the number is either too high or too low. When you guess the number correctly, you’re told so.
The WinGuess Type & Run
You may have been surprised to realize that you already have seen nearly everything presented in the Guess.cs listing. This Type & Run includes a second listing that contains a number of things that you have not seen. This is a program similar to the previous Guess program; the big difference is that this new listing uses a windows form.
You should note that support for windows forms comes from the .NET Framework classes rather than from the C# language. If you are using Microsoft’s .NET Framework

Guess the Number! |
149 |
and compiler, this listing will be fully supported. If you are using a different compiler and .NET runtime, classes in this listing may not be supported. For example, at the time this book was written, the go-mono project had not completed development of the .NET forms classes. This means that if you are using the mono compiler and runtime, you may not be able to compile and run this listing—yet.
LISTING T&R 2.2 WinGuess.cs
1:// WinGuess.cs - Pick a Number
2://-------------------------------------------------------
4:using System;
5:using System.Windows.Forms;
6:using System.Drawing;
7:using System.Text;
9:public class WinGuess : Form
10:{
11:private Label lblTag1;
12:private Button btnGuess;
13:private Label lblInfo;
14:private TextBox txtEntry;
15: |
private |
int |
WinningNumber = 0; |
16: |
private |
int |
Guesses = 0; |
17: |
|
|
|
18:public WinGuess()
19:{
20:InitializeComponent();
21:}
22:
23:private void InitializeComponent()
24:{
25:// Get a random number from zero to 10000...
26:WinningNumber = getRandomNumber( 10000 );
28:// Put title into window title bar
29:this.Text = “WinGuess”;
30:
31:// Center form on screen
32:this.StartPosition = FormStartPosition.CenterScreen;
34:// Set form style
35:this.FormBorderStyle = FormBorderStyle.Fixed3D;
37: |
lblTag1 = new Label(); |
// Create label |
38:lblTag1.Text = “Enter A Number:”;
39:lblTag1.Location = new Point( 50, 20);
40: |
this.Controls.Add(lblTag1); |
// Add label to form |
150 |
Type & Run 2 |
LISTING T&R 2.2 continued
41: |
|
|
42: |
lblInfo = new Label(); |
// Create label |
43:lblInfo.Text = “Enter a number between 0 and 10000.”;
44:lblInfo.Location = new Point( 50, 80);
45:lblInfo.Width = 200;
46:lblInfo.Height = 40;
47: |
this.Controls.Add(lblInfo); |
// |
Add label to |
form |
48: |
|
|
|
|
49: |
txtEntry = new TextBox(); |
// |
Create text |
box |
50:txtEntry.Location = new Point( 150, 18 );
51:this.Controls.Add(txtEntry); // Add to form
54: |
btnGuess = new Button(); |
// Create a button |
|
55: |
btnGuess.Text |
= “Try Number”; |
|
56:btnGuess.BackColor = Color.LightGray;
57:// following centers button and puts it near bottom
58:btnGuess.Location = new Point( ((this.Width/2) -
59: |
(btnGuess.Width / |
2)), |
|
60: |
(this.Height |
- 75)); |
|
61: |
this.Controls.Add(btnGuess); // Add button to |
form |
|
62: |
|
|
|
63:// Add a click event handler using the default event handler
64:btnGuess.Click += new System.EventHandler(this.btnGuess_Click);
65:}
66:
67:private int getRandomNumber( int nbr )
68:{
69:if ( nbr > 0 )
70:{
71:Random Rnd = new Random();
72:return (Rnd.Next(0, nbr));
73:}
74:else
75:{
76:return 0;
77:}
78:}
79:
80:protected void btnGuess_Click( object sender, System.EventArgs e)
81:{
82:int val = 0;
83:StringBuilder tmpString = new StringBuilder();
84:tmpString.Append(“Current Guess: “);
85:tmpString.Append(txtEntry.Text);
86:tmpString.Append(“\n”);
87: |
|
88: |
try // try, catch, and finally are covered on Day 9 |
89:{

Guess the Number! |
151 |
LISTING T&R 2.2 continued
90: val = int.Parse(txtEntry.Text); 91:
92:// If a number was not entered, an exception will be
93:// throw. Program flow will go to catch statement below
95: tmpString.Append(“Guesses: “); 96:
97: Guesses += 1; // Add one to Guesses 98:
99:tmpString.Append(Guesses.ToString());
100:tmpString.Append(“\n”);
101:
102:if( val < 0 || val > 10000 )
103:{
104:// bad value entered
105:tmpString.Append(“Number is out of range...Try again.\n”);
106:tmpString.Append(“Enter a number from 0 to 10000”);
107:}
108:else
109:{
110:if ( val < WinningNumber )
111:{
112:tmpString.Append(“You guessed low... Try again.\n”);
113:tmpString.Append(“Enter a number from 0 to 10000”);
114:}
115:else
116:if ( val > WinningNumber )
117:{
118:tmpString.Append(“You guessed high... Try again.\n”);
119:tmpString.Append(“Enter a number from 0 to 10000”);
120:}
121:else
122:{
123:tmpString.Append(“You guessed correctly!!”);
124:}
125:}
126:}
127:// Catch format errors....
128:catch( FormatException )
129:{
130:tmpString.Append(“Please enter a valid number...\n”);
131:tmpString.Append(“Enter a number from 0 to 10000”);
132:}
133:finally
134:{
135:this.lblInfo.Text = tmpString.ToString();
136:this.txtEntry.Text = “”;
137:
152 |
Type & Run 2 |
LISTING T&R 2.2 continued
138:// Next line will put winning number in window title
139:// this.Text = WinningNumber.ToString();
140:}
141:}
142:
143:public static void Main( string[] args )
144:{
145:Application.Run( new WinGuess() );
146:}
147:}
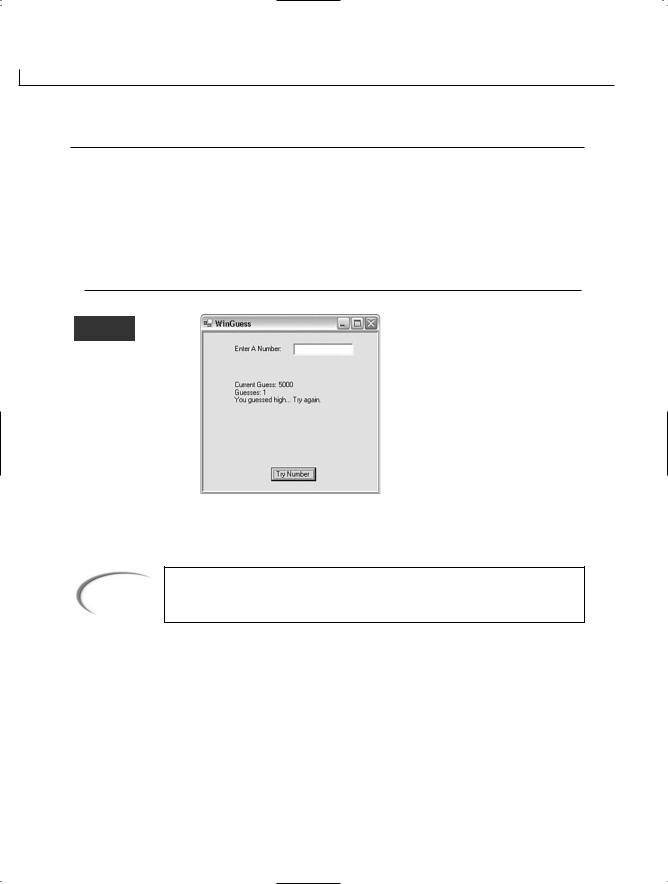
OUTPUT
FIGURE TR2.1
T&R output.
As you can see in Figure TR2.1, this new listing has the same functionality as the previous listing. The difference is that this listing creates a windows form.
Note
The source code for this listing is available on the included CD. Any updates to the code will be available at www.TeachYourselfCSharp.com.

WEEK 1
DAY 5
The Core of C#
Programming: Classes
As you learned on Day 1, “Getting Started with C#,” classes are critical to an object-oriented language, including C#. Whether you’ve realized it or not, you have seen classes used in every example included in the book so far. Because classes are central to C#, today’s lesson and tomorrow’s are among the two most important in this book. Today you…
•Revisit the concepts involved in object-oriented programming.
•Learn how to declare a class.
•Learn how to define a class.
•Discover class members.
•Create your own data members.
•Implement properties in your classes.
•Take your first serious look at namespaces.
154 |
Day 5 |
Digging into Object-Oriented Programming
On Day 1, you learned that C# is considered an object-oriented language. You also learned that to take full advantage of C#, you should understand the concepts of objectoriented languages. In the next few sections, you briefly revisit the concepts you learned about in Day 1. You will then begin to see how these concepts are applied to actual C# programs.
Recall from Day 1 the key characteristics that make up an object-oriented language:
•Encapsulation
•Polymorphism
•Inheritance
•Reuse
Encapsulation
Encapsulation is the concept of making classes (or “packages”) that contain everything you need. In object-oriented programming, this means that you can create a class that stores all the variables that you need and all the routines to commonly manipulate this data. You can create a Circle class that stores information on a circle. This could include storing the location of the circle’s center and its radius, plus storing routines commonly used with a circle. These routines could include getting the circle’s area, getting its circumference, changing its center point, changing its radius, and much more.
By encapsulating a circle, you allow the user to be oblivious to how the circle works. You need to know only how to interact with the circle. This provides a shield to the inner workings of the circle, which means that the variables within the class could be changed and it would be invisible to the user. For example, instead of storing the radius of the circle, you could store the diameter. If you have encapsulated the functionality and the data, making this change impacts only your class. Any programs that use your class should not need to change. In today’s and tomorrow’s lessons, you see programs that work directly with a Circle class.
Note
Encapsulation is often referred to as “black boxing,” which refers to hiding the functionality or the inner workings of a process. For a circle, if you send in the radius, you can get the area. You don’t care how it happens, as long as you know that you are getting back the correct answer.

The Core of C# Programming: Classes |
155 |
Inheritance
In many object-oriented programming books, an animal analogy is used to illustrate inheritance. The analogy starts with the concept of an animal as a living being.
Now consider reptiles, which are everything that an animal is; plus, they are coldblooded. A reptile contains all of the features of an animal, but it also adds its own unique features. Now consider a snake. A snake is a reptile that is long and skinny and that has no legs. It has all the characteristics of a reptile, but it also has its own unique characteristics. A snake can be said to inherit the characteristics of a reptile. A reptile can be said to inherit the characteristics of an animal.
A second example of inheritance can be shown with a circle. A class can be created called shape. All shapes have a number of sides and an area. A circle can be created by inheriting from shape. It would still have the number of sides and the area that a shape provides. Additionally, it could have a center point. A triangle could also be created by inheriting from shape. The triangle would add its own unique characteristics to those that it gets from shape.
On Day 10, “Reusing Existing Code with Inheritance,” you will see how this same concept is applied to classes and programming.
Polymorphism
Polymorphism is having the capability to assume many forms, which means that the programs can work with what you send them. For example, you could have a routine that gives the area of a shape. Because the area of a triangle is calculated differently than that
of other shapes, the routine to calculate the area would need to adapt based on what is 5 sent. Regardless of whether a triangle, a circle, or another shape is sent, the routine
would be capable of treating them all as shapes and, thus, calculating the area. You will learn how to program polymorphism on Day 10.
Overloading is another concept that is often related to polymorphism. For example, you have used the WriteLine() routine in several of the previous days. You have seen that you can create a parameter field using {0}. What values does this field print? As you have seen, it can print a variable regardless of its type, or it can print another string. The WriteLine() routine takes care of how it gets printed. The routine is polymorphic, in that it adapts to most of the types that you can send it.
Using a circle as an example, you might want to call a circle object to get its area. You can do this by using three points or by using a single point and the radius. Either way,

156 |
Day 5 |
you expect to get the same results. This polymorphic feature is done by using overloading. You’ll learn more about overloading in tomorrow’s lesson, “Packaging Functionality: Class Methods and Member Functions.”
Reuse
When you create a class, you can reuse it to create lots of objects. By using inheritance and some of the features described previously, you can create routines that can be used repeatedly in many programs and in many ways. By encapsulating functionality, you can create routines that have been tested and are proven to work. You won’t have to test the details of how the functionality works—only that you are using it correctly. This makes reusing these routines quick and easy.
Objects and Classes
On Day 1, an example of a cookie cutter and cookies illustrated classes and objects. Now you are done with cookies and snakes—it is time to jump into some code.
Note
You will learn about classes by starting with extremely simple examples and then building on them over the next several days.
Defining a Class
To keep things simple, a keyword called class is used to define classes. The basic structure of a class follows this format:
class identifier
{
class-body ;
}
identifier is the name given to the class, and class-body is the code that makes up the class.
The name of a class is like any other variable name that can be declared. You want to give a class a meaningful name, something that describes what the class does.
The .NET Framework has a large number of built-in classes. You have actually been using one since the beginning of this book: the Console class. The Console class contains several data members and routines. You’ve already used many of these routines, including Write and WriteLine. The class name—the identifier—of this class is Console. The body of the Console class contains the code for the Write and WriteLine routines. By the end of tomorrow’s lesson, you will be able to create and name your own classes that have their own routines.

The Core of C# Programming: Classes |
157 |
Declaring Classes
After a class is defined, you use it to create objects. A class is just a definition used to create objects. A class by itself does not have the capability to hold information or actually perform routines. Instead, a class is used to declare objects. The object can then be used to hold the data and perform the routines as defined by the class.
Note
The declaration of an object is commonly referred to as instantiation. Said differently, an object is an instance of a class.
The format of declaring an object from a class is as follows: class_name object_identifier = new class_name();
class_name is the name of the class, and object_identifier is the name of the object being declared. For example, if you have a class called Point, you can create an object called startingPoint with the following line of code:
point startingPoint = new Point();
The name of the class is Point, and the name of the object declared is startingPoint. Because startingPoint is an object, it can contain data and routines if they were defined within the Point class.
In looking at this declarative line of code, you might wonder what the other items are.
Most important, a keyword is being used that you have not yet seen: new. |
5 |
|
|
||
As its name implies, the new keyword is used to create new items. In this case, it creates |
|
|
a new point. Because Point is a class, an object is created. The new keyword indicates that |
|
|
a new instance is to be created. In this case, the new instance is a Point object. |
|
|
When declaring an object with a class, you also have to provide parentheses to the class |
|
|
name on the right of the assignment. This enables the class to be constructed into a new |
|
|
object. |
|
|
Caution |
|
|
If you don’t add the construction code new class_name, you will have |
|
|
declared a class, but the compiler won’t have constructed its internal struc- |
|
|
|
|
|
|
ture. You need to make sure that you assign the new class_name code to the |
|
|
declared object name to make sure everything is constructed. You will learn |
|
|
more about this initial construction in tomorrow’s lesson. |
|
|
|
|
158 |
Day 5 |
Look at the statement again:
point startingPoint = new Point();
The following breaks down what is happening:
point startingPoint
The Point class is used to declare an object called startingPoint. This piece of the statement is like what you have seen with other data types, such as integers and decimals.
startingPoint =
As with variables, you assign the result of the right side of the assignment operator (the equals sign) to the variable on the left. In this case, the variable happens to be an object—which you now know is an object of type Point called startingPoint.
new Point()
This part of the statement does the actual construction of the Point object. The name of the class with parentheses is a signal to construct—create—an object of the class type— in this case, Point. The new keyword says to reserve some room in memory for this new object. Remember, a class is only a definition: It doesn’t store anything. The object needs to store information, so it needs memory reserved. The new keyword reserves the memory.
Like all statements, this declaration is ended with a semicolon, which signals that the statement is done.
The Members of a Class
Now that you know the overall structure for creating an object with a class, it is time to look at what can be held in a class. Two primary types of items can be contained within the body of a class: data members and function members.
Data members include variables and constants. These include variables of any of the types that you learned about on Day 2, “Understanding C# Programs,” and any of the more advanced types that you will learn about later. These data members can even be other classes.
The other type of element that is part of a class’s body is function members. Function members are routines that perform an action. These actions can be as simple as setting a value to something more complex, such as writing a line of text using a variable number of values—as you have seen with Write and WriteLine. Write and WriteLine are member functions of the Console class. In tomorrow’s lesson, you will learn how to create and use member functions of your own. For now, it is time to visit data members.

The Core of C# Programming: Classes |
159 |
Working with Data Members, a.k.a. Fields
Another name for a variable is a field. As stated previously, data members within a class are variables that are members of a class. In the Point class referenced
earlier, you expect a data member to store the x and y coordinates of the point. These coordinates could be any of a number of data types; however, if these were integers, you would define the Point class as such:
class Point
{
int x; int y;
}
That’s it. This is effectively the code for a very simple Point class. You should include one other item for now: an access modifier called public. A variable is accessible only within the block where you declare it, unless you indicate otherwise. In this case, the block is the definition of the Point class. Without adding the word public, you cannot access x or y outside the Point class.
Note
Remember, a block is a section of code between two braces ({}). The body of a class is a block of code.
The change made to the Point class is relatively simple. With the public accessor added, |
|
|
|
||
the class becomes this: |
5 |
|
class Point |
||
|
||
{ |
|
|
public int x; |
|
|
public int y; |
|
|
} |
|
|
|
||
Although the Point class contains two integers, you can actually use any data type within |
|
|
this class. For example, you can create a FullName class that contains three strings that |
|
|
store the first, middle, and last names. You can create an Address class that contains a |
|
|
name class and additional strings to hold the different address pieces. You can create a |
|
|
customer class that contains a long value for a customer number, an address class, a deci- |
|
|
mal account balance, a Boolean value for active or inactive, and more. |
|
Accessing Data Members
When you have data members declared, you want to get to their values. As you learned, the public accessor enables you to get to the data members from outside the class.

160 |
Day 5 |
You cannot simply access data members from outside the class by their name. For example, if you have a program that declares a startingPoint from the Point class, it would seem as if you should be able to get the point by using x and y—the names that are in the Point class. What happens if you declare both a startingPoint and an endingPoint in the same program? If you use x, which point is being accessed?
To access a data member, you use both the name of the object and the data member. The member operator, which is a period, separates these. To access the startingPoint’s coordinates, you therefore use this
startingPoint.x
and this:
startingPoint.y
For the ending point, you use this
endingPoint.x
and this:
endingPoint.y
At this time, you have the foundation to try out a program. Listing 5.1 presents the Point class. This class is used to declare two objects, starting and ending.
LISTING 5.1 PointApp.cs—Declaring a Class with Data Members
1:// PointApp.cs- A class with two data members
2://--------------------------------------------------------------------
4:class Point
5:{
6:public int x;
7:public int y;
8:}
9:
10:class pointApp
11:{
12:public static void Main()
13:{
14:Point starting = new Point();
15: |
Point ending |
= new Point(); |
16: |
|
|
17:starting.x = 1;
18:starting.y = 4;
19:ending.x = 10;
20:ending.y = 11;

The Core of C# Programming: Classes |
161 |
LISTING 5.1 continued
21:
22:System.Console.WriteLine(“Point 1: ({0},{1})”,
23: |
starting.x, starting.y); |
24:System.Console.WriteLine(“Point 2: ({0},{1})”,
ending.x, ending.y);
26:}
27:}
Point 1: (1,4)
Point 2: (10,11)
A simple class called Point is declared in Lines 4–8. This class follows the structure that was presented earlier. In Line 4, the class keyword is being used, fol-
lowed by the name of the class, Point. Lines 5–8 contain the braces that enclose the body of the class. Within the body of this class, two integers are declared, x and y. These are each declared as public so that you can use them outside of the class.
Line 10 contains the start of the main portion of your application. It is interesting to note that the main portion of your application is also a class. In this case, the class containing your application is called pointApp. You will learn more about this later.
Line 12 contains the main routine that you should now be very familiar with. In Lines 14–15, two objects are created using the Point class, following the same format
that was described earlier. In Lines 17–20, values are set for each of the data members of the Point objects. In Line 17, the value 1 is assigned to the x data member of the starting
class. The member operator, the period, separates the member name from the object 5 name. Lines 18–20 follow the same format.
Line 22 contains a WriteLine routine, which you have also seen before. This one is unique because you print the values stored within the starting point object. The values are stored in starting.x and starting.y, not just x and y. Line 24 prints the values for the
ending point.
Using Data Members
Listing 5.1 showed you how to assign a value to a data member, as well as how to get its value. What if you want to do something more complex than a simple assignment or a simple display?
The data members of a class are like any other variable type. You can use them in operations, control statements, or anywhere that a regular variable can be accessed. Listing 5.2 expands on the use of the point class. In this example, the calculation is performed to determine the length of a line between two points. If you’ve forgotten your basic algebraic equation for this, Figure 5.1 illustrates the calculation to be performed.

162 |
Day 5 |
FIGURE 5.1 |
Starting (x1, y1) |
c |
|
Calculating line length |
y2 – y1 |
||
|
|||
from two points. |
b |
Ending (x2, y2) |
|
|
x2 – x1 a
c2 = a2 + b2 or
c = (x2 – x1)2 + (y2 – y1)2
LISTING 5.2 LineApp.cs—Working with Data Members
1:// LineApp.csCalculate the length of a line.
2://--------------------------------------------------------------------
4:class Point
5:{
6:public int x;
7:public int y;
8:}
9:
10:class lineApp
11:{
12:public static void Main()
13:{
14:Point starting = new Point();
15: |
Point ending |
= new Point(); |
16: |
double Line; |
|
17: |
|
|
18:starting.x = 1;
19:starting.y = 4;
20:ending.x = 10;
21:ending.y = 11;
23:Line = System.Math.Sqrt( (ending.x - starting.x)*(ending.x - starting.x) +
24: (ending.y - starting.y)*(ending.y - starting.y) );
25:
26:System.Console.WriteLine(“Point 1: ({0},{1})”,
27: |
starting.x, starting.y); |
28:System.Console.WriteLine(“Point 2: ({0},{1})”,
29: |
ending.x, ending.y); |
30:System.Console.WriteLine(
31: |
“Length of line from Point 1 to Point 2: {0}”, |
32: |
Line); |
33:}
34:}

The Core of C# Programming: Classes |
163 |
OUTPUT |
Point |
1: |
(1,4) |
Point |
2: |
(10,11) |
|
|
Length of line from Point 1 to Point 2: 11.4017542509914 |
||
|
This listing is very similar to Listing 5.1. The biggest difference is the addition |
||
ANALYSIS |
|||
|
of a data member and some calculations that determine the length of a line. In |
||
|
|||
Line 16, you see that the new data member is declared of type double and is called line. This variable will be used to hold the result of the length of the line between the two declared points.
Lines 23–24 are actually a single statement that looks more complex than it is. Other than the System.Math.Sqrt part, you should be able to follow what the line is doing. Sqrt is a routine within the System.Math object that calculates the square root of a value. If you compare this formula to the information presented in Figure 5.1, you will see that it is a match. The end result is the length of the line. The important thing to note is that the data members are being used within this calculation in the same manner that any other variable would be used. The only difference is the naming scheme.
Using Classes as Data Members
It was stated earlier that you can nest one class within another. A class is another type of data. As such, an object declared with a class type—which is just an advanced variable type—can be used in the same places as any other variable. Listing 5.3 presents an example of a line class. This class is composed of two points, starting and ending.
LISTING 5.3 line2.cs—Nested Classes
5
1:// line2.cs- A class with two data members
2://--------------------------------------------------------------------
4:class Point
5:{
6:public int x;
7:public int y;
8:}
9:
10:class Line
11:{
12:public Point starting = new Point();
13:public Point ending = new Point();
14:public double len;
15:}
16:
17:class lineApp
18:{
19:public static void Main()
164 |
Day 5 |
LISTING 5.3 continued
20:{
21:Line myLine = new Line();
23:myLine.starting.x = 1;
24:myLine.starting.y = 4;
25:myLine.ending.x = 10;
26:myLine.ending.y = 11;
27:myLine.len = System.Math.Sqrt(
28:(myLine.ending.x – myLine.starting.x) *
29:(myLine.ending.x – myLine.starting.x) +
30:(myLine.ending.y – myLine.starting.y)*
31:(myLine.ending.y – myLine.starting.y) );
33:System.Console.WriteLine(“Point 1: ({0},{1})”,
34: |
myLine.starting.x, myLine.starting.y); |
35:System.Console.WriteLine(“Point 2: ({0},{1})”,
36: |
myLine.ending.x, myLine.ending.y); |
37:System.Console.WriteLine(“Line Length: {0}”,
38: |
myLine.len); |
39:}
40:}
Point 1: (1,4)
Point 2: (10,11)
Line Length: 11.4017542509914
Listing 5.3 is very similar to the previous listings. The Point class that you are coming to know and love is defined in Lines 4–8. There is nothing different
about this from what you have seen before. In Lines 10–15, however, you see a second class being defined. This class, called line, is composed of three variables. The first two in Lines 12–13 are of type point, which is a class. These two variables are called starting and ending. When an object is declared using the Line class, the Line class, in turn, creates two Point objects. The third data member declared in Line 14 is a double that will be used to store the length of the line.
Continuing with the listing, you see in Line 21 that a new object is created using the Line class. This new Line object is given the name myLine. Line 21 follows the same format that you saw earlier for creating an object from a class.
Lines 23–31 access the data members of the Line class and assign them values. It is beginning to look a little more complex; however, looks can be deceiving. If you break this down, you will see that it is relatively straightforward. In Line 23, you assign the constant value 1 to the variable myLine.starting.x. In other words, you are assigning the value 1 to the x member of the starting member of myLine. Going from the other

The Core of C# Programming: Classes |
165 |
direction, you can say that you are assigning the value 1 to the myLine line object’s starting member’s x member. It is like a tree. Figure 5.2 illustrates the Line class’s members.
The rest of this listing follows the same structure. Lines 27–31 might look complicated; however, this is the same formula that was used earlier to calculate the length of a line. The result, however, is placed into the len data member of the myLine object.
FIGURE 5.2
The myLine object’s |
point starting |
int x |
|
int y |
|||
|
|||
data members. |
myLine |
|
|
|
|
||
|
point ending |
int x |
|
|
int y |
||
|
|
Working with Nested Types
On Day 2, you learned about the different standard data types that can be used. As you saw in Listing 5.3, an object created with a class can be used in the same places as any other variable created with a data type.
When used by themselves, classes really do nothing—they are only a description. For example, in Listing 5.3, the Point class in Lines 4–8 is only a description; nothing is declared and no memory is used. This description defines a type. In this case, the type is the class, or, specifically, a Point.
It is possible to nest a type within another class. If Point will be used only within the
context of a line, it can be defined within the Line class. This enables Point objects to be 5 used in the Line class.
The code for the nested Point type is as follows:
class Line
{
public class Point
{
public int x; public int y;
}
public Point starting = new Point(); public Point ending = new Point();
}
One additional change was made. The Point class had to be declared as public as well. If you don’t declare the type as public, you get an error. The reason for the error should

166 |
Day 5 |
make sense if you think about it. How can the parts of a Point object be public if the point itself isn’t public?
Using Static Variables
Sometimes you want a bunch of objects declared with the same class to share a value. For example, you might want to declare a number of line objects that all share the same originating point. If one Line object changes the originating point, you want all lines to change it.
To share a single data value across all the objects declared by a single class, you add the static modifier. Listing 5.4 revisits the Line class. This time, the same starting point is used for all objects declared with the Line class.
LISTING 5.4 StatLine.cs—Using the static Modifier with Data Members
1:// StatLine.cs- A class with two data members
2://--------------------------------------------------------------------
4:class Point
5:{
6:public int x;
7:public int y;
8:}
9:
10:class Line
11:{
12:static public Point origin= new Point();
13:public Point ending = new Point();
14:}
15:
16:class lineApp
17:{
18:public static void Main()
19:{
20:Line line1 = new Line();
21:Line line2 = new Line();
23:// set line origin
24:Line.origin.x = 1;
25:Line.origin.y = 2;
28:// set line1’s ending values
29:line1.ending.x = 3;
30:line1.ending.y = 4;
31:

The Core of C# Programming: Classes |
167 |
LISTING 5.4 continued
32:// set line2’s ending values
33:line2.ending.x = 7;
34:line2.ending.y = 8;
35:
36:// print the values...
37:System.Console.WriteLine(“Line 1 start: ({0},{1})”,
38: |
Line.origin.x, Line.origin.y); |
39:System.Console.WriteLine(“line 1 end: ({0},{1})”,
40: |
line1.ending.x, line1.ending.y); |
41:System.Console.WriteLine(“Line 2 start: ({0},{1})”,
42: |
line.origin.x, line.origin.y); |
43:System.Console.WriteLine(“line 2 end: ({0},{1})\n”,
44: |
line2.ending.x, line2.ending.y); |
45: |
|
46:// change value of line2’s starting point
47:Line.origin.x = 939;
48:Line.origin.y = 747;
49:
50: // and the values again...
51:
52:System.Console.WriteLine(“Line 1 start: ({0},{1})”,
53: |
Line.origin.x, Line.origin.y); |
54:System.Console.WriteLine(“line 1 end: ({0},{1})”,
55: |
line1.ending.x, line1.ending.y); |
56:System.Console.WriteLine(“Line 2 start: ({0},{1})”,
57: |
line.origin.x, line.origin.y); |
58:System.Console.WriteLine(“line 2 end: ({0},{1})”,
59: |
|
|
|
line2.ending.x, line2.ending.y); |
|
||
60: |
} |
|
|
|
5 |
||
61: } |
|
|
|
|
|
||
|
|
|
Line 1 start: |
(1,2) |
|
|
|
OUTPUT |
|
|
|
||||
|
line 1 end: |
(3,4) |
|
|
|||
|
|
|
Line 2 start: |
(1,2) |
|
|
|
|
|
|
|
||||
|
|
|
line 2 end: |
(7,8) |
|
|
|
|
|
|
Line 1 start: |
(939,747) |
|
|
|
|
|
|
line 1 end: |
(3,4) |
|
|
|
|
|
|
Line 2 start: |
(939,747) |
|
|
|
|
|
|
line 2 end: |
(7,8) |
|
|
|
|
Caution |
|
|
|
|||
|
|
If you try to access a static data member with an object name, such as line1, |
|
|
|||
|
|
you will get an error. You must use the class name to access a static data |
|
|
|||
|
|
|
|
|
|||
|
|
|
|
member. |
|
|
|
|
|
|
|
|
|
|
|

168 |
Day 5 |
Listing 5.4 is not much different from what you have seen already. The biggest ANALYSIS difference is in Line 12, where the origin point is declared as static in addition
to being public. The static keyword makes a big difference in this Line class. Instead of each object that is created from the Line class containing an origin point, only one origin point is shared by all instances of Line.
Line 18 is the beginning of the Main routine. Lines 20–21 declare two Line objects, called line1 and line2. Lines 28–29 set the ending point of line1, and Lines 33–34 set the ending point of line2. Going back to Lines 24–25, you see something different from what you have seen before. Instead of setting the origin point of line1 or line2, these lines set the point for the class name, Line. This is important. If you try to set the origin on line1 or line2, you will get a compiler error. In other words, the following line of code is an error:
line1.origin.x = 1;
Because the origin object is declared static, it is shared across all objects of type Line. Because neither line1 nor line2 owns this value, these cannot be used directly to set the value. You must use the class name instead. Remember, a variable declared static in a class is owned by the class, not the individual objects that are instantiated.
Lines 37–44 print the origin point and the ending point for line1 and line2. Again, notice that the class name is used to print the origin values, not the object name. Lines 47–48 change the origin, and the final part of the program prints the values again.
Note
A common use of a static data member is as a counter. Each time an object does something, it can increment the counter for all the objects.
Inspecting the Application Class
If you haven’t already noticed, a class being used in all your applications has not been fully discussed. In Line 16 of Listing 5.4, you see the following code:
class lineApp
You will notice a similar class line in every application that you have entered in this book. C# is an object-oriented language. This means that everything is an object—even your application. To create an object, you need a class to define it. Listing 5.4’s application is lineApp. When you execute the program, the lineApp class is instantiated and creates a lineApp object, which just happens to be your program.

The Core of C# Programming: Classes |
169 |
Like what you have learned already, your application class declares data members. In Listing 5.4, the lineApp class’s data members are two classes: line1 and line2. There is additional functionality in this class as well. In tomorrow’s lesson, you will learn that this additional functionality can be included in your classes as well.
Creating Properties
Earlier, it was stated that one of the benefits of an object-oriented program is the capability to control the internal representation and access to data. In the examples used so far in today’s lesson, everything has been public, so access has been freely given to any code that wants to access the data members.
In an object-oriented program, you want to have more control over who can and can’t get to data. In general, you won’t want code to access data members directly. If you allow code to directly access these data members, you might lock yourself into being unable to change the data types of the values.
C# provides a concept called properties to enable you to create object-oriented fields within your classes. Properties use the reserved words get and set to get the values from your variables and set the values in your variables. Listing 5.5 illustrates the use of get and set with the Point class that you used earlier.
LISTING 5.5 prop.cs—Using Properties
1:// PropApp.csUsing Properties
2: |
// |
5 |
|
||
3: |
|
|
4:class Point
5:{
6:int my_X; // my_X is private
7:int my_Y; // my_Y is private
9:public int x
10:{
11:get
12:{
13:return my_X;
14:}
15:set
16:{
17:my_X = value;
18:}
19:}
20:public int y
21:{

170 |
Day 5 |
LISTING 5.5 continued
22:get
23:{
24:return my_Y;
25:}
26:set
27:{
28:my_Y = value;
29:}
30:}
31:}
32:
33:class PropApp
34:{
35:public static void Main()
36:{
37:Point starting = new Point();
38: |
Point ending |
= new Point(); |
39: |
|
|
40:starting.x = 1;
41:starting.y = 4;
42:ending.x = 10;
43:ending.y = 11;
45:System.Console.WriteLine(“Point 1: ({0},{1})”,
46: |
starting.x, starting.y); |
47:System.Console.WriteLine(“Point 2: ({0},{1})”,
48: |
ending.x, ending.y); |
49:}
50:}
Point 1: (1,4)
Point 2: (10,11)
Listing 5.5 creates properties for both the x and y coordinates of the Point class. The Point class is defined in Lines 4–31. Everything on these lines is a part of
the Point class’s definition. In Lines 6–7, you see that two data members are created, my_X and my_Y. Because these are not declared as public, they cannot be accessed outside the class; they are considered private variables. You will learn more about keeping things private on Day 7, “Storing More Complex Stuff: Structures, Enumerators, and Arrays.”
Lines 9–19 and Lines 20–30 operate exactly the same, except that the first set of lines uses the my_X variable and the second set uses the my_Y variable. These sets of lines create the property capabilities for the my_X and my_Y variables.

The Core of C# Programming: Classes |
171 |
Line 9 looks like just another declaration of a data member. In fact, it is. In this line, you |
|
|
declare a public integer variable called x. Note that there is no semicolon at the end of |
|
|
this line; therefore, the declaration of the member variable is not complete. Instead, it |
|
|
also includes what is in the following code block in Lines 10–19. Within this block of |
|
|
code you have two commands. Line 11 begins a get statement, which is called whenever |
|
|
a program tries to get the value of the data member being declared—in this case, x. For |
|
|
example, if you assign the value of x to a different variable, you get the value of x and set |
|
|
it into the new variable. In this case, getting the value of x is the code that occurs in the |
|
|
block (Lines 12–14) following the get statement. When getting the value of x, you are |
|
|
actually getting the value of my_X, as you can see in Line 13. |
|
|
The set statement in Line 15 is called whenever you are setting a value in the x variable. |
|
|
For example, setting x equal to 10 places the value of 10 in x. |
|
|
When a program gets the value of x, the get property in Line 11 is called. This executes |
|
|
the code within the get, which is Line 13. Line 13 returns the value of my_X, which is the |
|
|
private variable in the Point class. |
|
|
When a program places a value in x, the set property in Line 15 is called. This executes |
|
|
the code within the set, which is Line 17. Line 17 sets something called value into the |
|
|
private variable, my_X, in the Point class. value is the value being placed in x. (It is great |
|
|
when a name actually describes the contents.) For example, value is 10 in the following |
|
|
statement: |
|
|
x = 10; |
|
|
This statement places the value of 10 in x. The set property within x places this value in |
5 |
|
my_X. |
||
|
||
Looking at the main application in Lines 33–50, you should see that x is used as it was |
|
|
before. There is absolutely no difference in how you use the Point class. The difference |
|
|
is that the Point class can be changed to store my_X and my_Y differently, without impact- |
|
|
|
||
ing the program. |
|
|
Although the code in Lines 9–30 is relatively simple, it doesn’t have to be. You can do |
|
|
any coding and any manipulation that you want within the get and set. You don’t even |
|
|
have to write to another data member. |
|

172 |
Day 5 |
DO |
DON’T |
|
|
|
|
Do make sure that you understand data |
|
Don’t forget to mark data members as |
|
||
members and the class information pre- |
|
public if you want to access them from |
sented in today’s lesson before going to |
|
outside your class. |
Day 6, “Packaging Functionality: Class |
|
|
Methods and Member Functions.” |
|
|
Do use property accessors to access your |
|
|
class’s data members in programs that |
|
|
you create. |
|
|
|
|
|
A First Look at Namespaces
As you begin to learn about classes, it is important to know that a large number of classes are available that do a wide variety of functions. The .NET Framework provides a substantial number of base classes that you can use. You can also obtain third-party classes that you can use.
Note
Day 15, “Using Existing Routines from the .NET Base Classes,” focuses specifically on using a number of key .NET base classes.
As you continue through this book, you will be exposed to a number of key classes. You’ve actually used a couple of base classes already. As mentioned earlier, Console is a base class. You also learned that Console has member routines, Write and WriteLine. For example, the following writes my name to the console:
System.Console.WriteLine(“Bradley L. Jones”);
You now know that “Bradley L. Jones” is a literal. You know that WriteLine is a routine that is a part of the Console class. You even know that Console is an object declared from a class. This leaves System.
Because of the number of classes, it is important that they be organized. Classes can be grouped into namespaces. A namespace is a named grouping of classes. The Console class is a part of the System namespace.
System.Console.WriteLine is a fully qualified name. With a fully qualified name, you point directly to where the code is located. C# provides a shortcut method for using classes and methods that doesn’t require you to always include the full namespace name. This is accomplished with the using keyword.

The Core of C# Programming: Classes |
173 |
The using keyword enables you to include a namespace in your program. When the namespace is included, the program knows to search the namespace for routines and classes that might be used. The format for including a namespace is as follows:
using namespace_name
namespace_name is the name of the namespace or the name of a nested namespace. For example, to include the System namespace, you include the following line of code near the top of your listing:
using System;
If you include this line of code, you do not need to include the System section when calling classes or routines within the namespace. Listing 5.6 calls the using statement to include the System namespace.
LISTING 5.6 NameApp.cs—Using using and Namespaces
1:// NameApp.csNamespaces and the using keyword
2://--------------------------------------------------------------------
4: using System; 5:
6:class name
7:{
8:public string first;
9:public string last;
10:}
11: |
|
5 |
12: |
class NameApp |
13:{
14:public static void Main()
15:{
16:// Create a name object
17:name you = new name();
19:Console.Write(“Enter your first name and press enter: “);
20:you.first = Console.ReadLine();
21:System.Console.Write(“\n{0}, enter your last name and press enter: “,
22: |
you.first); |
23: |
you.last = System.Console.ReadLine(); |
24: |
|
25:Console.WriteLine(“\nData has been entered.....”);
26:System.Console.WriteLine(“You claim to be {0} {1}”,
27: |
you.first, you.last); |
28:}
29:}
174 |
Day 5 |
Enter your first name and press enter: Bradley
Bradley, enter your last name and press enter: Jones
Data has been entered.....
You claim to be Bradley Jones
The bold text in the output is text that I entered. You can enter any text in its place. I suggest using your own name rather than mine!
Line 4 of Listing 5.6 is the focal point of this program. The using keyword includes the System namespace; when you use functions from the Console class,
you don’t have to fully qualify their names. You see this in Lines 19, 20, and 25. By including the using keyword, you are not precluded from continuing to use fully qualified names, as Lines 21, 23, and 26 show. However, there is no need to fully qualify names because the namespace was included.
This program uses a second routine from the Console class, called ReadLine. As you can see by running this program, the ReadLine routine reads what is entered by users up to the time they press Enter. This routine returns what the user enters. In this case, the text entered by the user is assigned with the assignment operator to one of the data members in the name class.
Nested Namespaces
Multiple namespaces can be stored together and also are stored in a namespace. If a namespace contains other namespaces, you can add them to the qualified name, or you can include the subnamespace qualified in a using statement. For example, the System namespace contains several other namespaces, including ones called Drawing, Data, and Windows.Forms. When using classes from these namespaces, you can either qualify these names or include them with using statements. To include a using statement for the Data namespace within the System namespace, you enter the following:
using System.Data;
Note
A namespace can also be used to allow the same class name to be used in multiple places. For example, I could create a class called person. You could also create a class called person. To keep these two classes from clashing, they could be placed into different namespaces. You’ll learn how to do this on Day 8, “Advanced Method Access.”

The Core of C# Programming: Classes |
175 |
Summary
Today’s and tomorrow’s lessons are among two of the most important lessons in this book. Classes are the heart of object-oriented programming languages and, therefore, are the heart of C#. In today’s lesson, you revisited the concepts of encapsulation, polymorphism, inheritance, and reuse. You then learned how to define the basic structure of a class and how to create data members within your class. You learned one of the first ways to encapsulate your program when you learned how to create properties using the set and get accessors. The last part of today’s lesson introduced you to namespaces and the using statement. Tomorrow you will build on this by learning how to add more functionality to your classes.
Q&A
Q Would you ever use a class with just data members?
A Generally, you would not use a class with just data members. The value of a class and of object-oriented programming is the capability to encapsulate both functionality and data into a single package. You learned about only data today. In tomorrow’s lesson, you learn how to add the functionality.
Q Should all data members always be declared public so people can get to them?
AAbsolutely not! Although many of the data members were declared as public in today’s lesson, sometimes you don’t want people to get to your data. One reason is to allow the capability to change the way the data is stored.
Q It was mentioned that there are a bunch of existing classes. How can I find out |
5 |
about these? |
|
AMicrosoft has provided a bunch of classes called the .NET base classes, and also has provided documentation on what each of these classes can do. The classes are organized by namespace. At the time this book was written, the only way to get any information on them was through online help. Microsoft included a complete references section for the base classes. You will learn more about the base classes on Day 19, “Creating Remote Procedures (Web Services).”
Workshop
The Workshop provides quiz questions to help you solidify your understanding of the material covered and exercises to provide you with experience in using what you’ve learned. Try to understand the quiz and exercise answers before continuing to the next day’s lesson. Answers are provided on the CD.

176 |
Day 5 |
Quiz
1.What are the four characteristics of an object-oriented program?
2.What two key things can be stored in a class?
3.What is the difference between a data member declared as public and one that hasn’t been declared as public?
4.What does adding the keyword static do to a data member?
5.What is the name of the application class in Listing 5.2?
6.What commands are used to implement properties?
7.When is value used?
8.Is Console a class, a data member, a namespace, a routine, or a type?
9.Is System a class, a data member, a namespace, a routine, or a type?
10.What keyword is used to include a namespace in a listing?
Exercises
1.Create a class to hold the center of a circle and its radius.
2.Add properties to the Circle class created in Exercise 1.
3.Create a class that stores an integer called MyNumber. Create properties for this number. When the number is stored, multiply it by 100. Whenever it is retrieved, divide it by 100.
4.Bug Buster: The following program has a problem. Enter it in your editor and
compile it. Which lines generate error messages?
1:// A bug buster program
2:// Is something wrong? Or not? 3://-------------------------------------------
4:using System;
5:using System.Console;
7:class name
8:{
9:public string first;
10:}
11:
12:class NameApp
13:{
14:public static void Main()
15:{
16:// Create a name object
17:name you = new name();
19: Write(“Enter your first name and press enter: “);

The Core of C# Programming: Classes |
177 |
20:you.first = ReadLine();
21:Write(“\nHello {0}!”, you.first);
22:}
23:}
5.Write a class called die that will hold the number of sides of a die, sides, and the current value of a roll, value.
Use the class in Exercise 5 in a program that declares two dice objects. Set values into the side data members. Set random values into the stored roll values. (See Listing 5.3 for help with this program.)
5


WEEK 1
DAY 6
Packaging Functionality:
Class Methods and
Member Functions
Yesterday you learned that a class has several parts. The most important thing you learned, though, is that a class has the capability of defining objects used for storing data and routines. Also, in yesterday’s lesson you learned how data is stored. Today you learn about creating, storing, and using routines within your classes. These routines give your objects the power to do what you want. Although storing data can be important, manipulation of the information brings life to your programs. Today you…
•Build methods of your own.
•Pass information to your routines with parameters.
•Re-evaluate the concepts of “by value” and “by reference.”
•Understand the concepts of calling methods.

180 |
Day 6 |
•Discover the truth about constructors.
•Learn to finalize or destruct your classes.
Getting Started with Methods
On previous days, you learned how to store data and how to manipulate this data. You also learned how to manipulate your program’s flow. Now you will learn to package this functionality into routines that you can reuse. Additionally, you will learn to associate these routines with the data members of a class.
Routines in C# are called functions or methods. There is no real distinction between these two terms, so you can use them interchangeably.
Note
Most Java, C++ and C# developers refer to routines as methods. Some programmers refer to them as functions. Regardless of what you call them, they all refer to the same thing.
A method is a named piece of independent code that is placed in a reusable for-
NEW TERM
mat. A method can operate without interference from other parts of an application. If created correctly, it should perform a specific task that is indicated by its name.
As you will learn in today’s lesson, methods can return a value. Additionally, methods can have information passed to them.
Using Methods
You have already used a number of methods in this book. Write, WriteLine, and ReadLine are all methods that you’ve used that are associated with a Console object. Additionally, you have used the Main method in every program you have created. Listing 6.1 presents the Circle class that you have seen before. This time, the routines for calculating the area and circumference have been added to the class as methods.
LISTING 6.1 CircleApp.cs—A Class with Member Methods
1:// CircleApp.cs - A simple circle class with methods
2://-----------------------------------------------------
4:class Circle
5:{
6:public int x;
7:public int y;

Packaging Functionality: Class Methods and Member Functions |
181 |
LISTING 6.1 continued
8: public double radius; 9:
10:public double getArea()
11:{
12:double theArea;
13:theArea = 3.14159 * radius * radius;
14:return theArea;
15:}
16:
17:public double circumference()
18:{
19:double theCirc;
20:theCirc = 2 * 3.14159 * radius;
21:return theCirc;
22:}
23:}
24:
25:class CircleApp
26:{
27:public static void Main()
28:{
29:Circle first = new Circle();
30:Circle second = new Circle();
32:double area;
33:double circ;
34:first.x = 10;
35:first.y = 14;
36:first.radius = 3;
38:second.x = 10;
39:second.y = 11;
40:second.radius = 4;
42:System.Console.WriteLine(“Circle 1: Center = ({0},{1})”,
43: |
|
first.x, first.y); |
6 |
||
44: |
System.Console.WriteLine(“ |
Radius |
= {0}”, first.radius); |
||
|
|||||
45: |
System.Console.WriteLine(“ |
Area |
= {0}”, first.getArea()); |
|
|
46: |
System.Console.WriteLine(“ |
Circum = {0}”, |
|
||
47: |
|
first.circumference()); |
|
||
48:area = second.getArea();
49:circ = second.circumference();
51:System.Console.WriteLine(“\nCircle 2: Center = ({0},{1})”,
52: |
|
second.x, second.y); |
||
53: |
System.Console.WriteLine(“ |
Radius |
= {0}”, second.radius); |
|
54: |
System.Console.WriteLine(“ |
Area |
= |
{0}”, area); |
55: |
System.Console.WriteLine(“ |
Circum = |
{0}”, circ); |
|
56:}
57:}

182 |
Day 6 |
OUTPUT
ANALYSIS
Circle 1: Center = (10,14)
Radius = 3
Area = 28.27431
Circum = 18.84954
Circle 2: Center = (10,11)
Radius = 4
Area = 50.26544
Circum = 25.13272
Most of the code in Listing 6.1 should look familiar. The parts that might not seem familiar will be by the end of today’s lesson.
Jumping into the listing, you see that Line 4 starts the class definition for the circle. In Lines 6–8, the same three data members that were declared in previous examples are declared. This includes an x and a y value to store the center point of the circle, and the variable radius to store the radius. The class continues after the declaration of the data members.
In Lines 10–15, you see the first definition of a member method. The details of how this method works are covered in the following sections. For now, you can see that the name of this method is getArea. Lines 12–14 are the code within this method; this code calculates the area and returns it to the calling program. Lines 12–13 should look familiar.
You’ll learn more about Line 14 later today. Lines 17–22 are a second method called circumference, which calculates the value of the circumference and returns it to the calling program.
Line 25 is the beginning of the application class for this listing. Line 27 contains the Main method that is the starting point of the application. This routine creates two circle objects (Lines 29–30) and then assigns values to the data members (Lines 34–40). In Lines 42–43, the data members are printed for the first circle. In Lines 45–46, you see the Console.WriteLine method that you’ve seen before; the difference is the value that you pass to be printed. In Line 45, you pass first.area(). This is a call to the first class’s getArea member method, which was defined in Lines 10–15. The result of calling this method is then printed as the parameter in the WriteLine call.
Line 48 is a little more straightforward. It calls getArea for the second class and assigns the result to the area variable. Line 49 calls the circumference method and assigns its value to circ. These two variables are then printed in Lines 51–55 along with the other members of the second class.
Tip
You know that getArea in the listing is a member method rather than a data member because the name is followed by parentheses when it is called. You’ll learn more about this later.

Packaging Functionality: Class Methods and Member Functions |
183 |
If you haven’t already, you should execute this listing and see what happens. The next few sections detail how to define your own methods and explain the way a method works. Additionally, you will learn how to send and receive values from a method.
Understanding Program Flow with Methods
As you were told earlier, a method is an independent piece of code that is packaged and named so that you can call it from your programs. When a method is called, program flow goes to the method, executes its code, and then returns to the calling routine. Figure 6.1 presents the order of flow for Listing 6.1. You can also see that a method can call another method with the same flow expectations.
FIGURE 6.1 |
Start |
The program flow of |
1 |
the circle application |
|
in Listing 6.1.
Main |
Circle |
|
2 |
|
3 |
|
4 |
|
5 |
Circumference |
Area |
8 |
6 |
9 |
7 |
12 |
10 |
13 |
11 |
14
End
6
Exploring the Format of a Method
It is important to understand the format of a method. Listing 6.1 has hinted at the format and the procedure for calling a method. The basic format of a method is as follows:
Method_header
{
Method_body
}
184 |
Day 6 |
The Method Header
The method header is the entry point to a method that defines several things about the method:
•The access that programs have to the method
•The return data type of the method
•Any values that are being sent to the method
•The name of the method
In Line 10 of Listing 6.1, you see the header for the getArea method:
public double getArea()
This method is declared as public, which means that it can be accessed by programs outside this class. Additionally, you see that the method has a return type of double. The method can return one double value to the calling program. The method’s name is getArea. Finally, because the parentheses are empty, no values are sent to this getArea method. Instead, it uses values that are data members within the same class. In a few moments, you will send information to the method.
Caution |
The method header does not end with a semicolon. If you place a semicolon |
|
at the end of the method header, you get an error. |
||
|
||
|
|
Returning Data from a Method
A method has the capability to be declared using a return data type. This data type is indicated in the method’s header. You can use any valid data type as the return data type for a method.
From within a method’s body, a value of this data type must be returned to the program that called the method. To return a value from a method, you use the return keyword. The return keyword is followed by a value or variable of the same type specified in the header. For example, the area method in Listing 6.1 was declared with a return type of double. In Line 14 of the listing, the return keyword is used to return a variable of type double. The value of the double is returned to the calling program
What if a method does not need to return a value? What data type is used then? If a method does not return a value, you use the void keyword with the method. void indicates that no value is to be returned.

Packaging Functionality: Class Methods and Member Functions |
185 |
Naming Methods
It is important to name your methods appropriately. Several theories exist on naming methods; you need to decide what is best for you or your organization. One general rule is consistent: Always give your methods a meaningful name. If your method calculates and returns the area, the name getArea makes sense, as would names such as
CalculateArea and CalcArea. Names such as routine1 or myRoutine make less sense.
One popular guideline for naming methods is to always use a verb/noun combination. Because a method performs some action, you can always use this type of combination. Using this guideline, a name such as area is considered a less useful name; however, the names CalculateArea or CalcArea are excellent choices.
Building the Method Body
The method body contains the code that will be executed when the method is called. This code starts with an opening brace and ends with a closing brace. The code in between can be any of the programming you’ve already seen. In general, however, the code modifies only the data members of the class that it is a part of or data that has been passed into the method.
If the method header indicates that the method has a return type, the method needs to return a value of that type. As stated earlier, you return a value by using the return keyword. The return keyword is followed by the value to be returned. Reviewing the getArea() method in Listing 6.1, you see that the method body is in Lines 11–15. The area of the circle is calculated and placed into a double field called theArea. In Line 14, this value is returned from the method using the return statement.
Caution |
The data type of the variable returned from a method must match the data |
|
type within the header of the method. |
||
|
||
|
|
6
Using Methods
To use a method, you call it. A method is called the same way a data member is called: You enter the object name followed by a period and then the method name. The difference between calling a method and calling data members is that you must also include parentheses and any parameters that are needed. In Listing 6.1, the theArea method is called for the first object with the following code:
first.area()

186 |
Day 6 |
As with a variable, if the method has a return type, it is returned to the spot where the method is called. For example, the getArea method returns the area of a circle as a double value. In Line 45 of Listing 6.1, this value is returned as the parameter to another method, Console.WriteLine. In Line 48, the return value from the second object’s area method is assigned to another variable called area.
Using Data Members from a Method
The getArea method in Listing 6.1 uses the radius data member without identifying the class or object name. The code for the method is as follows:
public double getArea()
{
double theArea;
theArea = 3.14159 * radius * radius; return theArea;
}
Previously, you had to include the name of the object when you used a data member. No object name is included on this use of radius. How can the routine get away with omitting the object name? The answer is simple if you think it through.
When the getArea method is called, it is called using a specific object. If you call getArea with the circle1 object, you are calling the copy of the method within the circle1 object:
circle1.getArea()
The routine knows that you called with circle1, so all the regular data members and other methods within circle1 are available. You don’t need to use the object name because you are within the member method for that specific object.
You also see that additional variables can be declared within a class’s member method. These variables are valid only for the time the method is operating. These variables are said to be local to the method. In the case of the getArea method, a double variable called theArea is created and used. When the method exits, the value stored in theArea—as well as theArea—goes away.
Listing 6.2 illustrates the use of a local variable and the program flow.
LISTING 6.2 LocalsApp.cs—Using Local Versus Class Variables
1:// localsApp.cs - Local variables
2://-----------------------------------------------------
4: using System; 5:
6: class loco

Packaging Functionality: Class Methods and Member Functions |
187 |
LISTING 6.2 continued
7:{
8:public int x;
10:public void count_x()
11:{
12:int x;
13:
14:Console.WriteLine(“In count_x method. Printing X values...”);
15:for ( x = 0; x <= 10; x++)
16:{
17:Console.Write(“{0} - “, x);
18:}
19:Console.WriteLine(“\nAt the end of count_x method. x = {0}”, x);
20:}
21:}
22:
23:class LocalsApp
24:{
25:public static void Main()
26:{
27:loco Locals = new loco();
29:int x = 999;
30:Locals.x = 555;
32:Console.WriteLine(“\nIn Main(), x = {0}”, x);
33:Console.WriteLine(“Locals.x = {0}”, Locals.x);
34:Console.WriteLine(“Calling Method”);
35:Locals.count_x();
36:Console.WriteLine(“\nBack From Method”);
37:Console.WriteLine(“Locals.x = {0}”, Locals.x);
38:Console.WriteLine(“In Main(), x = {0}”, x);
39:}
40:}
OUTPUT
ANALYSIS
In Main(), |
x = 999 |
6 |
|
||
Locals.x = |
555 |
|
Calling Method |
|
|
In count_x |
method. Printing X values... |
|
0 - 1 - 2 - 3 - 4 - 5 - 6 - 7 - 8 - 9 - 10 - |
|
|
At the end |
of count_x method. x = 11 |
|
Back From Method
Locals.x = 555
In Main(), x = 999
Listing 6.2 does not contain good names for its variables; however, this listing illustrates a couple of key points that you should understand.

188 |
Day 6 |
Several variables called x are declared in this listing. This includes a public int x declared in Line 8 as a part of the loco class. A local integer variable x also is declared in Line 12 as part of the count_x method. Finally, a third integer variable called x is declared in Line 29 as part of the Main method. Although all three of these variables have the same name, they are three totally different variables.
The first of these variables, the one in the loco class, is easiest to recognize. It is part of a class. As you’ve seen already, to use this variable outside the class, you use an object name. This is done in Line 30 of the listing, where an object declared with the name Locals is used to set a value its x data member to 555. The Main routine’s x value was set to the value of 999 in Line 29. You can see in Lines 32–33 that these two variables contain their own values and are easy to differentiate from each other.
In Line 35, the Main method calls the count_x method of the Locals object. You can see the count_x method in the loco class. First, in Lines 10–21, a variable called x is declared (Line 12). This value overshadows any previous declarations of x, including the declaration of x in the class. In the rest of the method, this local variable x is used to loop and print numbers. When the loop is done, the value of x is printed one last time before the method ends.
With the end of the method, control is returned to the Main method, where the x variables are printed again. You can see from the output that the Locals data member x was not touched. Additionally, the x variable that was a local within Main retained its value of 999. Each of the variables operated independently.
What happens if you want to work with the class data member x in the count_x method? You learned earlier that within a class’s method, you can call a data member without using the object name. In fact, you can’t use the object name because it can vary. How, then, can you use the data member x within a method if there is a local variable with the same name—in this case, called x? Listing 6.3 is the previous locals listing, with a slight change.
LISTING 6.3 LocalsApp2.cs—Calling a Data Member Within a Method
1:// LocalsApp2.cs - Local variables
2://-----------------------------------------------------
4: using System; 5:
6:class loco
7:{
8:public int x;

Packaging Functionality: Class Methods and Member Functions
LISTING 6.3 continued
10:public void count_x()
11:{
12:int x;
13:
14:Console.WriteLine(“In count_x method. Printing X values...”);
15:for ( x = 0; x <= 10; x++)
16:{
17:Console.Write(“{0} - “, x);
18:}
19:
20:Console.WriteLine(“\nDone looping. x = {0}”, x);
21:Console.WriteLine(“The data member x’s value: {0}”, this.x);
22:Console.WriteLine(“At the end of count_x method.”);
23:}
24:}
25:
26:class LocalsApp
27:{
28:public static void Main()
29:{
30:loco Locals = new loco();
32:int x = 999;
33:Locals.x = 555;
35:Console.WriteLine(“\nIn Main(), x = {0}”, x);
36:Console.WriteLine(“Locals.x = {0}”, Locals.x);
37:Console.WriteLine(“Calling Method”);
38:Locals.count_x();
39:Console.WriteLine(“\nBack From Method”);
40:Console.WriteLine(“Locals.x = {0}”, Locals.x);
41:Console.WriteLine(“In Main(), x = {0}”, x);
42:}
43:}
In Main(), x = 999 OUTPUT Locals.x = 555
Calling Method
In count_x method. Printing X values...
0 - 1 - 2 - 3 - 4 - 5 - 6 - 7 - 8 - 9 - 10 - Done looping. x = 11
The data member x’s value: 555 At the end of count_x method.
Back From Method
Locals.x = 555
In Main(), x = 999
189
6

190 |
Day 6 |
Line 21 is the unique part of this listing—a value called this.x is printed. The keyword this always refers to the current object being used. In this case, this
refers to the Locals object on which the method was called. Because it refers to the current object, this.x refers to the object’s x data member—not the local data member. So, to access a data member from a method within the same class, you use the keyword this.
How can the class method access the value of x in the calling program—the local x variable declared in Main on Line 32 of Listing 6.3? It can’t unless it is passed in as a parameter.
Passing Values to Methods
You now know how to access a method. You also know how to declare local variables within the method and how to use data members within the same class. What if you want to use a value, or multiple values, from another class or another method? For example, suppose that you want a method that multiplies two numbers and returns the result. You know how to return a single result, but how can you get the two numbers into the method?
To receive values, the header must have been defined with parameters. The format of a method header with parameters is as follows:
Modifiers ReturnType Name ( Parameters )
The parameters are passed within the parentheses of the method. Parameters are optional, so if no parameters are sent, the parentheses are empty—just as you’ve seen in the previous examples.
The basic format for each parameter that is used is as follows:
[Attribute] Type Name
Type is the data type of the value being passed, and Name is the name of the variable being passed. Optionally, you can have an attribute, which is covered later in today’s lessons. First, Listing 6.4 presents a simple program that multiplies two numbers and returns the result.
LISTING 6.4 Mult.cs—Passing Values
1:// MultiApp.cs - Passing values
2://---------------------------------------------------
4:using System;

Packaging Functionality: Class Methods and Member Functions |
191 |
LISTING 6.4 continued
6:class Multiply
7:{
8:static public long multi( long nbr1, long nbr2 )
9:{
10:return (nbr1 * nbr2);
11:}
12:}
13:public class MultiApp
14:{
15:public static void Main()
16:{
17:long x = 1234;
18:long y = 5678;
19:long a = 6789;
20:long b = 9876;
21:
22: long result; 23:
24:result = Multiply.multi( x, y);
25:Console.WriteLine(“x * y : {0} * {1} = {2}”, x, y, result);
27:result = Multiply.multi(a, b);
28:Console.WriteLine(“a * b : {0} * {1} = {2}”, a, b, result);
30:result = Multiply.multi( 555L, 1000L );
31:Console.WriteLine(“With Long values passed, result is {0}”, result);
32:}
33:}
x * y : 1234 * 5678 = 7006652 a * b : 6789 * 9876 = 67048164
With Long values passed, the result was 555000
Listing 6.4 illustrates the point of passing two values; it also illustrates a couple of other items. First, take a look at the method definition in Lines 8–11. This
method, called multi, has two parameters. These are each long data types and have been 6 given the names nbr1 and nbr2. These two names are local variables that can be used in
this method. In Line 10, the two variables are multiplied, and the resulting value is returned to the caller. In the method header in Line 8, the multi method is declared as a long, so it can return a single long value.
In Lines 24, 27, and 30, you see the multi method called three different times, each with different values. You can pass data variables, as in Lines 24 or 27. You can also pass literal values, as in Line 28. When the multi method is called, the values passed are sent to the method and are referenced with the variable names in the method header. So, for

192 |
Day 6 |
Line 24, x and y are passed to nbr1 and nbr2. In Line 27, a and b are passed to nbr1 and nbr2. In Line 30, the values 555 and 1000 are passed to nbr1 and nbr2. These values are then used by the method.
It is important to note that the number of values sent to the method must match the number of parameters that were defined. In the case of the multi method, you must pass two values. If you don’t, you get an error.
Note
There are no default parameters in C#, unlike in some other programming languages.
Working with Static Methods
You learned earlier that the static modifier caused a data member to be associated with a class instead of a specific object of a class. In Listing 6.4, a static method was used. Just as with data members, methods can be associated with the class by using the static modifier. The Multiply class in Listing 6.4 has a static method called multi. Just like with static data members, this method can be called using the class name instead of an object name.
In general, you will not declare your methods as static. If the multi method had not been static, you would have needed to declare a Multiply object to use it. Again, this is just like working with data members.
Access Attributes for Parameters
In the previous example, you passed the values to the method. The method had copies of what was originally passed. These copies were used and then thrown out when the method finished. This passing of values is known as passing by value. Passing by value to a method is only one means of interacting with the method and its parameters. There are three types of access attributes for parameters:
•Value
•Reference
•Out
Note
A method is defined with parameters. When you call a method, the values that you pass to the method are called arguments. The attributes listed previously are defined with the parameters of a method. As you will see, they impact how the arguments are treated.

Packaging Functionality: Class Methods and Member Functions |
193 |
Using Value Access on Parameters
As already stated, value access on a parameter refers to when a copy is made of the data being sent to the method. The method then uses a copy of the data being sent. The original values sent to the method are not impacted.
Using Reference Access on Parameters
Sometimes you will want to modify the data stored in the original variable being sent to a method. In this case, you can pass a reference to the variable instead of the variable’s value. A reference is a variable that has access to the original variable. If you change the reference, you change the original variable’s value as well.
In more technical terms, a reference variable points to a location in memory where the data is stored. Consider Figure 6.2. The variable number is stored in memory. A reference can be created that points to where number is stored. When the reference is changed, it changes the value in the memory, thus also changing the value of the number.
FIGURE 6.2 |
|
|
Reference variables |
|
|
versus value variables. |
Value |
Memory |
ref_var
Value |
Memory |
val_var
Because a reference variable can point to different places, it is not tied to a specific loca- |
6 |
|
tion in memory like a regular variable is. The reference points to the original variable’s |
||
|
||
location. Any changes to the parameter variable’s value also cause a change in the origi- |
|
|
nal variable. Each time a method that has a by reference parameter is called, the parame- |
|
|
ter points to the new variable that is being sent to the routine. |
|
|
When declaring a parameter, its attribute defaults to the attribute type of the data type. |
|
|
For the basic data types, this is by value. To cause a basic data type, such as an integer, |
|
|
to be passed by reference, you add the ref keyword to the method header before the data |
|
|
type. Listing 6.5 illustrates using the ref keyword and shows the difference between |
|
|
using reference and value parameters. Listing 6.5 calls the method squareByVal and |
|
194 |
Day 6 |
passes a double. This double is being passed by value. It is followed by calling a method called squareByRef, in which a double is passed by reference. The difference between these two methods can be seen in the output that results.
Note
As you learned in Day 2, “Understanding C# Programs,” the basic data types are attributed as value types by default. This means that when you create a variable, it is given a specific location in memory where it can store its value. Data types such as classes are reference types by default. This means that the class name contains the address where the data within the class will be located rather than the data itself.
LISTING 6.5 RefVars.cs—Calling a Method by Value Versus by Reference
1:// RefVars.cs - reference vs by value variables.
2://-----------------------------------------------------
4:using System;
6:class nbr
7:{
8:public double squareByVal( double x )
9:{
10:x = x * x;
11:return x;
12:}
13:
14:public double squareByRef( ref double x )
15:{
16:x = x * x;
17:return x;
18:}
19:}
20:
21:class RefVars
22:{
23:public static void Main()
24:{
25:nbr doit = new nbr();
27:double nbr1 = 3;
28:double retVal = 0;
30:// Calling method with a by value parameter:
31:Console.WriteLine(“Before square -> nbr1 = {0}, retVal = {1}”,
32: |
nbr1, retVal); |
33:

Packaging Functionality: Class Methods and Member Functions |
195 |
LISTING 6.5 continued
34: retVal = doit.squareByVal( nbr1 ); 35:
36:Console.WriteLine(“After square -> nbr1 = {0}, retVal = {1}”,
37: |
nbr1, retVal); |
|
38: |
|
|
39: |
Console.WriteLine(“\n--------- |
\n”); |
40: |
|
|
41:// Calling method with a by reference parameter:
42:retVal = 0; // reset return value to zero
43:
44:Console.WriteLine(“Before square -> nbr1 = {0}, retVal = {1}”,
45: |
nbr1, retVal); |
46: |
|
47: |
retVal = doit.squareByRef( ref nbr1 ); |
48: |
|
49:Console.WriteLine(“After square -> nbr1 = {0}, retVal = {1}”,
nbr1, retVal) ;
51:}
52:}
Before square -> nbr1 = 3, retVal = 0
After square -> nbr1 = 3, retVal = 9
---------
Before square -> nbr1 = 3, retVal = 0
After square -> nbr1 = 9, retVal = 9
The output from these two listings tells the story of what is going on. In the squareByVal method (Lines 8–12), references are not used. As a result, the vari-
able that is passed into the square method, var1, is not changed. It remains as the value of 3 both before and after the method is called. In the squareByRef method (Lines 14–18), a reference is passed. As you can see from the output of this listing, the variable passed to
the square method is modified.
6
In the method header for the squareByRef method, the parameter is declared with the ref keyword added (see Line 14). A double is normally a value data type, so to pass it to the method as a reference, you need to add the ref keyword before the variable being passed in. You see this in Line 47.
Caution |
If you try to call the squareByRef method without passing a reference vari- |
|
able—or using the ref keyword with a value data type—you will get an |
||
|
||
|
error when you compile. In the case of the squareByRef method, you get an |
|
|
error saying that a double cannot be converted to a ref double. |
|
|
|

196 |
Day 6 |
Using out Access to Parameters
The return type enables you to send back a single variable from a method; however, sometimes you will want more than one value to be returned. Although reference variables could be used to do this, C# has also added a special attribute type specifically for returning data from a method.
You can add parameters to your method header specifically for returning values by adding the out keyword. This keyword signifies that a value is being returned out of the method but is not coming in. When you call a method that has an out parameter, you must be sure to include a variable to hold the value being returned. Listing 6.6 illustrates the use of the out attribute.
LISTING 6.6 Outter.cs—Using the out Attribute
1:// Outter.cs - Using output variables
2://-----------------------------------------------------
4: using System; 5:
6:class nbr
7:{
8:public void math_routines( double x,
9: |
out double half, |
|
||
10: |
out |
double |
squared, |
|
11: |
out |
double |
cubed |
) |
12:{
13:half = x / 2;
14:squared = x * x;
15:cubed = x * x * x;
16:}
17:}
18:
19:class Outter
20:{
21:public static void Main()
22:{
23:nbr doit = new nbr();
25:double nbr = 600;
26:double Half_nbr, Squared_nbr Cubed_nbr;
28:doit.math_routines( nbr, out Half_nbr,
29: |
out Squared_nbr, out Cubed_nbr ); |
30:Console.WriteLine(“After method -> nbr = {0}”, nbr);
31: |
Console.WriteLine(“ |
Half_nbr = {0}”, Half_nbr); |
|||
32: |
Console.WriteLine(“ |
Squared_nbr |
= |
{0}”, |
Squared_nbr); |
33: |
Console.WriteLine(“ |
Cubed_nbr |
= |
{0}”, |
Cubed_nbr); |
34:}
35:}

Packaging Functionality: Class Methods and Member Functions |
197 |
After method -> nbr = 600
Half_nbr = 300
Squared_nbr = 360000
Cubed_nbr = 216000000
Two key pieces of code are in Listing 6.6. First is the method header in Lines 8–11. Remember, you can use whitespace to make your code easier to
read. This method header has been formatted so that each argument is on a different line. Notice that the first argument, x, is a regular double variable. The remaining three arguments have been declared with the out attribute. This means that no value is being passed into the method. Rather, these three arguments are containers for values to be passed out of the method.
Note
If one of the variables passed to the method already contains a value, it is overwritten.
The second line of code to review is Line 28, the call to the math_routines method. The variables being passed must also be attributed with the out keyword when calling the method. If you leave off the out keyword when calling the method, you get an error.
Overall, the code in this listing is relatively straightforward. The math_routines method within the nbr class does three math calculations on a number. In Lines 30–33, the values are reprinted after having been filled within the math_routines method.
If you don’t place a value in an output parameter, you get an error. It’s important to know that you must assign a value to all output parameters within a method. For example, comment out Line 14 in Listing 6.6:
14: // squared = x * x;
This removes the assignment to the square output variable. When you recompile this list- |
6 |
ing, you get the following error: |
outter2.cs(8,17): error CS0177: The out parameter ‘squared’ must be assigned to before control leaves the current method
As you can see, if an output parameter is defined, it must be filled.
Note
A variable that is being used as an out variable does not have to be initialized before the method is called.

198 |
Day 6 |
DO |
DON’T |
Do use class and method names that are clear and descriptive.
Don’t confuse by value variables with reference variables. Remember, passing a variable by value creates a copy. Passing by reference enables you to manipulate the original variable’s value.
Types of Class Methods
You have learned the basics of using methods, but you should be aware of a few special types of methods as well:
•Property accessor methods
•Constructors
•Destructors/finalizers
Property Accessor Methods
You’ve already worked with property accessor methods—set and get. These methods enable you to keep data members private.
Constructors
When an object is first created, often you will want some setup to occur. A special type of method is used specifically for this initial setup—or construction—of objects. This method is called a constructor. Two types of constructors exist: instance constructors, used when each instance or object is created, and static constructors, called before any objects are created for a class.
Instance Constructors
An instance constructor is a method that is automatically called whenever an object is instantiated. This constructor can contain any type of code that a normal method can contain. A constructor is generally used to do initial setup for an object and can include functionality, such as initializing variables.
The format of a constructor is as follows:
modifiers classname()
{
// Constructor body
}

Packaging Functionality: Class Methods and Member Functions |
199 |
This is a method that is defined using the class name that is to contain the constructor. Modifiers are the same modifiers that you can add to other methods. Generally, you use only public. You don’t include any return data type.
It is important to note that every class has a default constructor that is called, even if you don’t create one. By creating a constructor, you gain the capability to control some of the setup.
The constructor class is automatically called whenever you create an object. Listing 6.7 illustrates using a constructor.
LISTING 6.7 Constr.cs—Using a Constructor
1:// Constr.cs - constructors
2://--------------------------------------------------------------------
4: using System; 5:
6:public class myClass
7:{
8:static public int sctr = 0;
9:public int ctr = 0;
10:
11:public void routine()
12:{
13:Console.WriteLine(“In the routine - ctr = {0} / sctr = {1}\n”,
14: |
ctr, sctr ); |
15: |
} |
16: |
|
17:public myClass()
18:{
19:ctr++;
20:sctr++;
21:Console.WriteLine(“In Constructorctr = {0} / sctr = {1}\n”,
22: |
|
ctr, sctr ); |
23: |
} |
6 |
24: } |
|
|
25: |
|
|
26:class TestApp
27:{
28:public static void Main()
29:{
30:Console.WriteLine(“Start of Main method...”);
32:Console.WriteLine(“Creating first object...”);
33:myClass first = new myClass();
34:Console.WriteLine(“Creating second object...”);
35:myClass second = new myClass();

200 |
Day 6 |
LISTING 6.7 continued
36:
37:Console.WriteLine(“Calling first routine...”);
38:first.routine();
39:
40:Console.WriteLine(“Creating third object...”);
41:myClass third = new myClass();
42:Console.WriteLine(“Calling third routine...”);
43:third.routine();
44:
45:Console.WriteLine(“Calling second routine...”);
46:second.routine();
47:
48:Console.WriteLine(“End of Main method”);
49:}
50:}
Start of Main method...
Creating first object...
In Constructorctr = 1 / sctr = 1
Creating second object...
In Constructorctr = 1 / sctr = 2
Calling first routine...
In the routine - ctr = 1 / sctr = 2
Creating third object...
In Constructorctr = 1 / sctr = 3
Calling third routine...
In the routine - ctr = 1 / sctr = 3
Calling second routine...
In the routine - ctr = 1 / sctr = 3
End of Main method
Listing 6.7 illustrates the use of a very simple constructor in Lines 17–23. This listing also helps to again illustrate the use of a static class data member versus
a regular data member. In Lines 6–24, a class is defined called myClass. This class contains two data members that can be used as counters. The first data member is declared as static and is given the name sctr. The second data member is not static, so its name is ctr (without the s) .

Packaging Functionality: Class Methods and Member Functions |
201 |
Note
Remember, a class creates one copy of a static data member that is shared across all objects. For regular data members, each class has its own copy.
The test class contains two routines. The first is a method called routine, which prints a line of text with the current value of the two counters. The second routine has the same name as the class, myClass. Because of this, you automatically know that it is a constructor. This method is called each time an object is created. In this constructor, a couple of things are going on. First, each of the two counters is incremented by 1. For the ctr variable, this is the first time it is incremented because it is a new copy of the variable for this specific object. For sctr, the number might be something else. Because the sctr data member is static, it retains its value across all objects for the given class. The result is that for each copy of the class, sctr is incremented by 1. Finally, in Line 21, the constructor prints a message that displays the value stored in ctr and the value stored in
sctr.
The application class for this program starts in Line 26. This class prints messages and instantiates test objects—nothing more. If you follow the messages that are printed in the output, you will see that they match the listing. The one interesting thing to note is that when you call the routine method for the second object in Line 46, the sctr is 3, not 2. Because sctr is shared across all objects, by the time you print this message, you have called the constructor three times.
You should note one final item about the constructor within your listing. Look at Line 33:
33:myClass first = new myClass();
This is the line that creates your object. Although the constructor is called automatically, notice the myClass call in this line.
6
Note |
Tomorrow you will learn how to pass parameters to a constructor. |
|
Static Constructors
As with data members and methods, you can also create static constructors. A constructor declared with the static modifier is called before the first object is created. It is called only once and then is never used again. Listing 6.8 is a modified version of Listing 6.7. In this listing, a static constructor has been added to the test class.

202 |
Day 6 |
Notice that this constructor has the same name as the other constructor. Because the static constructor includes the name static, the compiler can differentiate it from the regular constructor.
LISTING 6.8 StatCon.cs—Using a static Constructor
1:// StatCon.cs - static constructors
2://--------------------------------------------------------------------
4: using System; 5:
6:public class test
7:{
8:static public int sctr;
9:public int ctr;
10:
11:public void routine()
12:{
13:Console.WriteLine(“In the routine - ctr = {0} / sctr = {1}\n”,
14: |
ctr, sctr ); |
15: |
} |
16: |
|
17:static test()
18:{
19:sctr = 100;
20:Console.WriteLine(“In Static Constructor - sctr = {0}\n”, sctr );
21:}
22:
23:public test()
24:{
25:ctr++;
26:sctr++;
27:Console.WriteLine(“In Constructorctr = {0} / sctr = {1}\n”,
28: |
ctr, sctr ); |
29:}
30:}
31:
32:class StatCon
33:{
34:public static void Main()
35:{
36:Console.WriteLine(“Start of Main method...”);
38:Console.WriteLine(“Creating first object...”);
39:test first = new test();
40:Console.WriteLine(“Creating second object...”);
41:test second = new test();
42:
43: Console.WriteLine(“Calling first routine...”);

Packaging Functionality: Class Methods and Member Functions |
203 |
continued
44: |
first.routine(); |
45: |
|
46: |
Console.WriteLine(“Creating third object...”); |
47: |
test third = new test(); |
48: |
Console.WriteLine(“Calling third routine...”); |
49: |
third.routine(); |
50: |
|
51: |
Console.WriteLine(“Calling second routine...”); |
52: |
second.routine(); |
53: |
|
54: |
Console.WriteLine(“End of Main method”); |
55: |
} |
56: |
} |
|
|
Start of Main method...
Creating first object...
In Static Constructor - sctr = 100
In Constructorctr = 1 / sctr = 101
Creating second object...
In Constructorctr = 1 / sctr = 102
Calling first routine... |
|
|||
In the |
routine |
- ctr = 1 / sctr = 102 |
|
|
Creating third |
object... |
|
||
In Constructorctr = 1 / sctr = 103 |
|
|||
Calling third routine... |
|
|||
In the |
routine |
- ctr = 1 / sctr = 103 |
|
|
Calling second |
routine... |
|
||
In the |
routine |
- ctr = 1 / sctr = 103 |
6 |
|
End of |
Main method |
|||
|
||||
There is one key difference in the output of this listing from that of Listing 6.7. The third line printed in the output came from the static constructor. This
printed the simple line In Static Constructor.... This constructor (in Lines 17–21) initializes the static data member, sctr, to 100 and then prints its message. The rest of the program operates exactly as it did for Listing 7.8. The output differs a little because the sctr variable now starts at 100 rather than at 0.
204 |
Day 6 |
Destructors/Finalizers
You can perform some operations when an object is destroyed. These are accomplished in the destructor.
A destructor is automatically executed at some point after the program is finished using an object. Does “at some point after” sound vague? This is intentional. This destruction can happen from the point at which the object of a class is no longer used up to the point just before the program ends. In fact, it is possible that the program can end without calling the destructor, which means that it would never be called. You don’t have any real control over when the destructor will execute; therefore, the value of a destructor is limited.
Caution
Note
In languages such as C++, a destructor can be called and the programmer can control when it will perform. This is not the case in C#.
From the technical side of things, a destructor is generally called by the C# runtime after an object of a class is no longer in use. The C# runtime normally calls destructors just before checking to see whether any available memory can be freed or released (a concept called garbage collection). If the C# runtime does not do any of this memory checking between the time the object is no longer used and the time the program ends, the destructor will never happen. It is possible to force garbage collection to happen; however, it makes more sense to just limit your use of destructors.
Using a Destructor
A C# destructor is defined by using a tilde (~) followed by the class name and empty parentheses. For example, the destructor for an xyz class is as follows
~xyz()
{
// Destructor body
}
There are no modifiers or other keywords to be added to a destructor. Listing 6.9 presents a simpler version of Listing 6.7 with a destructor added.

Packaging Functionality: Class Methods and Member Functions |
205 |
LISTING 6.9 DestrApp.cs—Using a Destructor
1:// DestrApp.cs - constructors
2://--------------------------------------------------------------------
4: using System; 5:
6:public class test
7:{
8:static public int sctr = 0;
9:public int ctr = 0;
10:
11:public void routine()
12:{
13:Console.WriteLine(“In the routine - ctr = {0} / sctr = {1}”,
14: |
ctr, sctr); |
15: |
} |
16: |
|
17:public test()
18:{
19:ctr++;
20:sctr++;
21:Console.WriteLine(“In Constructor”);
22:}
23:
24:~test()
25:{
26:Console.WriteLine(“In Destructor”);
27:}
28:}
29:
30:class DestrApp
31:{
32:public static void Main()
33:{
34:Console.WriteLine(“Start of Main method”);
36:test first = new test();
37: |
test second = new test(); |
6 |
38: |
|
|
39: |
first.routine(); |
|
40: |
|
|
41:test third = new test();
42:third.routine();
43:
44: second.routine(); // calling second routine last 45:
46:Console.WriteLine(“End of Main method”);
47:}
48:}

206 |
Day 6 |
Start of Main method
In Constructor
In Constructor
In the routine - ctr = 1 / sctr = 2
In Constructor
In the routine - ctr = 1 / sctr = 3
In the routine - ctr = 1 / sctr = 3
End of Main method
In Destructor
In Destructor
In Destructor
The destructor in Lines 24 to 27 is called in the output after the final destruction of each of the objects. In this case, it happened after the Main() method ended;
however, there is a chance that this destruction could have never happened.
Note
It is worth repeating: Destructors are not guaranteed to happen. You might find that they don’t execute when you run Listing 6.9.
Destructors and Finalization
Destructors are often called finalizers because of something that happens internally. A destructor is related to a method called Finalize. The compiler converts your constructor into the correct code for this finalization.
Summary
Today’s lessons covered only a few topics; however, these topics are critical to your capability to program in C# and to program an object-oriented language. Yesterday you learned to add data members to your own classes. Today you learned how to add functionality in the form of methods to your classes. You learned that methods, functions, and routines are different terms that ultimately refer to the same thing.
After learning the basics of methods, you reviewed the difference between by value and by reference. You learned how to pass information as arguments to the parameters specified in a method’s header. You learned that, by using keywords, such as ref and out, you can change the way the method treats the data passed.
Finally, you learned about a few special types of methods, including constructors and destructors.

Packaging Functionality: Class Methods and Member Functions |
207 |
In Day 7, “Storing More Complex Stuff: Structures, Enumerators, and Arrays,” you expand on what you’ve learned about methods today. You will explore overloading, delegates, and a number of other more advanced features of methods.
Q&A
Q What is the difference between a parameter and an argument?
A A parameter is a definition of what will be sent to a method. A parameter occurs with the definition of a method in the method head. An argument is a value that is passed to a method. You pass arguments to a method. The method matches the arguments to the parameters that were set in the method definition.
Q Can you create a method outside a class?
AAlthough in other languages you can create methods that are outside a class, in C# you cannot. C# is object-oriented, so all code must be within the framework of a class.
QDo methods and classes in C# operate the same way that they do for other languages, such as C++ and Java?
AFor the most part, methods and classes operate similarly. However, differences exist between each language. It is beyond the scope of today’s lesson to detail this here. As an example of a difference, C# does not allow defaulted parameters within a method. In languages such as C++, you can have a variable within a method default to a specified value if the calling method doesn’t supply it. This is not the case with C#. Other differences exist as well.
Q If I’m not supposed to count on destructors, how can I do cleanup code?
AIt is recommended that you create your own methods to do cleanup code and that you explicitly call these when you know that you are done with an object. For
example, if you have a class that creates a file object, you will want to close the file when you are done with it. Because a destructor might not be called, or might
not get called for a very long time, you should create your own closing method. 6 You really don’t want to leave the file sitting open longer than you need to.
Workshop
The Workshop provides quiz questions to help you solidify your understanding of the material covered and exercises to provide you with experience in using what you’ve learned. Try to understand the quiz and exercise answers before continuing to the next day’s lesson. Answers are provided on the CD.

208 |
Day 6 |
Quiz
1.What are the two key parts of a method?
2.What is the difference between a function and a method?
3.How many values can be returned from a method?
4.What keyword returns a value from a method?
5.What data types can be returned from a method?
6.What is the format of accessing a member method of a class? For example, if an object called myObject is instantiated from a class called myClass, which contains a method called myMethod, which of the following are correct for accessing the method?
a.myClass.myMethod
b.myObject.myMethod
c.myMethod
d.myClass.myObject.myMethod
7.What is the difference between passing a variable by reference and passing a variable by value?
8.When is a constructor called?
9.What is the syntax for a destructor that has no parameters?
10.When is a destructor called?
Exercises
1.Write the method header for a public method called xyz. This method will take no arguments and return no values.
2.Write the method header for a method called myMethod. This method will take three arguments as its parameters. The first will be a double passed by value, called myVal. The second will be an output variable called myOutput, and the third will be
an integer passed by reference called myReference. The method will be publicly accessible and will return a byte value.
3.Using the circle class that you saw in Listing 6.1, add a constructor that defaults the center point to (5, 5) and the radius to 1. Use this class in a program that prints with both the defaulted values and prints after you have set values. Instead of printing the circle information from the Main() method, create a method to print the circle information.

Packaging Functionality: Class Methods and Member Functions |
209 |
4.Bug Buster: The following code snippet has a problem. Which lines generate error messages?
public void myMethod()
{
System.Console.WriteLine(“I’m a little teapot short and stout”); System.Console.WriteLine(“Down came the rain and washed the spiderout”);
return 0;
}
5.Using the dice class that you saw on previous days, create a new program. In this program, create a dice class that has three data members. These should be the number of sides of the dice, the value of the dice, and a static data member that contains the random number class (defined as rnd in previous examples). Declare a member method for this class called roll() that returns the next random value of the die.
6


WEEK 1
DAY 7
Storing More Complex
Stuff: Structures,
Enumerators, and Arrays
You’ve learned about the basic data types and about classes. C# offers several other ways of storing information in your programs. In today’s lesson, you learn about several of these alternative storage methods, including structures, enumerators, and arrays. More specifically, today you…
•Learn how to store values in structures.
•Discover how structures are similar to and different from classes.
•Understand what an enumerator is and how it can be used to make your programs easier to understand.
•See how to declare and use arrays to hold lots of values of the same data type.
•Work with the foreach keyword to manipulate arrays.

212 |
Day 7 |
Working with Structures
Structures are a data type provided by C#. Like classes, structures can contain both data and method definitions. Also like a class, a structure can contain constructors, constants, fields, methods, properties, indexers, operators, and nested types.
Understanding the Difference Between Structures and
Classes
Although a lot of similarities exist between classes and structures, there is one primary difference and a few minor differences. The primary difference between a structure and a class is centered on how a structure is stored and accessed. A structure is a value data type, and a class is a reference data type.
Although the difference between value and reference data types was covered before, it is worth covering several more times to ensure that you fully understand the difference. A value data type stores the actual values at the location identified by the data type’s name. A reference data type actually stores a location that points to where the information is stored. Figure 7.1 is a repeat of the figure you saw on Day 6, “Packaging Functionality: Class Methods and Member Functions.” This figure illustrates the difference between value and reference data type storage.
FIGURE 7.1 |
|
|
Storage by reference |
|
|
versus by value. |
Value |
Memory |
ref_var
Value |
Memory |
val_var
As you can see from Figure 7.1, a reference variable is actually more complicated to store than a value variable. However, the compiler takes care of this complexity for you. Although there are benefits to storing information by reference, this results in extra overhead in memory. If you are storing small amounts of information, the extra overhead can actually outweigh the amount of information being stored.

Storing More Complex Stuff: Structures, Enumerators, and Arrays |
213 |
A structure is stored by value. The overhead of reference is not included, so it is preferred when dealing with small amounts of data or small data values.
When dealing with large amounts of data, a reference type such as a class is a better storage method. This is especially true when passing the data to a method. A reference variable passes only the reference, not the entire data value. A value variable such as a structure is copied and passed to the method. Such copying can cause fat, slower programs if the structures are large.
Tip
If you need to decide between a class and a structure, and if the total size of the data members being stored is 16 bytes or less, use a structure. If it is greater than 16 bytes, consider how you will use the data.
Structure Members
Declaring members in a structure is identical to declaring data members in a class. The following is a structure for storing a point:
struct Point
{
public int x; public int y;
}
This is similar to the class you saw on previous days. The only real difference is that the struct keyword is used instead of the class keyword. You can also use this in a listing as you would use a class. Listing 7.1 uses this Point structure.
LISTING 7.1 PointApp.cs—Using a Point Structure
1:// PointApp.cs- A structure with two data members
2://--------------------------------------------------------------------
4:struct Point
5:{
6:public int x;
7:public int y;
8:}
9: |
|
7 |
10: |
class PointApp |
11:{
12:public static void Main()
13:{
14:Point starting = new Point();
214 |
Day 7 |
LISTING 7.1 continued
15: Point ending = new Point(); 16:
17:starting.x = 1;
18:starting.y = 4;
19:ending.x = 10;
20:ending.y = 11;
22:System.Console.WriteLine(“Point 1: ({0},{1})”,
23: |
starting.x, starting.y); |
24:System.Console.WriteLine(“Point 2: ({0},{1})”,
25: |
ending.x, ending.y); |
26:}
27:}
Point 1: (1,4)
Point 2: (10,11)
The primary difference between using the Point structure and using a class is the struct keyword when defining the class (Line 4). In fact, you could replace the
struct keyword with the class keyword, and the listing would still work. As stated earlier, the biggest difference between using a structure and using a class is how they are stored in memory. Figure 7.2 illustrates how a starting Point object from a class could be placed in memory, versus how an instance of the starting Point structure could be stored.
FIGURE 7.2 |
Starting object from class |
Storing a starting |
|
Point structure and a |
reference to data members |
class in memory. |
|
Memory
 Starting.x
  Starting.y
 Starting.x
  Starting.y
Memory
 Starting instance from structure

Storing More Complex Stuff: Structures, Enumerators, and Arrays |
215 |
You can also see that members of a structure are accessed in the same manner in which members of a class are accessed. This is by using the name of the structure instance, followed by the member operator (a period), followed by the name of the data member. For example, Line 17 accesses the x data member of the starting instance of the Point structure.
Declaring an instance from a structure can be simpler. Declaring instances from structures does not require you to use the new keyword, which means that Lines 14–15 could be replaced with the following:
14:Point starting;
15:Point ending;
Make this change and recompile Listing 8.1. You will see that the listing still compiles and works. If you replace the struct keyword with the class keyword in this modified version of the listing, the result is an error when you compile:
PointApp.cs(17,7): error CS0165: Use of unassigned local variable ‘starting’
PointApp.cs(19,7): error CS0165: Use of unassigned local variable ‘ending’
Nesting Structures
Like classes, structures can contain any other data type, which includes other structures.
Listing 7.2 illustrates a Line structure that contains two Point structures.
LISTING 7.2 LineApp.cs—A Line Structure
1:// line.cs- A line structure which contains point structures.
2://--------------------------------------------------------------------
4:struct Point
5:{
6:public int x;
7:public int y;
8:}
9:
10:struct Line
11:{
12:public Point starting;
13:public Point ending;
14:}
15: |
|
|
16: |
class LineApp |
7 |
17: |
{ |
|
18: |
public static void Main() |
|
19: |
{ |
|
20: |
Line myLine; |
|
21: |
|
|
|
|
|

216
x
starting
y
myLine
x
ending
y
Structure Methods
Like classes, structures can also contain methods and properties. Methods and properties are declared exactly the same as classes. This includes using the modifiers and attributes used with classes. You can overload these methods, pass values, and return values.
Listing 7.3 presents the Line class with a length method.

Storing More Complex Stuff: Structures, Enumerators, and Arrays |
217 |
LISTING 7.3 LineApp2.cs—Adding Methods to Structures
1:// LineApp2.csAdding methods to a structure.
2://--------------------------------------------------------------------
4:struct Point
5:{
6:public int x;
7:public int y;
8:}
9:
10:struct Line
11:{
12:public Point starting;
13:public Point ending;
15:public double length()
16:{
17:double len = 0;
18:len = System.Math.Sqrt( (ending.x - starting.x)*(ending.x - starting.x) +
19: |
(ending.y - starting.y)* |
|
(ending.y - starting.y)); |
20:return len;
21:}
22:}
23:
24:class LineApp
25:{
26:public static void Main()
27:{
28:Line myLine;
29:
30:myLine.starting.x = 1;
31:myLine.starting.y = 4;
32:myLine.ending.x = 10;
33:myLine.ending.y = 11;
35:System.Console.WriteLine(“Point 1: ({0},{1})”,
36: |
myLine.starting.x, myLine.starting.y); |
37:System.Console.WriteLine(“Point 2: ({0},{1})”,
38: |
myLine.ending.x, myLine.ending.y); |
39:System.Console.WriteLine(“Length of line Point 1 to Point 2: {0}”,
40: |
myLine.length()); |
41:}
42: } |
7 |
|
OUTPUT |
Point |
1: |
(1,4) |
|
Point |
2: |
(10,11) |
||
|
Length of from |
Point 1 to Point 2: 11.4017542509914 |
||

218 |
Day 7 |
Listing 7.3 adds the same length method you have seen in listings on previous ANALYSIS days. This method is declared in Lines 15–21 within the Line structure. As was
done previously, this structure uses the data members of the Line class to calculate the length of the line. This value is placed in the len variable and returned from the method in Line 20 as a double value.
The length method is used in the lineApp class. Its value is output using the Console.WriteLine method in Lines 39–40.
Although the Line class has only a single method, you could have created a number of methods and properties for the Line structure. You could also have overloaded these methods.
Structure Constructors
In addition to having regular methods, structures can have constructors. Unlike classes, if you decide to declare a constructor, you must include declarations with parameters. You cannot declare a constructor for a structure that has no parameters. Listing 7.4 includes the Point structure with a constructor added.
LISTING 7.4 PointApp2.cs—A Point Class with a Constructor
1:// point2.cs- A structure with two data members
2://--------------------------------------------------------------------
4:struct Point
5:{
6:public int x;
7:public int y;
9:public Point(int x, int y)
10:{
11:this.x = x;
12:this.y = y;
13:}
14:// public Point() // parameterless constructors not allowed!
15: // |
{ |
16:// this.x = 0;
17:// this.y = 0;
18: |
// |
} |
19: |
} |
|
20: |
|
|
21:class PointApp
22:{
23:public static void Main()
24:{
25:Point point1 = new Point();

219
7

220 |
Day 7 |
Caution |
Although you can avoid the new operator when using the default construc- |
|
tor, you cannot avoid it when instantiating an instance of a structure with |
||
|
||
|
parameters. Replacing Line 26 of Listing 7.4 with the following line gives |
|
|
you an error: |
|
|
Point point2(8,8); |
|
|
|
Structure Destructors
Whereas classes can have destructors, structures cannot. Recall that destructors are not to be relied upon in classes even though they are available for you to use. With structures, you cannot declare a destructor—if you try to add one, the compiler gives you an error.
Clarifying with Enumerators
Another type that can be used in C# is enumerators. Enumerators enable you to create variables that contain a limited number of values. For example, there are only seven days in a week. Instead of referring to the days of a week as 1, 2, 3, and so on, it would be much clearer to refer to them as Day.Monday, Day.Tuesday, Day.Wednesday, and so on. You could also have a toggle that could be either on or off. Instead of using values such as 0 and 1, you could use values such as Toggle.On and Toggle.Off.
An enumerator enables you to create these values. Enumerators are declared with the enum keyword. The format of creating an enumerator is as follows:
modifiers enum enumName
{
enumMember1, enumMember2,
...
enumMemberN
}
modifiers is either the new keyword or the access modifiers (public and private, which you are familiar with, or protected and internal, which you will learn about on later days). enumName is a name for the enumerator that is any valid identifier name. enumMember1, enumMember2 to enumMemberN are the members of the enumeration that contain the descriptive values.
The following declares a toggle enumerator with public access:
public enum toggle
{
On,
Storing More Complex Stuff: Structures, Enumerators, and Arrays |
221 |
Off
}
The enum keyword is used, followed by the name of the enumerator, toggle. This enumeration has two values, On and Off, which are separated by a comma. To use the toggle enum, you declare a variable of type toggle. For example, the following declares a myToggle variable:
toggle myToggle;
This variable, myToggle, can contain two valid values—On or Off. To use these values, you use the name of the enum and the name of the value, separated by the member operator (a period). For example, myToggle can be set to toggle.On or toggle.Off. Using a switch statement, you can check for these different values. Listing 7.5 illustrates the creation of an enumerator to store a number of color values.
Note
By default, when an enumerator variable is initially declared, it is set to the value of 0.
LISTING 7.5 Colors.cs—Using an Enumeration
1:// Color.csUsing an enumeration
2: |
// |
Note: Entering a nonnumeric number when running this |
3: |
// |
program will cause an exception to be thrown. |
4: |
//-------------------------------------------------------------------- |
|
5: |
|
|
6: |
using System; |
|
7: |
|
|
8:class Colors
9:{
10:enum Color
11:{
12:red,
13:white,
14:blue
15:}
16:
17:public static void Main()
18:{
19:string buffer;
20: |
Color myColor; |
7 |
21: |
|
|
22:Console.Write(
”Enter a value for a color: 0 = Red, 1 = White, 2 = Blue): “);
23:buffer = Console.ReadLine();

222 |
Day 7 |
LISTING 7.5 continued
24:
25: myColor = (Color) Convert.ToInt32(buffer); 26:
27:switch( myColor )
28:{
29:case Color.red:
30:System.Console.WriteLine(“\nSwitched to Red...”);
31:break;
32:case Color.white:
33:System.Console.WriteLine(“\nSwitched to White...”);
34:break;
35:case Color.blue:
36:System.Console.WriteLine(“\nSwitched to Blue...”);
37:break;
38:default:
39:System.Console.WriteLine(“\nSwitched to default...”);
40:break;
41:}
42: |
|
|
43: |
System.Console.WriteLine(“\nColor is {0} |
({1})”, |
44: |
myColor, (int) |
myColor); |
44: |
} |
|
45: |
} |
|
Enter a value for a color: 0 = Red, 1 = White, 2 = Blue): 1
Switched to White...
Color is white (1)
Enter a value for a color: 0 = Red, 1 = White, 2 = Blue): 5
Switched to default...
Color is 5 (5)
This listing was executed twice for this output. The first time, the value of 1 was entered and recognized as being equivalent to white. In the second execution, the
value of 5 was entered, which does not equate to any colors.
Looking closer at the listing, you can see that the Color enumerator was declared in Lines 10–15. This enumerator contains three members: red, white, and blue. When this enumerator is created, the value of 0 is automatically assigned to the first member (red), 1 is assigned to the second (white), and 2 is assigned to the third (blue). By default, all enumerators start with 0 as the first member and are then incremented by one for each additional member.

Storing More Complex Stuff: Structures, Enumerators, and Arrays |
223 |
In Line 20, the enumerator is used to create a variable called myColor that can store a value from the Color enumerator. This variable is assigned a value in Line 25. The value that is assigned is worthy of some clarification. In Line 22, a prompt is displayed to the screen. In Line 23, the ReadLine method of the Console class is used to get a value entered by the user. Because the user can enter any value, the program is open to errors. Line 25 assumes that the value entered by the user can be converted to a standard integer. A method called ToInt32 in the Convert class is used to convert the buffer that contains the value entered by the user. This is cast to a Color type and placed in the myColor variable. If a value other than a number is entered, you get an exception error from the runtime, and the program ends. On Day 9, “Handling Problems in Your Programs: Exceptions and Errors,” you will learn one way to handle this type of error gracefully so that a runtime error isn’t displayed and your program can continue to operate.
Line 27 contains a switch statement that switches based on the value in myColor. In
Lines 29–35, the case statements in the switch don’t contain literal numbers; they contain the values of the enumerators. The value in the myColor enumerator will actually match against the enumerator word values. This switch really serves no purpose other than to show you how to switch based on different values of an enumerator.
Line 43 is worth looking at closely. Two values are printed in this line. The first is the value of myColor. You might have expected the numeric value that was assigned to the variable to be printed; however, it isn’t. Instead, the actual enumerator member name is printed. For the value of 1 in myColor, the value white is printed—not 1. If you want the numeric value, you must explicitly force the number to print. This is done in Line 43 using a cast.
Changing the Default Value of Enumerators
The default value set to an enumerator variable is 0. Even though this is the default value assigned to an enumerator variable, an enumerator does not have to have a member that is equal to 0. Earlier, you learned that the values of the members in an enumerator definition start at 0 and are incremented by one. You can actually change these default values. For example, you will often want to start with the value of 1 rather than 0.
You have two options for creating an enumerator with values that start at 1. First, you can put a filler value in the first position of the enumerator. This is an easy option if you want the values to start at 1; however, if you want the values of the enumerator to be larger
numbers, this can be a bad option. |
7 |
|
The second option is to explicitly set the value of your enumerator members. You can set these with literal values, the value of other enumerator members, or calculated values.
224 |
Day 7 |
Listing 7.6 doesn’t do anything complex for setting the values of an enumerator. Instead, it starts the first value at 1 rather than 0.
LISTING 7.6 Bday.cs—Setting the Numeric Value of Enumerator Members
1:// Bday.csUsing an enumeration, setting default values
2://--------------------------------------------------------------------
4: using System; 5:
6:public class Bday
7:{
8:enum Month
9:{
10:January = 1,
11:February = 2,
12:March = 3,
13:April = 4,
14:May = 5,
15:June = 6,
16:July = 7,
17:August = 8,
18:September = 9,
19:October = 10,
20:November = 11,
21:December = 12
22:}
23:
24:struct birthday
25:{
26:public Month bmonth;
27:public int bday;
28:public int byear;
29:}
30:
31:public static void Main()
32:{
33:birthday MyBirthday;
35:MyBirthday.bmonth = Month.August;
36:MyBirthday.bday = 11;
37: |
MyBirthday.byear = 1981; // This is a lie... |
38: |
|
39:System.Console.WriteLine(“My birthday is {0} {1}, {2}”,
40:MyBirthday.bmonth, MyBirthday.bday, MyBirthday.byear);
41:}
42:}

Storing More Complex Stuff: Structures, Enumerators, and Arrays |
225 |
My birthday is August 11, 1981
This listing creates an enumerator type called Month. This enumerator type contains the 12 months of the year. Rather than using the default values, which
would be from 0 to 11, this definition forces the values to be the more expected numbers of 1 to 12. Because the values would be incremented based on the previous value, it is not necessary to explicitly set February to 2 or any of the additional values; it is done here for clarity. You could just as easily have set these values to other numbers. You could even have set them to formulas. For example, June could have been set to this:
May + 1
Because May is considered equal to 5, this would set June to 6.
The Month enumerator type is used in Line 35 to declare a public data member within a structure. This data member, called bmonth, is declared as a public Month type. In Line 33, the structure, called birthday, is used to declare a variable called MyBirthday. The data members of this structure instance are then assigned values in Lines 26–28. The bmonth variable is assigned the value of Month.August. You could also have done the following to cast August to the MyBirthday.bmonth variable; however, the program would not have been as clear:
MyBirthday.bmonth = (Month) 8;
In Line 39, you again see that the value stored in MyBirthday.bmonth is August rather than a number.
Changing the Underlying Type of an Enumerator
In the examples so far, the underlying data type of the enumerators has been of type int. Enumerators can actually contain values of type byte, sbyte, int, uint, short, ushort, long, and ulong. If you don’t specify the type, the default is type int. If you know that you need to have larger or smaller values stored in an enum, you can change the default underlying type to something else.
To change the default type, you use the following format:
modifiers enum enumName : typeName { member(s) }
This is the same definition as before, with the addition of a colon and the typeName,
which is any of the types mentioned previously. If you change the type, you must make 7 sure that any assigned values are of that type.
Listing 7.7 illustrates a new listing using the color enumerator shown earlier. This time, because the values are small, the enumerator is set to use bytes, to save a little memory.

226 |
Day 7 |
LISTING 7.7 Colors2—Displaying Random Byte Numbers
1:// Colors2.csUsing enumerations
2://--------------------------------------------------------------------
4: using System; 5:
6:class Colors2
7:{
8:enum Color : byte
9:{
10:red,
11:white,
12:blue
13:}
14:
15:public static void Main()
16:{
17:Color myColor;
18:byte roll;
19:
20: System.Random rnd = new System.Random(); 21:
22:for ( int ctr = 0; ctr < 10; ctr++ )
23:{
24:roll = (byte) (rnd.Next(0,3)); // random nbr from 0 to 2
25:myColor = (Color) roll;
26:
27:System.Console.WriteLine(“Color is {0} ({1} of type {2})”,
28: myColor, (byte) myColor, myColor.GetTypeCode());
29:}
30:}
31:}
Color is white (1 of type Byte)
OUTPUT Color is white (1 of type Byte)
Color is red (0 of type Byte)
Color is white (1 of type Byte)
Color is blue (2 of type Byte)
Color is red (0 of type Byte)
Color is red (0 of type Byte)
Color is red (0 of type Byte)
Color is blue (2 of type Byte)
Color is red (0 of type Byte)
Note
Your output will vary from this because of the random generator.

Storing More Complex Stuff: Structures, Enumerators, and Arrays |
227 |
This listing does more than just declare an enumerator using a byte; you’ll see this in a minute. First, look at Line 8. You can see that, this time, the Color enu-
merator type is created using bytes instead of type int values. You know this because of the inclusion of the colon and the byte keyword. This means that Color.red will be a byte value of 0, Color.white will be a byte value of 1, and Color.blue will be a byte value of 2.
In the Main method, this listing’s functionality is different from the earlier listing. This listing uses the random logic that you have seen already. In Line 24, you can see that a random number from 0 to 2 is created and explicitly cast as a byte value into the roll variable. The roll variable was declared as a byte in Line 18. This roll variable is then explicitly cast to a Color type in Line 25 and is stored in the myColor variable.
Note
The Rnd.Next method returns a value that is equal to or greater than the first parameter, and less than the second parameter. In this example, it returns a value that is 0 or larger, yet less than 3.
Line 27 starts out similarly to what you have seen already. The WriteLine method is used to print the value of the myColor variable (which results in either red, white, or blue). This is followed by printing the numeric value using the explicit cast to byte. The third value being printed, however, is something new.
Enumerators are objects. Because of this, some built-in methods can be used on enumerators. The one that you will find most useful is the GetTypeCode method, which returns the type of the variable stored. For myColor, the return type is Byte, which is displayed in the output. If you add this parameter to one of the previous two listings, you will find that it prints Int32. Because the type is being determined at runtime, you get a .NET Framework data type instead of the C# data type.
Tip
To determine other methods of enumerators, check out the .NET Framework documentation. Look up the Enum class.
DO |
DON’T |
7 |
Do use commas—not semicolons—to separate enumerator members.
Don’t place filler values as enumerator members.

228 |
Day 7 |
Using Arrays to Store Data
You’ve learned that you can store different types of related information together in classes and structure. Sometimes you will want to store a bunch of information that is the same data type. For example, a bank might keep track of monthly balances, or a teacher might want to keep track of the scores from a number of tests.
If you need to keep track of a number of items that are of the same data type, the best solution is to use an array. If you want to keep track of balances for each of the 12 months, without arrays you could create 12 variables to track these numbers:
decimal Jan_balance; decimal Feb_balance; decimal Mar_balance; decimal Apr_balance; decimal May_balance; decimal Jun_balance; decimal Jul_balance; decimal Aug_balance; decimal Sep_balance; decimal Oct_balance; decimal Nov_balance; decimal Dec_balance;
To use these variables, you must determine which month it is and then switch among the correct variables. This requires several lines of code and could include a large switch statement, such as the following:
...
switch (month)
{
case 1: // do January stuff Jan_balance += new_amount; break;
case 2: // do February stuff Feb_balance += new_amount; break;
...
This is obviously not the complete switch statement; however, it is enough to see that a lot of code needs to be written to determine and switch among the 12 monthly balances.
Note
Although you could use an enumerator to make the switch statement more readable, this would still result in a lot of code to track and use the individual values.

Storing More Complex Stuff: Structures, Enumerators, and Arrays |
229 |
Using an array, you can create much more efficient code. In this example, you could create an array of decimals to keep track of the monthly balances.
Creating Arrays
An array is a single data variable that can store multiple pieces of data that are each of the same data type. Each of these elements is stored sequentially in the computer’s memory, thus making it easy to manipulate them and navigate among them.
Note
Because you declare one piece of data—or variable—after the other in a code listing does not mean that they will be stored together in memory. In fact, variables can be stored in totally different parts of memory, even though they are declared together. An array is a single variable with multiple elements. Because of this, an array stores its values one after the other in memory.
To declare an array, you use the square brackets after the data type when you declare the variable. The basic format of an array declaration is as shown here:
datatype[] name;
datatype is the type for the information you will store. The square brackets indicate that you are declaring an array, and the name is the name of the array variable. The following definition sets up an array variable called balances that can hold decimal values:
decimal[] balances;
This declaration creates the variable and prepares it to be capable of holding decimal values; however, it doesn’t actually set aside the area to hold the variables. To do that, you need to do the same thing you do to create other objects, which is to initialize the variable using the new keyword. When you instantiate the array, you must indicate how many values will be stored. One way to indicate this number is to include the number of elements in square brackets when you do the initialization:
balances = new decimal[12];
You also can do this initialization at the same time that you define the variable:
decimal[] balances = new decimal[12];
7
As you can see, the format for initializing is as follows:
new datatype[nbr_of_elements]

230 |
Day 7 |


Storing More Complex Stuff: Structures, Enumerators, and Arrays |
235 |
This declaration creates a two-dimensional array called letters, which contains two elements that are each arrays that have three character elements. You can initialize the elements within the letters array at declaration time:
char[,] letters = new char[,] { {‘a’,’b’,’c’}, {‘X’,’Y’,’Z’} };
Or, you can initialize each element individually. To access the elements of a multidimensional array, you again use the indexes. The first element of the letters array is letters[0,0]. Remember, the indexes start at offset 0, not 1. letters[0,1] is the second element, which contains the letter ‘b’. The letter ‘X’ is letter[1,0] because it is in the second array (offset 1) and is the first element (offset 0). To initialize the letters array outside the declaration, you could do the following:
letters[0,0] = ‘a’; letters[0,1] = ‘b’; letters[0,2] = ‘c’; letters[1,0] = ‘X’; letters[1,1] = ‘Y’; letters[1,2] = ‘Z’;
Creating an Array Containing Different-Size Arrays
In the previous section, an assumption was made that in a two-dimensional array, all the subarrays are the same size. This would make the arrays rectangular. What happens if you want to store arrays that are not the same size? Consider the following:
char[][] myname = new char[3][];
myname[0] = new char[] { ‘B’, ‘r’, ‘a’, ‘d’, ‘l’, ‘e’, ‘y’}; myname[1] = new char[] { ‘L’, ‘.’ };
myname[2] = new char[] { ‘J’, ‘o’, ‘n’, ‘e’, ‘s’ };
The myname array is an array of arrays. It contains three character arrays that are each a different length. Because they are different lengths, you work with their elements differently from the rectangular arrays that you saw before. Figure 7.5 illustrates the myname array.
Instead of addressing each element by using index values separated by commas, you instead separate the elements into their own square brackets. For example, the following line of code uses the WriteLine method to print the array elements that would be my initials:
System.Console.WriteLine(“{0}{1}{2}”, myname[0][0], myname[1][0], myname[2][0]); |
7 |
|
|
It would be wrong to address these as myname[0,0], myname[1,0], and myname[2,0]. In fact, |
|
you’ll get an error if you try to access the elements this way. |
|

 myname [z] [z]
Storing More Complex Stuff: Structures, Enumerators, and Arrays |
237 |
object. The length of a one-dimensional array called balance can be obtained from
balance.Length.
In a multidimensional array, you still use Length, or you can use a method of the array called GetLength() to get the length of a subarray. You pass the index number of the subarray to identify which length to return. Listing 7.10 illustrates the use of the Length member along with a jagged array.
LISTING 7.10 Names.cs—Using a Jagged Two-Dimensional Array
1:// Names.cs - Using a two-dimensional array
2://--------------------------------------------------------------------
3:
4: using System; 5:
6:public class Names
7:{
8:public static void Main()
9:{
10:char[][] name = new char[3][];
12:name[0] = new char[7] {‘B’, ‘r’, ‘a’, ‘d’, ‘l’, ‘e’, ‘y’};
13:name[1] = new char[2] {‘L’, ‘.’};
14:name[2] = new char[5] {‘J’, ‘o’, ‘n’, ‘e’, ‘s’};
15:
16: Console.WriteLine(“Display the sizes of the arrays...\n”); 17:
18: Console.WriteLine(“Length of name array {0}”, name.Length); 19:
20:for( int ctr = 0; ctr < name.Length; ctr++)
21:Console.WriteLine(“Length of name[{0}] is {1}”,
22: |
ctr, name[ctr].Length); |
|
23: |
//--------------------------------------------------------------------- |
|
24: |
|
|
25: |
Console.WriteLine(“\nDisplaying the content of the name array... |
”); |
26: |
|
|
27:for( int ctr = 0; ctr < name.Length; ctr++)
28:{
29:Console.Write(“\n”); // new line
30:for( int ctr2 = 0; ctr2 < name[ctr].Length; ctr2++ )
31:{
32:Console.Write(“{0}”, name[ctr][ctr2]);
33:}
34: |
} |
7 |
|
||
35: |
Console.WriteLine(“\n...Done displaying”); |
|
36: |
} |
|
37: |
} |
|


Storing More Complex Stuff: Structures, Enumerators, and Arrays |
241 |
Q&A
QAre there other differences between structures and classes that were not mentioned in today’s lesson?
AYes, there are a few other differences that were not mentioned in today’s lesson. You now know that structures are stored by value and that classes are stored by references. You also learned that a structure can’t have a parameterless constructor. A structure is also not allowed to have a destructor. In addition to these differences, a structure is also different in that it is implicitly sealed. This concept will be explained when you learn about inheritance.
Q I’ve heard that enumerators can be used with bit fields. How is this done?
AThis is a more advanced topic that isn’t covered in this book. You can use an enumerator to store the values of a bit. This can be done by using byte members and setting each of the members of the enumerator to one of the positions of the bits in
the byte. The enumerator could be this:
enum Bits : byte
{
first = 1, second = 2, third = 4, fourth = 8, fifth = 16, sixth = 32, seventh = 64, eighth = 128
}
You could then use bitwise operators to do bitwise math using these predefined values.
Q Is an enumerator a value type or a reference type?
A When a variable is declared as an enumerator, it is a value type. The value is actually stored in the enumerator variable.
Q How many dimensions can you store in an array?
A You can store more dimensions than you should. If you declare an array that is more than three dimensions, one of two things happens: Either you waste a lot of memory because you are using rectangular arrays, or your code gets much more
complicated. In almost all cases, you can find simpler ways to work with your |
7 |
|
information that don’t require arrays of more than three dimensions. |
||
|


Week in Review |
247 |
LISTING WR1.1 continued
35: {
CH 5 36: private point lineStart; 37: private point lineEnd; 38:
CH 5 39: public point start
CH 5 |
40: |
{ |
41: |
get { return lineStart; } |
|
CH 5 |
42: |
set |
CH 5 |
43: |
{ |
44: |
if ( value.x < 0 ) |
|
CH 4 |
45: |
lineStart.x = 0; |
46: |
else |
|
CH 5 |
47: |
lineStart.x = value.x; |
|
48: |
if ( value.y < 0 ) |
|
49: |
lineStart.y = 0; |
|
50: |
else |
|
51: |
lineStart.y = value.y; |
|
52: |
} |
CH 5 |
53: |
} |
54: |
public point end |
|
CH 5 |
55: |
{ |
56: |
get { return lineEnd; } |
|
CH 5 |
57: |
set |
|
58: |
{ |
|
59: |
if ( value.x < 0 ) |
|
60: |
lineEnd.x = 0; |
|
61: |
else |
|
62: |
lineEnd.x = value.x; |
|
63: |
if ( value.y < 0 ) |
|
64: |
lineEnd.y = 0; |
|
65: |
else |
|
66: |
lineEnd.y = value.y; |
|
67: |
} |
|
68: |
} |
CH 6 |
69: |
|
70: |
public double length() |
|
CH 2 |
71: |
{ |
72: |
int x_diff; |
|
CH 2 |
73: |
int y_diff; |
CH 2 |
74: |
double length; |
CH 3 |
75: |
|
76: |
x_diff = end.x - start.x; |
|
CH 3 |
77: |
y_diff = end.y - start.y; |
CH 3 |
78: |
|
79: |
length = (double) Math.Sqrt((x_diff * x_diff) + (y_diff * y_diff)); |
|
CH 6 |
80: |
return (length); |
|
81: |
} |
|
82: |
|


Week in Review |
249 |
LISTING WR1.1 continued
CH 2 |
132: |
double total; |
|
|
|
|
CH 3 |
133: |
|
|
|
|
|
134: |
total = (width.length() * height.length()); |
|||||
CH 6 |
135: |
return (total); |
|
|
|
|
|
136: |
} |
|
|
|
|
CH 6 |
137: |
|
|
|
|
|
138: |
public double border() |
|
|
|
||
CH 2 |
139: |
{ |
|
|
|
|
140: |
double total; |
|
|
|
|
|
CH 6 |
141: |
|
|
|
|
|
142: |
total = ((2 * width.length()) + (2 * (height.length()))); |
|||||
CH 6 |
143: |
return (total); |
|
|
|
|
|
144: |
} |
|
|
|
|
CH 6 |
145: |
|
|
|
|
|
146: |
public void DisplayInfo() |
|
|
|
||
|
147: |
{ |
|
|
|
|
|
148: |
Console.WriteLine(“\n\n-------------------------- |
|
|
”); |
|
|
149: |
Console.WriteLine(“ |
Square stats:”); |
|||
|
150: |
Console.WriteLine(“-------------------------- |
|
|
”); |
|
|
151: |
Console.WriteLine(“ Area: |
|
{0:f3}”, area()); |
||
|
152: |
Console.WriteLine(“ Border: |
{0:f3}”, border()); |
|||
|
153: |
Console.WriteLine(“ WIDTH Points: ({0},{1}) to ({2},{3})”, |
||||
|
154: |
width.start.x, width.start.y, width.end.x, width.end.y); |
||||
|
155: |
Console.WriteLine(“ |
|
Length: {0:f3}”, width.length()); |
||
|
156: |
Console.WriteLine(“ HEIGHT Points: ({0},{1}) to ({2},{3})”, |
||||
|
157: |
height.start.x, height.start.y, height.end.x, height.end.y); |
||||
|
158: |
Console.WriteLine(“ |
|
Length: {0:f3}”, height.length()); |
||
|
159: |
|
|
|
|
|
|
160: |
Console.WriteLine(“-------------------------- |
|
|
\n”); |
|
|
161: |
} |
|
|
|
|
CH 6 |
162: |
|
|
|
|
|
163: |
public square() |
|
|
|
|
|
CH 5 |
164: |
{ |
|
|
|
|
165: |
squareHeight = new line(); |
|
|
|||
CH 5 |
166: |
squareWidth = |
new line(); |
|
|
|
CH 7 |
167: |
|
|
|
|
|
168: |
point tmpPoint = new point(0,0); |
|
||||
|
169: |
|
|
|
|
|
|
170: |
width.start |
= tmpPoint; |
|
|
|
|
171: |
width.end |
= tmpPoint; |
|
|
|
|
172: |
height.start |
= tmpPoint; |
|
|
|
|
173: |
height.end |
= tmpPoint; |
|
|
|
|
174: |
} |
|
|
|
|
|
175: } |
|
|
|
|
|
CH 2 |
176: |
|
|
|
|
|
177: |
//------------------------------------------------------------ |
|
|
|
|
|
CH 2 |
178: |
/// <summary> |
|
|
|
|
CH 2 |
179: /// This class encapsulates circle functionality |
|||||
180: |
/// <see>line</see> |
|
|
|
||


Week in Review |
251 |
LISTING WR1.1 continued
CH 6 |
230: |
public circle() |
|
CH 6 |
231: |
{ |
|
232: |
circleCenter = new point(); |
||
CH 7 |
233: |
|
|
234: |
center = new point(0,0); |
||
|
235: |
radius = 0; |
|
|
236: |
} |
|
|
237: } |
|
|
CH 5 |
238: |
|
|
239: class WR01App |
|
||
CH 2 |
240: { |
|
|
241: |
/// <summary> |
|
|
CH 2 |
242: |
/// Main() routine that starts the application |
|
CH 2 |
243: |
/// </summary> |
|
CH 2 |
244: |
public static void Main() |
|
CH 2 |
245: |
{ |
|
246: |
int menuChoice = 99; |
||
CH 4 |
247: |
|
|
248: |
do |
|
|
CH 6 |
249: |
{ |
|
250: |
menuChoice = GetMenuChoice(); |
||
CH 4 |
251: |
|
|
252: |
switch( menuChoice ) |
||
CH 4 |
253: |
{ |
|
254: |
case 0: |
break; |
|
CH 4 |
255: |
case 1: |
WorkWithLine(); |
CH 4 |
256: |
break; |
|
CH 4 |
257: |
case 2: |
WorkWithCircle(); |
CH 4 |
258: |
break; |
|
CH 4 |
259: |
case 3: |
WorkWithSquare(); |
CH 4 |
260: |
break; |
|
CH 4 |
261: |
case 4: |
WorkWithTriangle(); |
CH 4 |
262: |
break; |
|
CH 4 |
263: |
default: Console.WriteLine(“\n\nError... Invalid menu |
|
CH 4 |
|
option.”); |
|
264: |
break; |
|
|
|
265: |
} |
|
CH 4 |
266: |
|
|
267: |
if ( menuChoice !=0 ) |
||
|
268: |
{ |
|
CH 6 |
269: |
Console.Write(“\nPress <ENTER> to continue...”); |
|
270: |
Console.ReadLine(); |
||
|
271: |
} |
|
CH 4 |
272: |
|
|
273: |
} while ( menuChoice != 0 ); |
||
|
274: |
} |
|
CH 2 |
275: |
|
|
276: |
/// <summary> |
|
|
CH 2 |
277: |
/// Displays a menu of choices. |
|


Week in Review |
257 |
<summary>
Method to perform code for Working with Triangles. </summary>
</member>
</members>
</doc>
The Code at 50,000 Feet
Now that you’ve seen some of the output and the XML documentation that can ANALYSIS be created, it’s time to look at some of the code.
At a 50,000-foot view, there are a few things to notice about this listing. First, Line 9 includes the one namespace in this listing, System. As you learned on Day 5, “The Core of C# Programming: Classes,” this means that you don’t have to type System when using items from the System namespace. This includes items such as the Console methods. You should also notice that one structure and four classes are declared:
•point structure in Lines 16–27
•line class in Lines 34–99
•square class in Lines 106–174
•circle class in Lines 182–237
•WR01App class in Lines 239–390
The line, square, and circle classes are all similar. The point structure is used to help organize the other classes.
Dissecting the Main Method
Looking closer at the listing, you see that the program flow actually starts in Line 244, where the Main method is declared within the WR01 class. This method uses a do...while statement to continue processing a menu until the appropriate selection is made. The menu is displayed by calling another method, GetMenuChoice. Depending on the value returned from this function, one of a number of different routines is executed. A switch statement in Lines 252–265 is used to direct program flow to the correct statements.
In Lines 267–271, an if statement is used to check the value of the menu choice. If menuChoice is 0, the user chose to exit the program. If it is any other value, information is displayed on the screen. To pause the program before redisplaying the menu, Lines 269–270 were added. Line 269 provides a message to the user saying to press the Enter key to continue. Line 270 uses the Console.ReadLine method to wait for the Enter key to be pressed. If the user entered any text before pressing the key, this listing ignores it. When the user continues, the while statement’s condition is checked. If menuChoice is 0,


WEEK 2
DAY 8
Advanced Method Access
You have learned quite a bit in the past seven days. Today you continue building on this foundation of knowledge by working further with class methods. In Days 5, “The Core of C# Programming: Classes,” and 6, “Packaging Functionality: Class Methods and Member Functions,” you learned to encapsulate functionality and data into a class. In today’s lesson, one of the key things you will learn is how to make your class more flexible. Today you…
•Discover how to overload methods.
•Determine a method’s signatures.
•Learn how to pass a variable number of parameters to a method.
•Revisit scope.
•Learn to create your own namespaces.
Overloading Methods
One of the key features of an object-oriented programming language is polymorphism. As you have previously learned, polymorphism is the capability of reaching a result even if different options are provided. One form of polymorphism is overloading. Previously, an example of a circle was provided.

Advanced Method Access |
265 |
LISTING 8.1 Circle.cs— Method Overloading
1: |
// |
Circle.cs - Overloading the area method |
8 |
2: |
// |
-------------------------------------------------------------------- |
|
3: |
|
|
|
4: |
using System; |
|
|
5: |
|
|
|
6:public class Circle
7:{
8:public int x;
9:public int y;
10:public double radius;
11:private const float PI = 3.14159F;
13:public double Area() // Uses values from data members
14:{
15:return Area(radius);
16:}
17:
18:public double Area( double rad )
19:{
20:double theArea;
21:theArea = PI * rad * rad;
22:Console.WriteLine(“ The area for radius ({0}) is {1}”, rad,theArea);
23:return theArea;
24:}
25:
26:public double Area(int x1, int y1, double rad)
27:{
28:return Area(rad);
29:}
30:
31:public double Area( int x1, int y1, int x2, int y2 )
32:{
33:int x_diff;
34:int y_diff;
35:double rad;
36:
37:x_diff = x2 - x1;
38:y_diff = y2 - y1;
40: rad = (double) Math.Sqrt((x_diff * x_diff) + (y_diff * y_diff)); 41:
42:return Area(rad);
43:}
44:
45:public Circle()
46:{
47:x = 0;


Advanced Method Access |
269 |
LISTING 8.2 |
continued |
|
34: |
public Circle( int r ) |
8 |
35:{
36:x = 0;
37:y = 0;
38:radius = r;
39:}
40:
41:public Circle ( int new_x, int new_y )
42:{
43:x = new_x;
44:y = new_y;
45:radius = 0;
46:}
47:
48:public Circle ( int new_x, int new_y, int r )
49:{
50:x = new_x;
51:y = new_y;
52:radius = r;
53:}
54:
55:public void print_circle_info()
56:{
57:Console.WriteLine(“Circle: Center = ({0},{1})”, x, y);
58: |
Console.WriteLine(“ |
Radius |
= {0}”, radius); |
||
59: |
Console.WriteLine(“ |
Area |
= |
{0}”, |
area()); |
60: |
Console.WriteLine(“ |
Circum = |
{0}”, |
circumference()); |
|
61:}
62:}
63:
64:class CircleApp
65:{
66:public static void Main()
67:{
68:Circle first = new Circle();
69:Circle second = new Circle(4);
70:Circle third = new Circle(3,4);
71:Circle fourth = new Circle(1, 2, 5);
73:Console.WriteLine(“\nFirst Circle:”);
74:first.print_circle_info();
75:
76:Console.WriteLine(“\nSecond Circle:”);
77:second.print_circle_info();
78:
79:Console.WriteLine(“\nThird Circle:”);
80:third.print_circle_info();
81:


Advanced Method Access |
271 |
The fourth and final constructor for the Circle class in this listing is in Lines 48–53. This constructor takes three values. This includes the radius and the x and y coordinates for 8 the center point.
All of these methods are declared with the same name and in the same manner. The only difference is that each takes different parameters.
In Lines 68–71 of the CircleApp class, you see these constructors in action. Line 68 creates a new Circle object called first. This is declared and created in the same way you’ve seen objects created before.
In Line 69, the second object is created differently. When this object is created, instead of entering this
new Circle()
an argument has been added—a 4. To create the second object, a constructor is required that can accept a single numeric value of 4. This matches the constructor that starts in Line 34, which has the same format as the call in Line 69.
Based on the description of the creation of the second object, it should be easy to see that the third and fourth objects call the constructors that are appropriate for them. The appropriate constructor is the one with parameters that match the call’s arguments.
Consider what happens if you created a Circle object as follows:
Circle myCircle = new Circle(1, 2, 3, 4);
This results in an error because it would pass four values. None of the constructors in the Circle class accepts four values, so this declaration will not work.
Understanding Method Signatures
Methods can be overloaded because of the uniqueness of each method’s signature. As you learned in the previous section, the number of parameters in the method can determine which method should be called. There are actually other ways in which overloaded methods can differ from each other. Ultimately, these differences comprise a method’s signature.
A method’s signature is composed of the number of parameters and their types. You saw with the Circle constructor that there were four signatures:
Circle()
Circle( int )
Circle( int, int )
Circle( int, int, int)


Advanced Method Access |
273 |
What happens when you want to pass an unknown variable number of items to a
method? For example, suppose that you want to add a set of numbers, but you don’t 8 know how many numbers there will be. You could call a routine multiple times, or you
could set up a routine to take a variable number of parameters. Consider the Console.WriteLine and Console.Write methods. These methods both take a string and then a variable number of different values and data types.
To accept an unknown number of parameters, you can use the params keyword. This keyword can be used as the last value in a method’s parameters list. The params keyword is used with an array data type.
Listing 8.3 presents the params keyword used with a method that takes a variable number of integers. The method adds the integers and then returns a long value with the total.
LISTING 8.3 Addem.cs—Using the params Keyword
1:// Addem.cs - Using a variable number of arguments
2://--------------------------------------------------------------------
4: using System; 5:
6:public class AddEm
7:{
8:public static long Add( params int[] args )
9:{
10:int ctr = 0;
11:long Total = 0;
12:
13:for( ctr = 0; ctr < args.Length; ctr++)
14:{
15:Total += args[ctr];
16:}
17:return Total;
18:}
19:}
20:
21:class MyApp
22:{
23:public static void Main()
24:{
25:long Total = 0;
26:
27:Total = AddEm.Add( 1 );
28:Console.WriteLine(“Total of (1) = {0}”, Total);
30:Total = AddEm.Add( 1, 2 );
31:Console.WriteLine(“Total of (1, 2) = {0}”, Total);


Advanced Method Access |
281 |
LISTING 8.7 |
continued |
|
12: |
Console.WriteLine(“x is {0}”, x); |
8 |
13: |
} |
|
14: |
|
|
15:// Second for statement trying to redeclare x...
16:for( int x = 1; x < 5; x++ )
17:{
18:Console.WriteLine(“x is {0}”, x);
19:}
20:}
21:}
x is 1
OUTPUT x is 2 x is 3 x is 4 x is 1 x is 2 x is 3 x is 4
This listing works! Each of the x variables is local to its own block (the for ANALYSIS loops). Because of this, each x variable is totally independent of the other.
Now consider Listing 8.8 and its multiple use of x variables.
LISTING 8.8 Scope3.cs—Lots of x Variables
1:// Scope3.cs - Local scope.
2:// *** Error if lines are uncommented ***
3://--------------------------------------------------------------------
5: using System; 6:
7:class Scope3
8:{
9:static int x = 987;
11:public static void Main()
12:{
13:Console.WriteLine(“x is {0}”, x);
15:// for( int x = 1; x < 5; x++ )
16: |
// |
{ |
17: |
// |
Console.WriteLine(“x is {0}”, x); |
18: |
// |
} |
19:Console.WriteLine(“x is {0}”, x);
20:}
21:}


|
|
Advanced Method Access |
285 |
|
|
|
|
||
|
|
|
|
|
|
LISTING 8.10 MyMathApp2.cs—MyMath Class with a Private Constructor |
|
|
|
|
|
|
8 |
|
1: |
// MyMathApp2.cs - Private constructor |
|
||
2: |
//-------------------------------------------------------------------- |
|
|
|
3: |
|
|
|
|
4: |
using System; |
|
|
|
5: |
|
|
|
|
6:public class MyMath
7:{
8:public static long Add( params int[] args )
9:{
10:int ctr = 0;
11:long Answer = 0;
12:
13:for( ctr = 0; ctr < args.Length; ctr++)
14:{
15:Answer += args[ctr];
16:}
17:return Answer;
18:}
19:
20:public static long Subtract( int arg1, int arg2 )
21:{
22:long Answer = 0;
23:Answer = arg1 - arg2;
24:return Answer;
25:}
26:
27:private MyMath()
28:{
29:// nothing to do here since this will never get called!
30:}
31:}
32:
33:class MyMathApp
34:{
35:public static void Main()
36:{
37:long Result = 0;
38:
39: // MyMath var = new MyMath(); 40:
41:Result = MyMath.Add( 1, 2, 3 );
42:Console.WriteLine(“Add result is {0}”, Result);
44:Result = MyMath.Subtract( 5, 2 );
45:Console.WriteLine(“Subtract result is {0}”, Result);
46:}
47:}


Advanced Method Access |
287 |
LISTING 8.11 |
continued |
7: { |
8 |
8:public class PI
9:{
10:public static double value = 3.14159;
11:private PI() {} // private constructor
12:}
13:public class three
14:{
15:public static int value = 3;
16:private three() {} // private constructor
17:}
18:}
19:
20:namespace MyMath
21:{
22:public class Routine
23:{
24:public static long Add( params int[] args )
25:{
26:int ctr = 0;
27:long Answer = 0;
28:
29:for( ctr = 0; ctr < args.Length; ctr++)
30:{
31:Answer += args[ctr];
32:}
33:return Answer;
34:}
35:
36:public static long Subtract( int arg1, int arg2 )
37:{
38:long Answer = 0;
39:Answer = arg1 - arg2;
40:return Answer;
41:}
42:}
43:}
44:
45:class MyMathApp
46:{
47:public static void Main()
48:{
49:long Result = 0;
50:
51:Result = MyMath.Routine.Add( 1, 2, 3 );
52:Console.WriteLine(“Add result is {0}”, Result);
54:Result = MyMath.Routine.Subtract( 5, 2 );
55:Console.WriteLine(“Subtract result is {0}”, Result);


Advanced Method Access |
291 |
In addition, you learned about namespaces. This includes learning how to create your
own namespaces. The using keyword was also addressed within the namespace discus- 8 sion. The using keyword enables you to avoid the need to include the fully qualified
name to a namespace’s members, and it also can be used to alias a namespace or class.
Q&A
Q Can you declare the Main method as private?
A You can declare the Main method as private; however, you would be unable to access the Main method. To run a program, you need a Main method that is publicly accessible. If you can’t access the Main method from outside the class, you can’t run the program.
Q What happens if you don’t declare the Main method as public?
AAlthough it was stated that methods and data types default to private, the Main method actually defaults to public. If you don’t include the public modifier (and tools such as Visual Studio don’t include it), it will still be public. To be explicit, it is best to always include the modifier.
QScope was briefly discussed in today’s lesson. What are the default values of variables if they are not explicitly given a value?
AA number of variable types are not initially assigned a value. This includes instance variables of an initially unassigned structure, output parameters, and local variables. A number of variable types are initially assigned. This includes static variables, instance variables of an object, instance variables of a structure variable that is initially assigned, array elements, value variables used as parameters in a method, and reference. Even though these are initially assigned, you should always set a value initially into all the variables you use.
Q Why not keep things simple and declare everything public?
AOne of the benefits of an object-oriented language is to have the capability to encapsulate data and functions into a class that can be treated as a black box. By keeping members private, you make it possible to change the internals without impacting any programs that use the class.
Workshop
The Workshop provides quiz questions to help you solidify your understanding of the material covered and exercises to provide you with experience in using what you’ve learned. Try to understand the quiz and exercise answers before continuing to the next day’s lesson. Answers are provided on the CD.


Advanced Method Access |
293 |
5. Create a namespace that contains a class and another namespace. This second
namespace should also contain a class. Create an application class that uses both of 8 these classes.
6.Create a program that has a number of overloaded methods. The overloaded method should have the following signatures. Are all these signatures legal? (overload.cs)
public myFunc() public myFunc( int )
public myFunc( float ) public myFunc( ref int ) public myFunc ( ref float )

WEEK 2
DAY 9
Handling Problems in
Your Programs:
Exceptions and Errors
If everyone wrote perfect code, if all users entered the correct information the first time, and if all computers disallowed errors, a large number of programmers today would be out of job. The reality is that computers, users, and programmers are not infallible. Because of this, you must write your programs to expect the unexpected. You must write your programs to handle the one thing that is different—the exception. When problems do occur in your programs, you need to find the problems and remove them—a concept known as debugging. Today you will cover a lot. More specifically, you will…
•Learn about the concept of exception handling.
•Discover the try and catch keywords.
•Implement finality with the finally keyword.
•Explore some common exceptions and their causes.


Handling Problems in Your Programs: Exceptions and Errors |
297 |
•The code within a program assigns a string to an integer variable.
•A routine tries to use a reference variable that contains a null (empty) value.
You can write code to avoid these problems, but what happens when you miss one?
What Causes Exceptions?
If you don’t programmatically catch problems, an exception can occur. An exception is |
9 |
an uncaught programming error. This excludes logic errors, which are errors because of |
results that occur, not because of a coding issue. When an uncaught error occurs, the runtime can choke and an exception is thrown. Listing 9.1 contains an error that throws an exception. Run this listing and see what happens when you access the nonexistent sixth element of a five-element array.
LISTING 9.1 Error.cs—Causing an Exception
1:// Error.cs
2:// A program that throws an exception
3://=============================================
4:using System;
5:
6:class Error
7:{
8:public static void Main()
9:{
10:int [] myArray = new int[5];
12:for ( int ctr = 0; ctr < 10; ctr++ )
13:{
14:myArray[ctr] = ctr;
15:}
16:}
17:}
This listing compiles with no errors. It is not very practical because it doesn’t create any real output or do anything of value. In Line 10, an array of five inte-
gers, named myArray, is created. In Lines 12–15, a for loop assigns the value of a counter to each value in the array. The value of 0 is assigned to myArray[0], 1 is assigned to
myArray[1], and so on.
What happens when ctr becomes equal to 5? The conditional statement in Line 12 enables ctr to continue to be incremented as long as it is less than 10. When ctr reaches 5, however, there is a different problem. In Line 14, myArray[5] is not valid—the array’s highest element is myArray[4]. The runtime knows that the array cannot have an index


Handling Problems in Your Programs: Exceptions and Errors |
299 |
provide cleaner results than pop-up boxes, terminated programs, and cryptic messages. To do this, you use the try and catch keywords.
Using try and catch
The try and catch keywords are the key to exception handling. The try command enables you to put a wrapper around a block of code that helps you route any problems (excep-
tions) that might occur.
9
The catch keyword enables you to catch the exceptions that the try command routes. By using a catch, you get the chance to execute code and control what happens rather than letting the program terminate. Listing 9.2 illustrates a basic use of the try and catch commands.
LISTING 9.2 TryIt.cs—Using try-catch
1:// TryIt.cs
2:// A program that throws an exception
3://=============================================
4:using System;
5:
6:class TryIt
7:{
8:public static void Main()
9:{
10:int [] myArray = new int[5];
12:try
13:{
14:for ( int ctr = 0; ctr < 10; ctr++ ) // Array only has 5 ele-ments!
15:{
16: |
myArray[ctr] = ctr; |
17:}
18:}
19:
20:catch
21:{
22:Console.WriteLine(“The exception was caught!”);
23:}
24:
25:Console.WriteLine(“At end of class”);
25:}
27:}
The exception was caught!
OUTPUT At end of class


Handling Problems in Your Programs: Exceptions and Errors |
301 |
LISTING 9.3 continued
5:
6:class TryIt2
7:{
8:public static void Main()
9:{
10:int [] myArray = new int[5];
12: |
try |
9 |
13:{
14:for ( int ctr = 0; ctr < 10; ctr++ ) // Array only has 5 ele-ments!
15:{
16: |
myArray[ctr] = ctr; |
17:}
18:}
19:
20:catch( Exception e)
21:{
22:Console.WriteLine(“The following exception was caught:\n{0}”, e);
23:}
25:Console.WriteLine(“At end of class”);
26:}
27:}
The following exception was caught:
System.IndexOutOfRangeException: Index was outside the bounds of the array.
at TryIt2.Main()
At end of class
Listing 9.3 doesn’t do much with the exception; however, you can gain a lot of information from what it does. In Line 22, e is printed using the WriteLine
method. This displays information on the exception. Looking at the output, you see that the value of e indicates that the exception thrown was an IndexOutOfRangeException and occurred in the Main() method of the MyAppClass—which is your program’s class.
This listing catches all exceptions that occur within the try statement. The error printed is based on the type of exception executed. You can actually add code to your program to work with specific errors.
