

Pro ASP.NET 2.0 In CSharp 2005 (2005) [eng]
.pdf678 C H A P T E R 1 9 ■ T H E A S P. N E T S E C U R I T Y M O D E L
With certificates, an organization purchases a certificate from a known certificate authority (CA) and installs it on its web server. The client implicitly trusts the CA and is therefore willing to trust certificate information signed by the CA. This model works well because it is unlikely that a malicious user will go to the expense of purchasing and installing a falsified certificate. The CA also retains information about each registered user. However, a certificate does not in any way ensure the trustworthiness of the server, the safety of the application, or the legitimacy of the business. In these ways, certificates are fundamentally limited in scope.
The certificate itself contains certain identifying information. It is signed with the CA’s private key to guarantee that it is authentic and has not been modified. The industry-standard certificate type, known as x.509v3, contains the following basic information:
•The holder’s name, organization, and address
•The holder’s public key, which will be used to negotiate an SSL session key for encrypting communication
•The certificate’s validation dates
•The certificate’s serial number
In addition, a certificate might also include business-specific information, such as the certificate holder’s industry, the length of time they have been in business, and so on.
The two biggest certificate authorities are as follows:
•Thawte: http://www.thawte.com
•VeriSign: http://www.verisign.com
If you don’t need the identity validation function of CAs (for example, if your certificates will be used only on a local intranet), you can create and use your own certificates and configure all clients to trust them. This requires Active Directory and Certificate Server (which is a built-in part of Windows 2003 Server and Windows 2000 Server). For more information, consult a dedicated book about Windows network administration.
Understanding SSL
As described in the previous section, every certificate includes a public key. A public key is part of an asymmetric key pair. The basic idea is that the public key is freely provided to anyone who is interested. The corresponding private key is kept carefully locked away and is available only to the server. The interesting twist is that anything that’s encrypted with one of the keys is decipherable with the other. That means a client can retrieve the public key and use it to encode a secret message that can be decrypted only with the corresponding private key. In other words, the client can create a message that only the server can read.
This process is called asymmetric encryption, and it’s a basic building block of SSL. An important principle of asymmetric encryption is that you can’t determine a private key by analyzing the corresponding public key. To do so would be computationally expensive (even more difficult than cracking one of the encrypted messages). However, asymmetric encryption also has its limitations— namely, it’s much slower and generates much larger messages than symmetric encryption.
Symmetric encryption is the type of encryption that most people are intuitively familiar with. It uses the same secret key to encrypt a message as to decrypt it. The drawback with symmetric encryption is that both parties need to know the secret value in order to have a conversation. How-
ever, you can’t transmit this information over the Internet, because a malicious user might intercept it and then be able to decipher the following encrypted conversation. The great trick of SSL is to combine asymmetric and symmetric encryption. Asymmetric encryption manages the initial key exchange—in other words, agrees on a secret value. Then, this secret value symmetrically encrypts all subsequent messages, which ensures the best possible performance.

C H A P T E R 1 9 ■ T H E A S P. N E T S E C U R I T Y M O D E L |
679 |
The whole process works like this:
1.The client sends a request to connect to the server.
2.The server signs its certificate and sends it to the client. This concludes the handshake portion of the exchange.
3.The client checks whether the certificate was issued by a CA it trusts. If so, it proceeds to the next step. In a web browser scenario, the client may warn the user with an ominoussounding message if it does recognize the CA and allow the user to decide whether to proceed.
4.The client compares the information in the certificate with the information received from the site (including its domain name and its public key). The client also verifies that the server-side certificate is valid, has not been revoked, and is issued by a trusted CA. Then the client accepts the connection.
5.The client tells the server what encryption keys it supports for communication.
6.The server chooses the strongest shared key length and informs the client.
7.Using the indicated key length, the client randomly generates a symmetric encryption key. This will be used for the duration of the transaction between the server and the client. It ensures optimum performance, because symmetric encryption is much faster than asymmetric encryption.
8.The client encrypts the session key using the server’s public key (from the certificate), and then it sends the encrypted session key to the server.
9.The server receives the encrypted session key and decrypts it using its private key. Both the client and server now have the shared secret key, and they can use it to encrypt all communication for the duration of the session.
You’ll notice that the symmetric key is generated randomly and used only for the duration of a session. This limits the security risk. First, it’s harder to break encrypted messages using cryptanalysis, because messages from other sessions can’t be used. Second, even if the key is determined by a malicious user, it will remain valid only for the course of the session.
Another interesting point is that the client must generate the symmetric key. This is because the client has the server’s public key, which can be used to encrypt a message that only the server can read. The server does not have corresponding information about the client and thus cannot yet encrypt a message. This also means that if the client supplies a weak key, the entire interaction could be compromised. For example, older versions of the Netscape browser used a weak random number generator to create the symmetric key. This would make it much easier for a malicious user to guess the key.
Installing Certificates in IIS
When deploying an application, you will probably want to purchase certificates from a genuine CA such as VeriSign. This is particularly the case with websites and Internet browsers, which recognize a limited number of certificate authorities automatically. If you use a test certificate to encrypt communication with a secured portion of a website, for example, the client browser will display a warning that the certificate is not from a known CA.
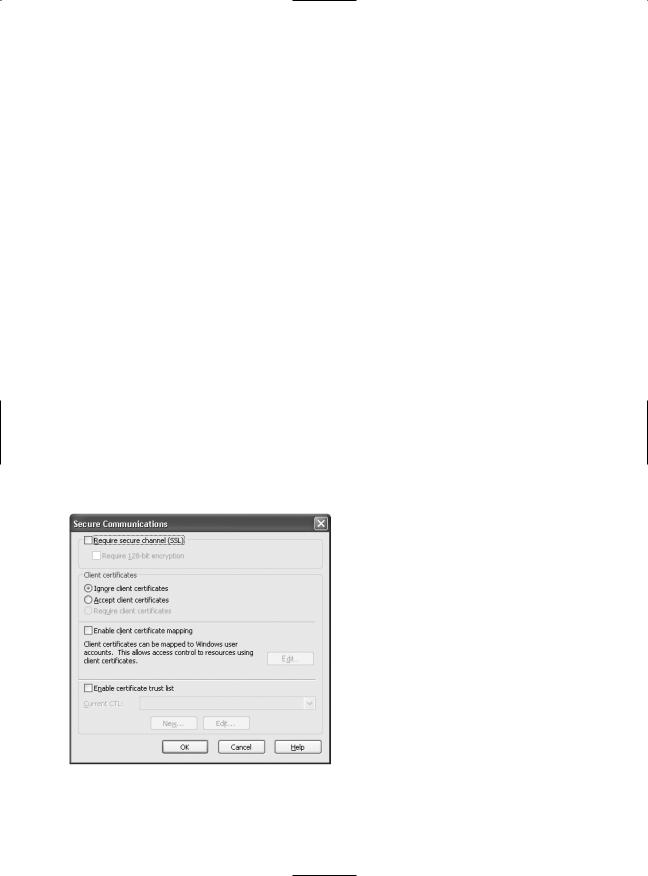
IIS Manager allows you to create a certificate request automatically. First, start IIS Manager. Expand the Web Sites group, right-click your website item (often titled Default Web Site), and choose Properties. Under the Directory Security tab, you’ll find a Server Certificate button (see Figure 19-6).

680 C H A P T E R 1 9 ■ T H E A S P. N E T S E C U R I T Y M O D E L
Figure 19-6. Configuring directory security
Click the Server Certificate button to start the IIS Certificate Wizard (see Figure 19-7). This wizard requests some basic organization information and generates a request file. You’ll also need to supply a bit length for the key—the higher the bit length, the stronger the key.
Figure 19-7. Creating a server certificate request
The generated file can be saved as a text file, but it must ultimately be e-mailed to a CA. A sample (slightly abbreviated) request file is as follows:

682 C H A P T E R 1 9 ■ T H E A S P. N E T S E C U R I T Y M O D E L
Keep in mind that there are good reasons not to enforce an SSL connection for an entire virtual directory. For example, you might want to secure some method calls in a web service but not secure others that don’t return sensitive information. This allows you to increase performance and reduce the work performed by the server. If needed, you can check for a secure connection in your code and then throw an exception or redirect the user if SSL is required but not present.
Here’s an example that checks whether the current request is transmitted over a secure connection using the HttpRequest.IsSecureConnection property:
if (Request.IsSecureConnection)
{
// (Application code goes here.)
}
else
{
// Redirect with https to ensure the page is accessed over SSL. Response.Redirect("https://www.mySite.com/account.asmx");
}
■Note A common mistake is to use localhost or any other aliases for the server host name in an SSL connection. This will not work, because the client attempts to verify that the CN (common name) part of the subject name of the server certificate matches the host name found in the HTTP request during the handshake portion of the SSL exchange.
With SSL, all traffic will be encrypted, not just the sensitive data. For this reason, many web servers use a hardware accelerator to improve the performance of encryption with SSL.
■Note Remember, SSL is not tied to ASP.NET in any way. If you want to learn more about SSL, consult a book dedicated to security and IIS such as IIS Security (Osbourne/McGraw-Hill, 2002).
ASP.NET Security Architecture
ASP.NET implements the concept of gatekeepers (introduced previously) through HTTP modules. Each module is a class implementing the interface IHttpModule, and each module acts as a gatekeeper of the ASP.NET infrastructure. Of course, HTTP modules are used for other tasks, but lots of them are security related. As you can see in Figure 19-9, ASP.NET includes several authentication and authorization modules.
Because web applications use the stateless HTTP, no information is retained for the user between requests. As a result, the user must be authenticated and authorized at the beginning of each request. ASP.NET handles this by firing global application events. Authentication modules can handle these events to perform user authentication. Not all requests require authentication or authorization. However, the related events always fire. These events are handled by the configured HTTP modules demonstrated in Figure 19-9. Of course, you can handle the events through the global application class as well (these events are defined in the code-behind class of the Global.asax file), but for higher reusability we recommend creating separate HTTP modules, because it is really easy to create them.


684 C H A P T E R 1 9 ■ T H E A S P. N E T S E C U R I T Y M O D E L
■Note Session state is not accessible until after the authorization and authentication events have fired. This prevents you from storing user identity information in session state. Instead, you must use other mechanisms.
The AuthenticateRequest event is raised by the HttpApplication object when a request requires authentication. Once the user is authenticated (typically supplying some sort of user credential such as a cookie with user information), the next step is to make sure the user identity information is readily available for the rest of the page-processing cycle. To accomplish this, you must create a new object with user information and attach it to the User property of the current HttpContext.
The AuthorizeRequest event is raised after the user has been authenticated in the AuthenticateRequest event. Authorization modules use AuthorizeRequest to check whether the user is authorized for the resource they are requesting.
Authentication
Authentication is implemented in ASP.NET through specialized HTTP modules, as demonstrated in Figures 19-9 and 19-10. You choose which authentication module you want to use with the <authentication> element in the web.config configuration file. All authentication modules implement the IHttpModule interface, which provides access to application events (as explained in Chapter 5). This allows them to handle the HttpApplication.AuthenticateRequest event. Each module also exposes its own Authenticate event that you can handle in the global.asax file.
■Note The <authentication> element can be used only in the web.config that is in the root directory of an application. Attempting to use it in a subdirectory will cause an error. This means that only one authentication type can be defined for each application. However, different subdirectories can define different authorization rules.
ASP.NET provides three core authentication modules:
•FormsAuthenticationModule
•WindowsAuthenticationModule
•PassportAuthenticationModule
The following sections briefly describe each module.
The FormsAuthenticationModule
The FormsAuthenticationModule module uses forms authentication, which allows you to design your own login pages, write your own authentication logic, but rely on ASP.NET to track user and role information using an encrypted cookie. The FormsAuthenticationModule module is active when the <authorization> element is set as follows:
<authentication mode="Forms" />
Chapter 20 explores forms authentication in more detail. (You can also use forms authentication with the Membership API and the Roles API, which are introduced later in this chapter and covered in detail in Chapter 20.)

C H A P T E R 1 9 ■ T H E A S P. N E T S E C U R I T Y M O D E L |
685 |
The WindowsAuthenticationModule
The WindowsAuthenticationModule module works in conjunction with IIS to perform Windows authentication. This module is active when the <authentication> element in the web.config file is set as follows:
<authentication mode="Windows" />
Chapter 22 explores Windows authentication in more detail.
The PassportAuthenticationModule
PassportAuthenticationModule is active when the <authentication> element in the web.config file is set as follows:
<authentication mode="Passport" />
The PassportAuthenticationModule module provides a wrapper for Microsoft’s Passport authentication service. When using Passport, users are authenticated using the information in Microsoft’s Passport database (the same technology that powers the free Hotmail e-mail system). The advantage of Passport is that you can use existing user credentials (such as an e-mail address and password), without forcing users to go through a separate registration process. The disadvantage is that you need to enter into a licensing agreement with Microsoft and pay a yearly fee based on use.
ASP.NET doesn’t include full support for Passport authentication. To use it successfully, you’ll need to download and install the Passport .NET SDK on your web server. This book doesn’t cover Passport, but you can learn more (and download the SDK) at http://www.microsoft.com/net/ services/passport.
Authorization
Once a user is authenticated, information such as the user’s name and security context is automatically made available by the ASP.NET infrastructure. You can access this information through the HttpContext.Current.User object and use this information to implement authorization in your code. Furthermore, ASP.NET includes the following prebuilt modules for implementing authorization:
UrlAuthorization: The UrlAuthorization module works based on the content of the <authorization> configuration in the web.config files of different directories of your web application. It can restrict access to both directories and files, based on the user’s name or the roles assigned to the user.
FileAuthorization: When using Windows authentication in intranets, ASP.NET automatically uses the FileAuthorization module for authorizing Windows users against files accessed by ASP.NET based on Windows ACLs. Therefore, each Windows user must have at least read access rights on the files of the web applications in that case. This module works with Windows authentication only—but without impersonation.
When impersonating users in Windows environments, you can even configure ACLs on registry entries or any other resource on the machine, and Windows does authorization based on the Windows user for you.


C H A P T E R 1 9 ■ T H E A S P. N E T S E C U R I T Y M O D E L |
687 |
The IIdentity interface defines the basic information needed to represent the current user. At a minimum, this includes the following three read-only properties:
•AuthenticationType: Returns the type of authentication used as a string (forms, Passport, NTLM, or a custom authentication type)
•IsAuthenticated: Returns a Boolean value that indicates whether the user has been authenticated (true) or is anonymous (false)
•Name: Returns the name of the current user as a string
You can access the IIdentity object that represents the current user through the IIPrincipal object. Here’s an example that uses this technique to check whether the user has been authenticated:
if (HttpContext.Current.User.Identity.IsAuthenticated)
{
lblUserName.Text = HttpContext.Current.User.Identity.Name + " is logged in";
}
The type of identity object depends on the type of authentication used. All in all, four identity classes are included in the .NET Framework:
•System.Web.Security.FormsIdentity: Represents a user who is logged on using forms authentication.
•System.Security.Principal.WindowsIdentity: Represents a Windows user account.
•System.Web.Security.PassportIdentity: Provides a class to be used by the PassportAuthenticationModule.
•System.Security.Principal.GenericIdentity: Represents a generic user identity. (You can use this to create identities if you’re creating a custom authentication system.)
Membership and Roles APIs
As you will see in Chapter 20, when using forms authentication, you need to authenticate your users against a custom store. This means you must do much more than create a basic login page for validating user names and passwords. Of course, you need a way to manage users as well as assign users to roles. With ASP.NET 1.x you had to create such management tools and components for programmatic management on your own. ASP.NET 2.0 provides this infrastructure through the Membership API, the Roles API, and the Profiles API.
Membership API
The Membership API is a complete user management system. It helps you create, edit, and delete users, and it includes functionality for password recovery. You can use the API for programmatically performing all these management tasks, or you can use the ASP.NET web configuration tool for the graphical administration of your users. With this infrastructure you can save lots of time, as you don’t have to create your own user administration application anymore because it already exists within the ASP.NET 2.0 framework. Furthermore, it includes functionality for validating a user name and password combination entered by the user.
You will learn more details about the Membership API in Chapter 21.