

C#
EXPLORE THE CLASS VIEW WINDOW
When you start a new C# project, C# creates default classes that define and categorize the elements in your new program. For example, if you start a
new Windows application that has a form, C# creates default classes that define the form objects. The Class View window lets you view all your classes and their related components so you know exactly what is in your class code without having to search through the code.
The Class View window gives you a convenient way to see with which class an object in your program is associated without having to close or minimize your program code or form. The Class View window appears in the same space in
the Microsoft Development Environment (MDE) window as the Solution Explorer window.
The class information appears in a tree format that you can expand to view all classes associated with a particular program component, such as a form. If you have more than one program in a project, the Class View window tree lets you access classes for all the programs in the project.
If you want to see classes that meet certain criteria, you can sort classes in the tree alphabetically, by type for viewing related classes in your program, or by access.
EXPLORE THE CLASS VIEW WINDOW
Class View - Windo . . .
WindowsApplication3
Form1.cs
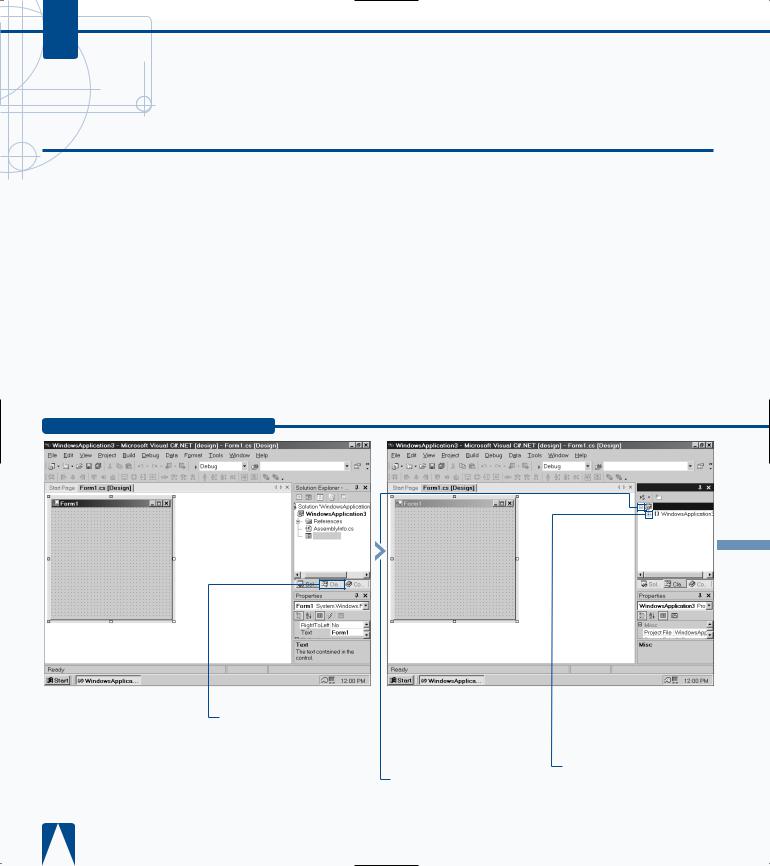
Class View tab. ■ The Class View window appears with the project name in bold at the top of the window.
‹ Click the plus sign  beside the project name.
■ The program name appears directly below the project name.
› Click the plus sign  beside the program name.
EXPLORING THE C# INTERFACE 2
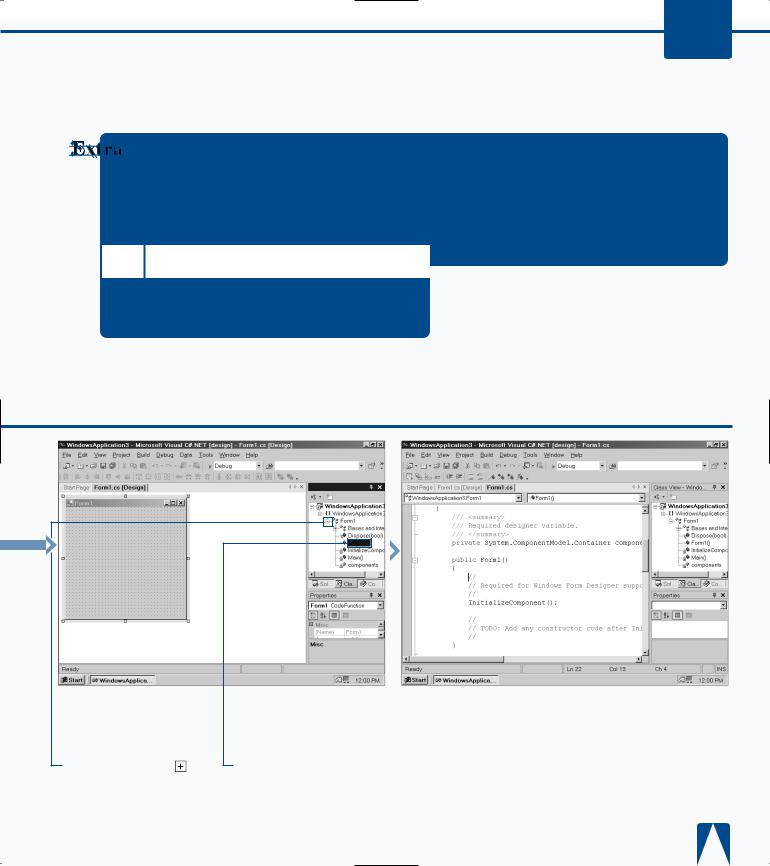
If the Class View window is not available as a tab at the bottom of the Solution Explorer window, you can access the Class View window from the menu bar.
You can open the Class View window by clicking View and then Class View on the menu. You can also open the Class View window by pressing Ctrl+Shift+C. No matter if you access the Class View window using the menu or the keyboard, after you open the Class View window, it replaces the Solution Explorer in the upper-right corner of the parent window.
When you click a class, the properties for that class appear in the Properties window; the Properties window appears below the Class View window.
If you do not have the Properties window open, you can right-click the class and then click Properties from the pop-up menu. See page 26 to learn more about the Properties window.
■ The |
class location appears |
appears |
code displayed in the |
program |
window. |
ˇ Click |
|
beside |
|
15
C#
VIEW THE CONTENTS WINDOW
The Microsoft Development Environment (MDE) window provides several different types of online Visual .NET documentation, including the
Contents window. When you access the Contents window, the window appears in the same space as the Solution Explorer window. If you have used Windows online help before, then the Contents window will be very familiar to you. The MDE organizes Visual Studio .NET information into different subjects that display in the Contents window in a tree format.
Microsoft has divided the Contents window into two main topic groups called books: Visual Studio .NET and MSDN Library. The online documentation displayed in each topic
contains subtopic groups. You can open each book in the tree that matches the subject you want more information about.
As you expand the tree, specific topics appear, enabling you to select your topic from this list. Many help pages also contain links to other help pages, in case you need related information.
The Filtered By drop-down list at the top of the Contents window lets you filter the type of information displayed in the tree. If you want to view only C# information, the Contents window tree will display those groups and topics that pertain only to C#.
VIEW THE CONTENTS WINDOW
Form1.cs
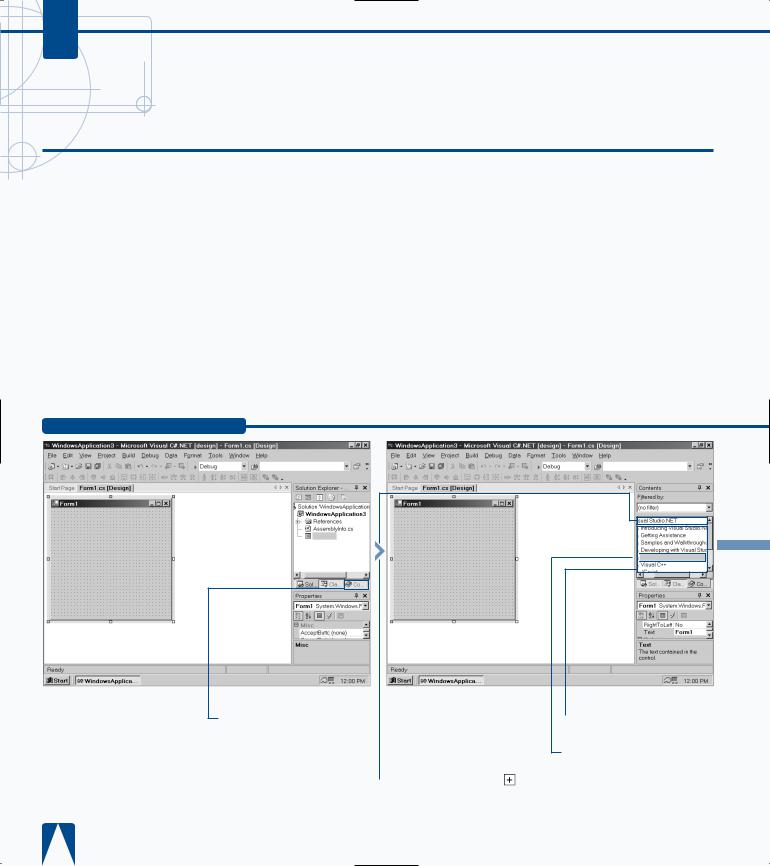
the Contents tab in |
■ The Contents window |
|
Solution Explorer |
appears with the Visual |
|
. |
Studio .NET and MSDN |
|
|
Library books. |
|
|
|
‹ Click the plus sign |
|
|
|
|
beside the Visual Studio .NET |
|
|
book. |
|
 Visual Basic and Visual C#
■ The major Visual Studio
.NET topic books appear.
› Click the plus sign beside the Visual Basic and Visual C# book.
EXPLORING THE C# INTERFACE 2
With some topics, the Contents window may not be able to display the full names of the topics. The MDE window provides two ways to scroll through the entire topic name so you can determine if that is a topic you want more information about.
First, you can click the horizontal scrollbar at the bottom of the Contents window. This lets you view the entire window. Second, you can move the mouse pointer over the topic name and the full topic name will appear in a white box above the mouse pointer. The second option does not work if the name of the topic is too long.
In the Contents window tree structure, as with any tree structure in the MDE, you can close all the topics underneath a book in the tree by clicking the minus sign beside the topic. When you do, all the topics that appear under the book minimize.
Visual C# Language |
Visual C# Language |
|
|
|
|
|
|
|
|
|
|
|
|
|
|
|
|
|
|
|
|
|
|
|
|
|
|
|
|
|
|
|
|
|
|
|
|
|
|
|
|
|
|
|
|
|
|
|
|
|
|
|
|
|
|
|
|
|
|
|
|
■ Topic books for Visual |
|
|
|
|
|
■ The C# Language Tour |
|||||
■ The Visual C# Language |
|||||||||||
Basic and Visual C# appear. |
help screen appears. |
help screen appears with |
|||||||||
|
ˇ Click the Visual C# |
|
Á Click the C# Language |
links to other help pages. |
|||||||
|
|
|
|||||||||
Language book. |
Tour link on the page. |
|
|||||||||
17