

C#
DELETE A TOOLBAR
If you find that you no longer use a toolbar and you want to use the extra space for other features in the MDE window, like the parent window for editing code, the
MDE window lets you delete a toolbar entirely from your system.
At the left of every toolbar is a series of dark gray lines or hashmarks. These lines indicate the start of the toolbar and where you can place the mouse pointer so you can move the toolbar around on the screen. You can determine whether the toolbar will remain at the top of the screen or float around the screen as its own window.
A down arrow appears at the far right of every active toolbar. This down arrow contains a menu that lets you conveniently add and remove buttons from the selected toolbar.
If you have more than one toolbar on the screen in the same toolbar row on the page, not all the buttons can fit on the toolbar row. If you want to have all the buttons visible in one toolbar row, move the toolbar to a new location or remove buttons from one or more toolbars so that all the toolbars fit, or increase your video resolution.
DELETE A TOOLBAR
Standard |
Add or Remove Buttons |
Customize. . . |
|
|
Form1.cs |
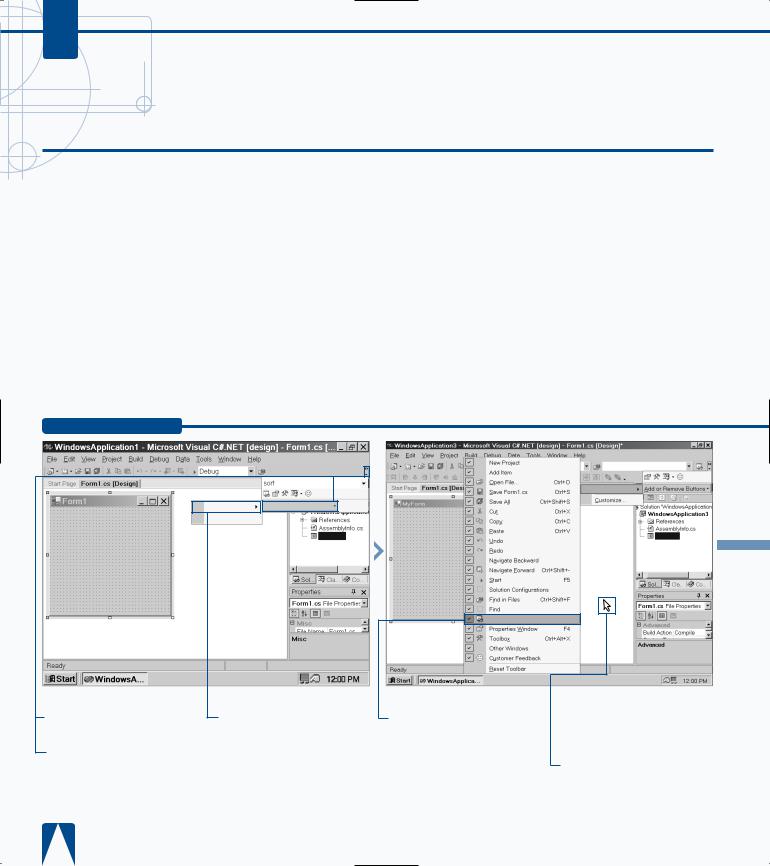
‹ Click Standard.
.
■ A side menu appears.
Standard
Form1.cs
Solution Explorer Ctrl+Alt+L
› Remove the Solution Explorer command icon by clicking Solution Explorer to uncheck.
Note: All active toolbar buttons have check marks next to their names in the menu.
■ The Solution Explorer command icon disappears from the toolbar.
ˇ Close the menu by clicking a location outside of the menu.
EXPLORING THE C# INTERFACE 2
You can also remove a toolbar by right-clicking the toolbar’s hashmark and selecting the active toolbar from the pop-up menu that appears. You can tell which toolbars are active by looking for a check mark next to each toolbar.
If you have a truncated button bar, it displays two caret marks (>) above the down arrow. When you click either the caret marks or the down arrow, the functionality for both appears in the pop-up window. In this case, the Add and Remove Buttons option appears below the rest of the buttons in the button bar.
If you move a floating button bar around the perimeter of the screen, the button bar will immediately attach itself (or dock) to the perimeter in its own vertical or horizontal bar. This approach helps ensure that you get the maximum window space for all the other windows in the parent window.
Help
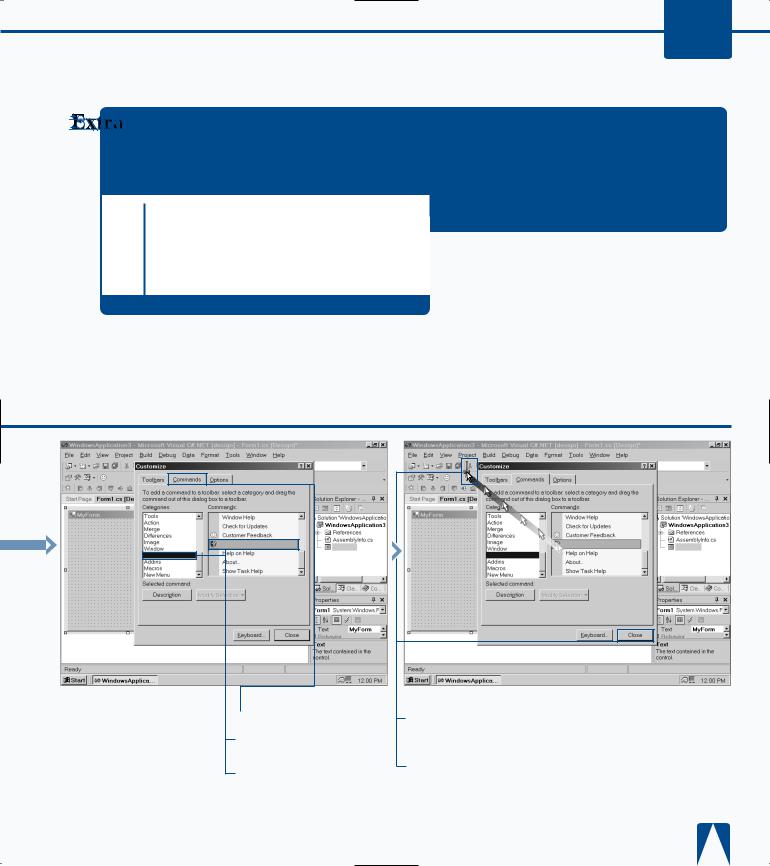
Á Repeat steps 1 and 2.
‡ Click Customize.
■ The Customize
window appears.
Technical Support
Form1.cs
° Click the Commands tab.
· Click to select Help in the Categories list box.
‚ Scroll down the Commands list box until you see Technical Support.
Technical Support |
Form1.cs |
|
Help
— Click and drag the Technical Support entry to the Standard toolbar.
± Click the Close button in the Customize window.
■The Technical Support icon appears on the Standard toolbar.
■You can now access the Technical Support command icon from the
Standard toolbar.
31
C#
CHANGE THE VISUAL STUDIO ENVIRONMENT
The MDE window gives you several methods for accessing commands including windows, toolbars, and shortcut keys. This modular approach to the user
environment lets you add and remove windows, toolbars, and shortcut keys to the MDE window to create a working environment designed for you.
The MDE parent window provides a dozen environmental categories that you can alter. These categories contain different attributes that you can change. For example, if you want to change the keyboard shortcuts to mimic those in the previous version of Visual Studio (version 6), or shortcuts for a particular Visual Studio component (such as
Visual Basic), you can do this so you do not have to spend time learning new keyboard shortcuts (or adding them).
These environmental attributes also contain the active defaults denoted by information that appears in a text box or choices denoted by selected (or unselected) check boxes or radio buttons. The Options window presents the object categories and attributes so you can make changes and view settings quickly.
Some attributes and settings also contain descriptions so you can make more informed choices. Some attributes also let you set choices more precisely by offering buttons to more advanced settings.
CHANGE THE VISUAL STUDIO ENVIRONMENT
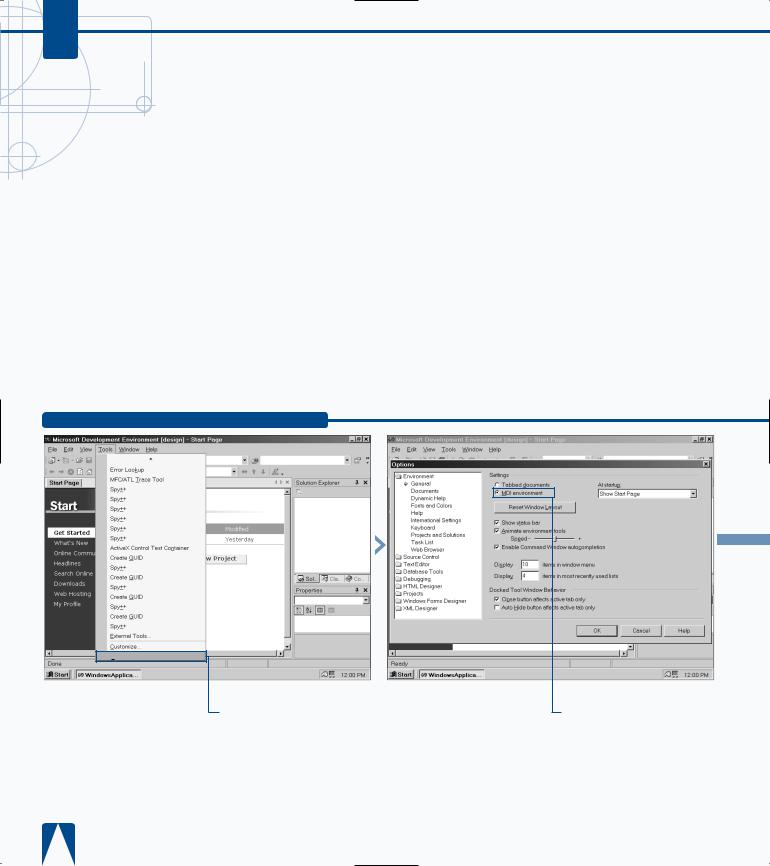
. ■ The Options window appears with the Environment folder open.
‹ Click to select the MDI environment radio button to change the MDE window environment to MDI.
EXPLORING THE C# INTERFACE 2
Two of the features that you will probably be interested in changing are the fonts and colors that appear in the parent window. Visual Studio
.NET gives you a lot of control over how the visual elements on your screen appear in the parent window. When you access the Fonts and Colors option in the Options window, you can change the font and color scheme for more than 65 different elements that appear in a wizard. The sample area displays how the element font and type look before you apply them.
Changes that you make to the Options window do not take effect until you click the OK button. Unfortunately, if you make a change that you did not want to make and you cannot change it, you must click the Cancel button (and lose any other changes you made), open the Options window again, and make your changes.
Fonts and Colors
Text
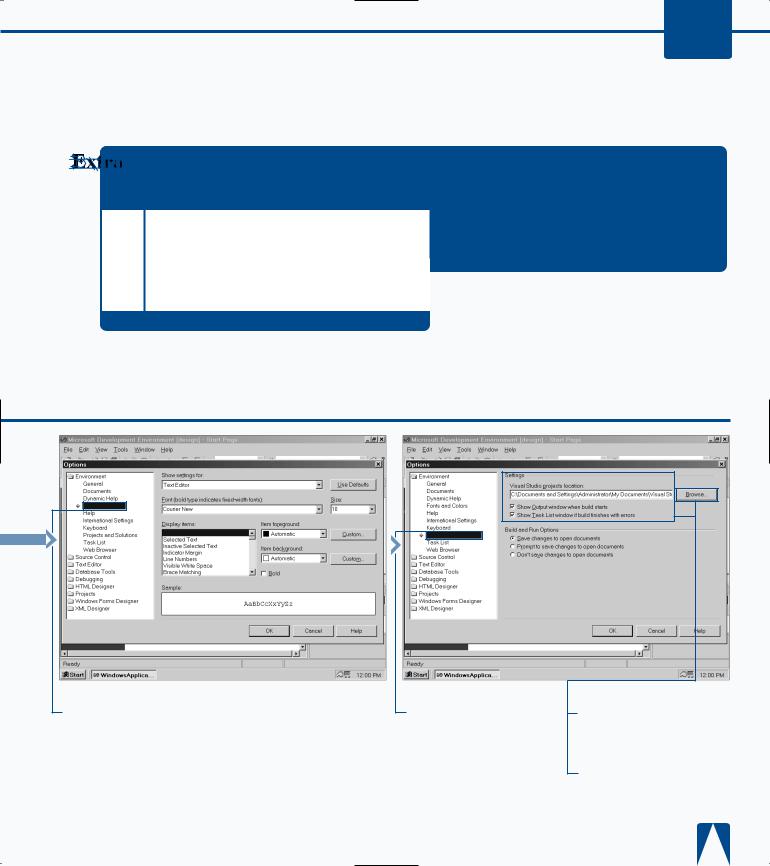
› Click to select the Fonts and Colors attribute to change the MDE window fonts and colors.
■ The Sample area shows how different elements will appear on screen.
Projects and Solutions
ˇ Click to select the Projects and Solutions attribute to change the file locations of projects and project build and run options.
■ You can change the default location on your disk for all projects in the Visual Studio projects location text box.
Á Click OK after you finish viewing and making
any changes.
33