Добавил:
Опубликованный материал нарушает ваши авторские права? Сообщите нам.
Вуз: Предмет: Файл:

Beginning ASP.NET 2.0 With CSharp (2006) [eng]

.pdf
Скачиваний:
83
Добавлен:
16.08.2013
Размер:
20.33 Mб
Скачать

Chapter 11

Figure 11-5

388

Figure 11-6

Roles and Profiles

6.In the Common Tasks box of the LoginView control (the flyout highlighted in Figure 11-6), click the Edit RoleGroups link. In the dialog box that appears (shown in Figure 11-7), you can enter the details for the two custom role groups. Click the Add button to add a new group, and then click the ellipsis next to the Roles property on the right and enter FanClubMember in the dialog box that appears.

Figure 11-7

7.Repeat the process and enter Administrator, Owner, Manager, and Reporter, each on separate lines in the pop-up, as depicted in Figure 11-8.

Figure 11-8

8.Click OK to close the dialogs and you’ll be returned to the Design View for the page.

9.Back in the Common Tasks box of the LoginView control (refer to Figure 11-6), select the AnonymousTemplate from the View drop-down and enter just a few words of text in the body of the control (see Figure 11-9).

389

Chapter 11

Figure 11-9

When you return to Source View, you will now see the following code:

<%@ Page Language=”C#” MasterPageFile=”~/site.master” AutoEventWireup=”false” CodeFile=”FanClub.aspx.cs” Inherits=”FanClub” Title=”Fan Club” %> <asp:Content ID=”Content1” ContentPlaceHolderID=”mainContent” Runat=”Server”>

<asp:LoginView ID=”FCLoginView” runat=”server”> <RoleGroups>

<asp:RoleGroup Roles=”FanClubMember”> </asp:RoleGroup>

<asp:RoleGroup Roles=”Administrator,Owner,Manager,Reporter”> </asp:RoleGroup>

</RoleGroups>

<AnonymousTemplate>

This is the anonymous template </AnonymousTemplate>

</asp:LoginView>

</asp:Content>

10.Stay in Source View and enter the following lines of code — this will make sure you have some visible content displayed no matter who views the site:

390

Roles and Profiles

<asp:LoginView ID=”FCLoginView” runat=”server”> <RoleGroups>

<asp:RoleGroup Roles=”FanClubMember”> <ContentTemplate>

<p>

Welcome back

<asp:LoginName ID=”FCLoginName” runat=”server” />

.</p>

<p>

There are always lots of exciting things happening with the fan club, most of which you already know from the email we regularly send out.

One that hasn’t made it to the email yet is the proposed end of season BBQ – a great excuse for a summer party (not that we really need an excuse). This will be open to all members of the public and tickets will be heavily discounted for fan club members as a thank you for all of the great support you’ve given the club. The date hasn’t yet been set, but keep your eyes on your inbox for more details.

</p>

</ContentTemplate>

</asp:RoleGroup>

<asp:RoleGroup Roles=”Administrator,Owner,Manager,Reporter”> <ContentTemplate>

To see the Fan Club features you need to be a member. As special users you get free entry to the fan club – talk to the admin people to get set up.

</ContentTemplate>

</asp:RoleGroup>

</RoleGroups>

<AnonymousTemplate>

<p>

The fan club provides a way for you to show your devotion to the club, and gains you exclusive privileges. You get discounts on match tickets and at the club store, as well as having the opportunity to meet up with like-minded fans.

</p>

<p>

Membership to the Fan Club can be bought from

the <a href=”Shop.aspx”> Club Shop</a>. Once membership has been received we’ll enable your account as a Fan Club Member.

</p>

</AnonymousTemplate>

</asp:LoginView>

11.Time to run the page and see how this works. Launch the site from VWD and, before you log in, go to the Fan Club page as an anonymous user. You should see the screen shown in Figure 11-10.

391

Chapter 11

Figure 11-10

12.Log in to the site as ChrisH, using the password chrish@123. You will now see the screen in Figure 11-11.

392

Roles and Profiles

Figure 11-11

13.Log out, and then log back in as Lou, using password lou@123. You’ll be presented with the welcome screen shown in Figure 11-12.

393

Chapter 11

Figure 11-12

How It Works

The LoginView control, which you first met in Chapter 4, is a great way of displaying content that is directly related to the user who is currently viewing a page. In this example, you’ve added code so that three possible views are available of the Fan Club home page.

If the user is anonymous, the anonymous template is used:

<AnonymousTemplate>

<p>

The fan club provides a way for you to show your devotion to the club, and gains you exclusive privileges. You get discounts on match tickets and at the club store, as well as having the opportunity to meet up with like minded fans.

</p>

<p>

Membership to the Fan Club can be bought from

the <a href=”Shop.aspx”>Club Shop</a>. Once membership has been received we’ll enable your account as a Fan Club Member.

</p>

</AnonymousTemplate>

394

Roles and Profiles

If the user has logged in, it’s fairly safe to assume that he is a member of a group, and hence he will see a different page depending on which roles he belongs to:

<RoleGroups>

<asp:RoleGroup Roles=”FanClubMember”> <ContentTemplate>

<p>

Welcome back

<asp:LoginName ID=”FCLoginName” runat=”server” />

.</p>

<p>

There are always lots of exciting things happening with the fan club, most of which you already know from the email we regularly send out. One that hasn’t made it to the email yet is the proposed end of season BBQ – a great excuse for a summer party (not that we really need an excuse). This will be open to all members of the public and tickets will be heavily discounted for fan club members as a thank you for all of the great support you’ve given the club. The date hasn’t yet been set, but keep your eyes on your inbox for more details.

</p>

</ContentTemplate>

</asp:RoleGroup>

Fan Club members will see a custom page with some text. There’s not a lot on here yet, but that will change later in this chapter when you learn about user profiles. These profiles can be used to store additional information about a user, so the fan club page will become a central place for site members to come so that they can modify their profiles.

If the user is a member of one of the other roles (Administrator, Owner, Manager, or Reporter), the user will see a different display:

<asp:RoleGroup Roles=”Administrator,Owner,Manager,Reporter”> <ContentTemplate>

To see the Fan Club features you need to be a member. As special users you get free entry to the fan club – talk to the admin people to get set up.

</ContentTemplate>

</asp:RoleGroup>

</RoleGroups>

If you wanted to extend this part of the site, perhaps you could include a button or a link that would fire an e-mail to the site administrator, indicating your interest in joining the fan club.

This example demonstrates how simple and easy it is to change the appearance of a page, depending on who is logged in to the site. There are some drawbacks to this technique, however, which you’ll see when you look at extending the display for fan club members to show and edit their profile details.

You now know that you can change the display of a site by user roles. The next step is to lock down parts of the site by role, and work with role-level access to the site.

395

Chapter 11

Configuring Page-Level Authorization

You control access to folders by managing general application access via the Web Site Administration Tool (see Figure 11-13). Previously (back in Chapter 4), you learned how to restrict access to the pages contained within the Admin folder to deny all unapproved users access to those pages.

Figure 11-13

This general level of restriction is fine for hiding the contents of a directory, but configuring who can access each page is controlled in the Web.config file for each folder.

In the Admin folder, in the code for the full Wrox United application, you will find a Web.config file. The following statements appear in this file:

<system.web>

<authorization> <deny users=”*” />

</authorization>

</system.web>

<location path=”Admin.aspx”>

<system.web>

<authorization>

<allow roles=”Reporter,Administrator,Owner,Manager” /> </authorization>

</system.web>

</location>

396

Roles and Profiles

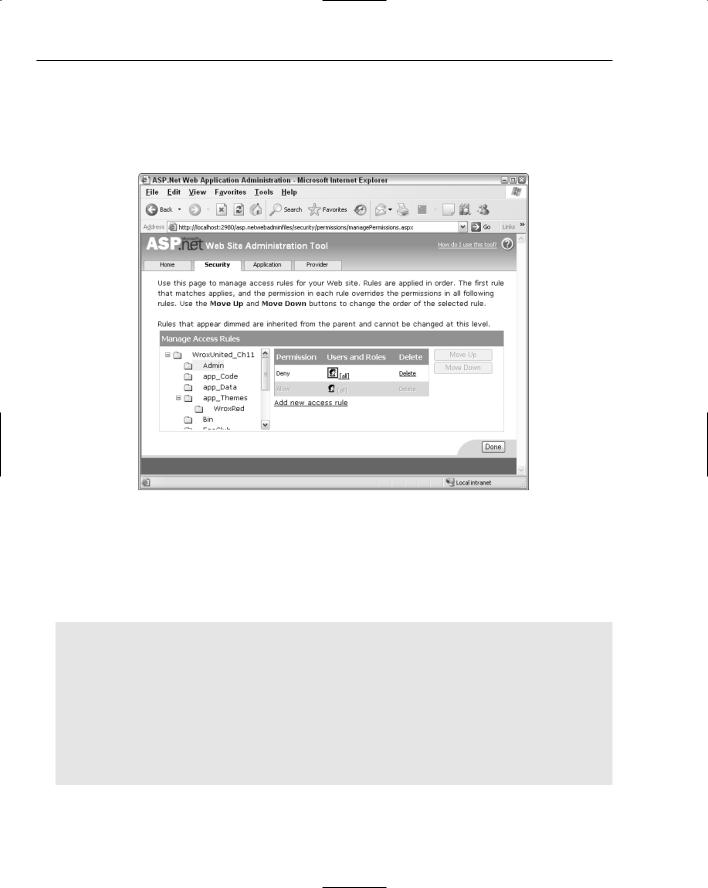
The first part of this extract reflects the setting applied in the site administration tool, denying all users access:

<deny users=”*” />

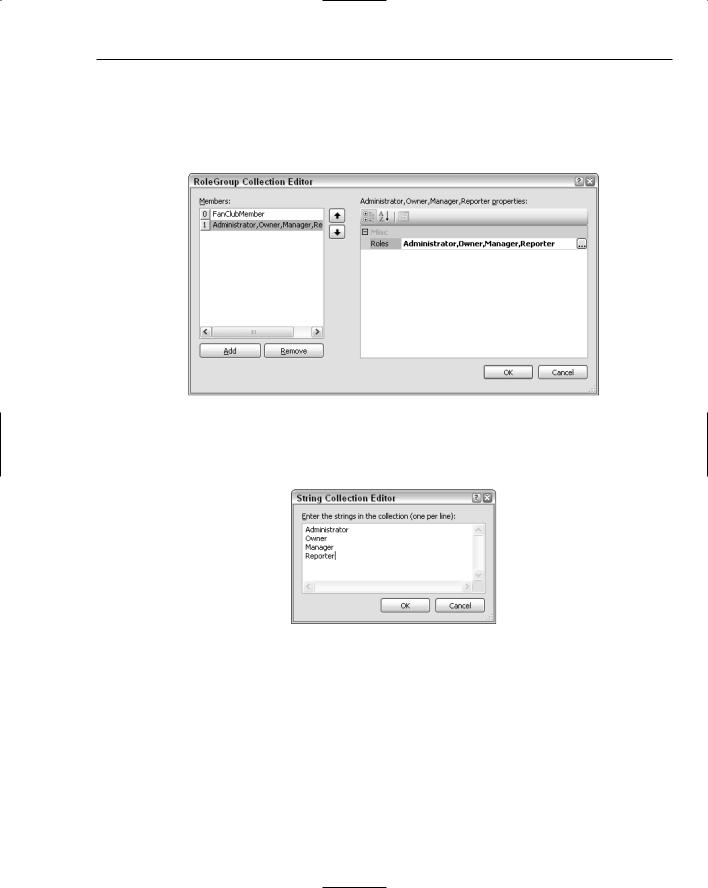
The second part of the extract applies access permissions to a specific page — the Admin.aspx page, in this case. The users who are allowed to view the Admin.aspx page include anyone who is a member of any of the Reporter, Administrator, Owner, or Manager roles:

<allow roles=”Reporter,Administrator,Owner,Manager” />

And so the pattern continues for the remainder of the configuration file, where access to each page is controlled by the configuration file, enabling access permissions to be set for each role against each page in the hierarchy.

Controlling Page Visibility

There may be some situations where you will want to allow a user to know of the existence of a page, even if the user is denied access to it. In this way, you can offer a link to users, but when they click that link, they are prompted to log in as a user with sufficient privileges before they can view the page. In order to achieve this, a roles attribute (see the shaded lines in the following code) can be added to the web.sitemap file, which ensures that a link will be visible to certain users to specified pages, even if the user is unable to view the content of the page itself. Here is an example:

<siteMapNode title=”Administration” url=”Admin/Admin.aspx” roles=”Reporter,Owner,Manager,Administrator”> <siteMapNode title=”Edit News” url=”Admin/EditNews.aspx”

description=”Edit club news” roles=”Reporter,Owner,Manager,Administrator/>

<siteMapNode title=”Schedule Match” url=”Admin/ScheduleMatch.aspx” description=”Schedule a Match”

roles=”Manager,Owner/>

Notice that the roles attribute on the Admin.aspx page states that Reporters, Owners, Managers, and Administrators should be aware of the existence of the Admin.aspx page. Contrast this with the ScheduleMatch.aspx page, and you’ll see that only Managers or Owners can see the link to be able to schedule matches.

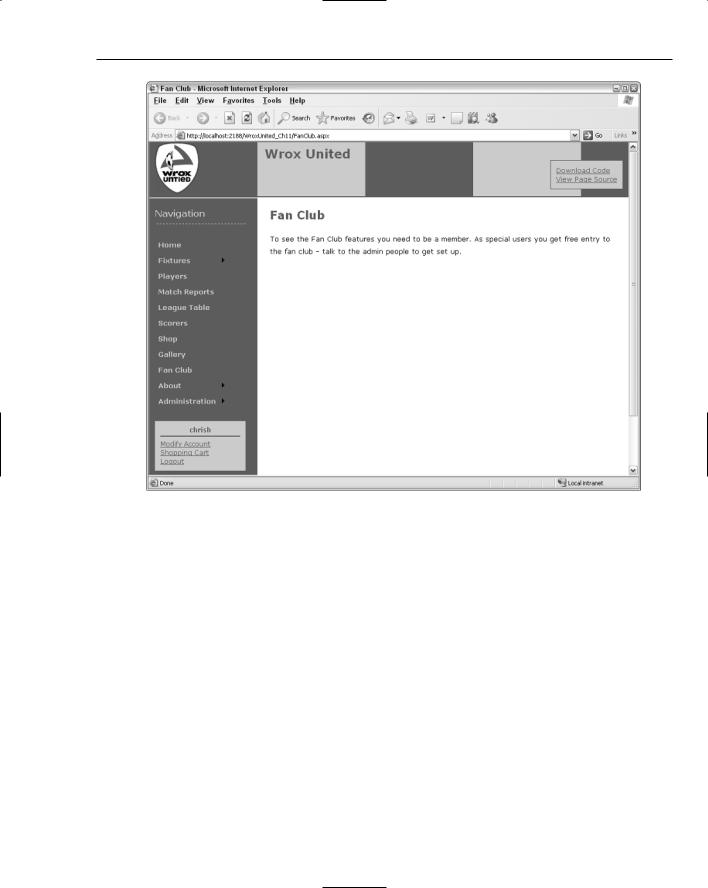
If you log in to the site as ChrisH, you’re a member of the Reporter role, so even if all access to all Admin pages is revoked, you will still see links to the Admin.aspx and EditNews.aspx pages, but you won’t see a link to the ScheduleMatch.aspx page.

Because the Web.config file and the roles attributes in the web.sitemap work together to control both visibility and access, the best way to understand how they work together is to see them in an example.

For this Try It Out, make sure you are using the Chapter 11 version of the Wrox United code. The code supplied has been modified slightly for the purposes of this example. Also, make sure you close any open browser windows from the previous exercise, or your changes may not appear as expected.

397