


Introduction to the Junos Operating System
Appendix B: The J-Web Interface
Introduction to the Junos Operating System
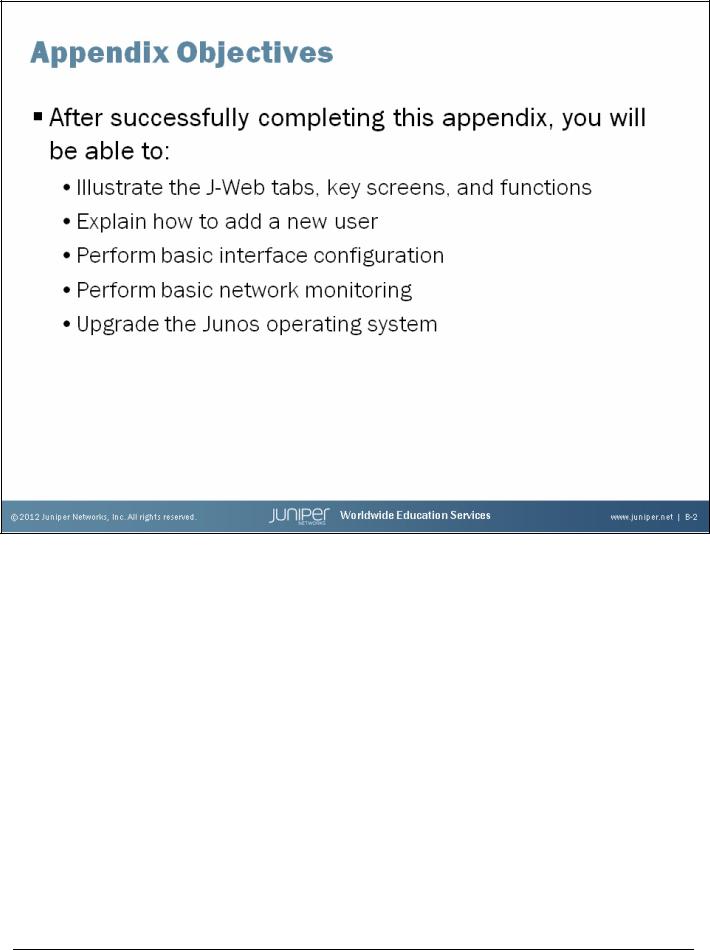
This Appendix Discusses:
•The J-Web graphical user interface (GUI) and its tabs, key screens, and functions;
•How to add a new user;
•Basic interface configuration;
•Basic network monitoring; and
•Upgrading the Junos operating system.
Appendix B–2 • The J-Web Interface |
www.juniper.net |
Introduction to the Junos Operating System
The J-Web GUI
The slide lists the topics we cover in this appendix. We discuss the highlighted topic first.
www.juniper.net |
The J-Web Interface • Appendix B–3 |
Introduction to the Junos Operating System
The J-Web User Interface
The J-Web makes initial deployment very easy. No client software is necessary other than a standard Web browser. After initial configuration, you can return to J-Web for system monitoring and maintenance.
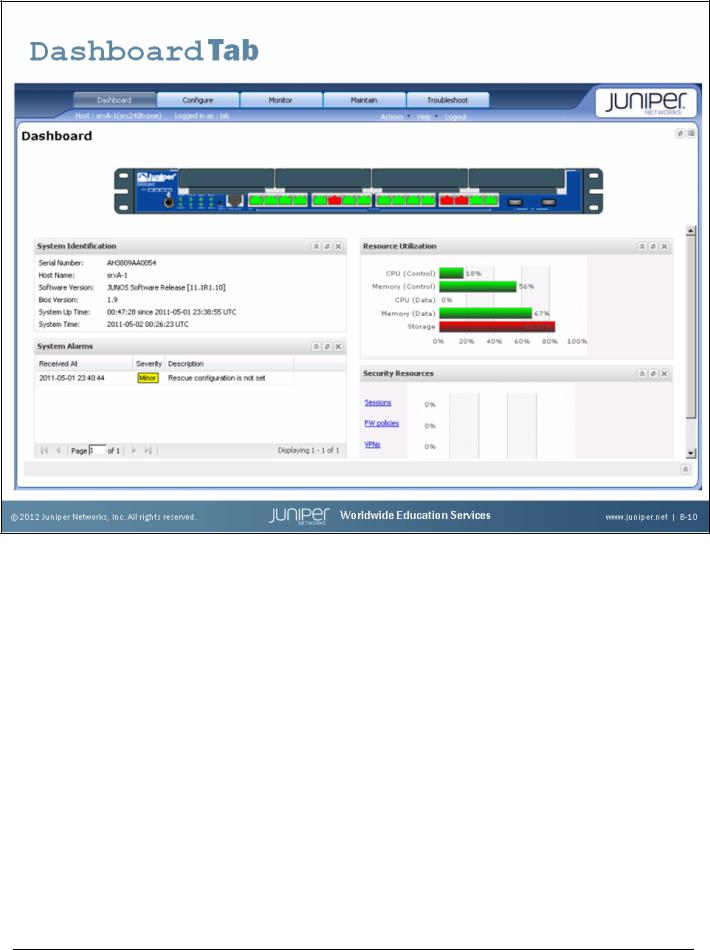
When you log in to J-Web, you always start by viewing the J-Web Dashboard. The Dashboard provides a quick glance at system status, ports, alarms, and utilization information.
The Configure tab allows you to configure the system in a point-and-click fashion or by a direct edit of the configuration in text format. Help is available by clicking the question mark (?) next to the various configuration options.
You can also view the results of configuration changes, such as routing table entries. You can view most details related to the show commands of the command-line interface (CLI) in J-Web using a point-and-click approach.
The Troubleshoot tab provides common network tools such as ping and traceroute to quickly assess network issues. You can use the Maintain tab to easily perform software upgrades and file system maintenance.
Appendix B–4 • The J-Web Interface |
www.juniper.net |
Introduction to the Junos Operating System
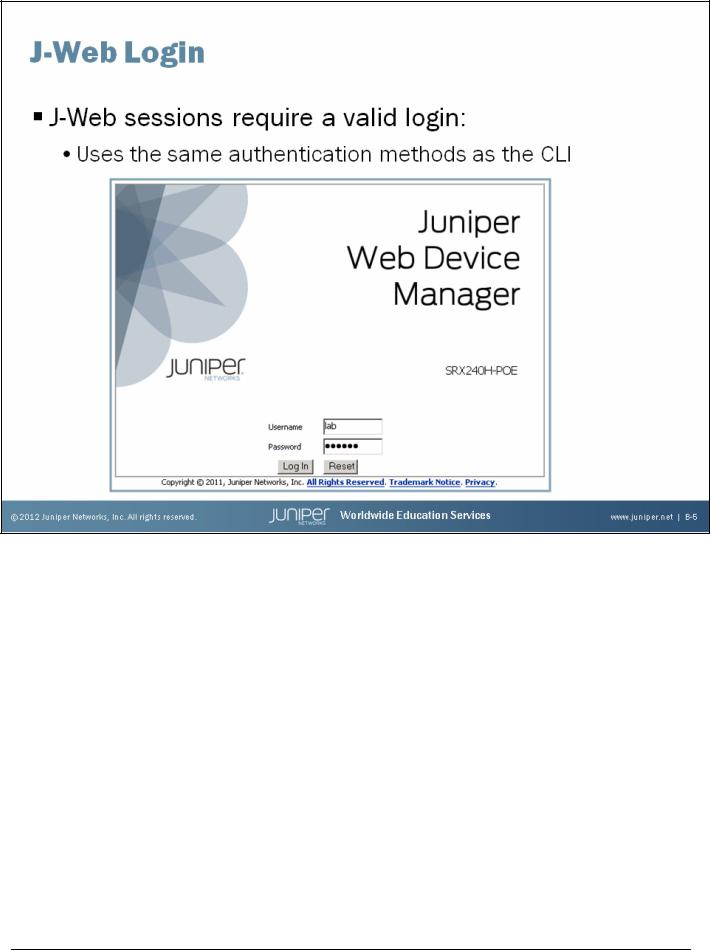
Logging In to J-Web
If you want remote access using J-Web, you must enable the HTTP or HTTPS service under the [edit system services] hierarchy level as shown in the following capture:
[edit system]
user@router# show services ssh;
telnet; web-management {
http;
}
If you configure HTTPS, a local certificate for secure Web management is created automatically.
Once you configure a device running the Junos OS for access, you can log in using your Web browser. If you configured the system to use an external authentication mechanism such as a RADIUS server, J-Web will also use that mechanism for authentication. Otherwise, it uses the username and password configured on the local system.
www.juniper.net |
The J-Web Interface • Appendix B–5 |
Introduction to the Junos Operating System
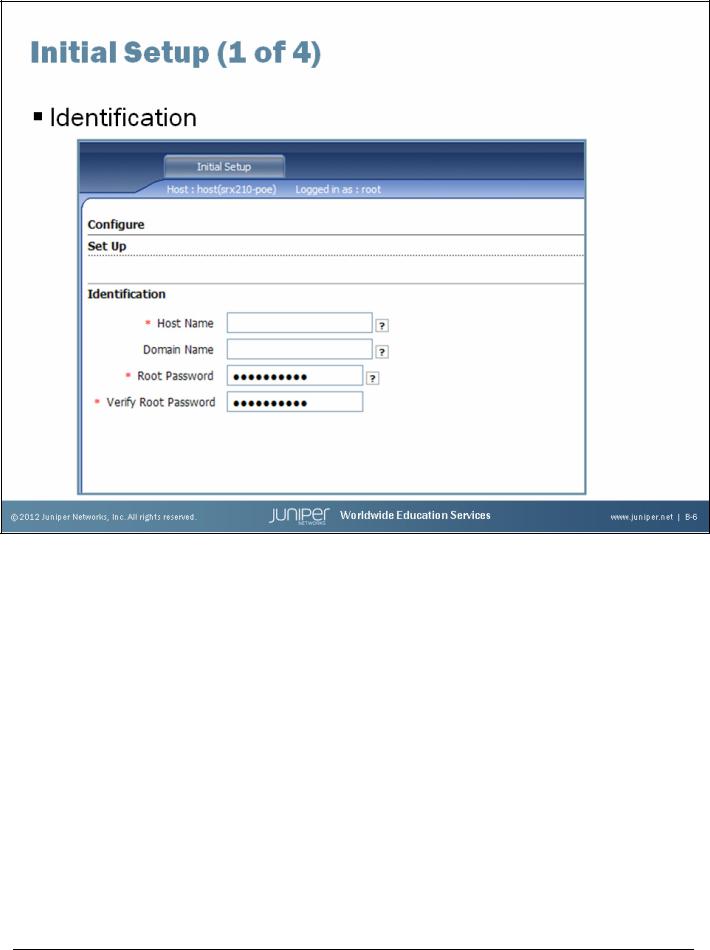
Initial Setup: Part 1
The initial setup screen appears the first time you log in to an unconfigured Junos device. You enter basic configuration information on this one-page setup screen. Any field with a red asterisk is a required field. Remember to click Apply (not shown on the slide) when you finish with this screen.
Appendix B–6 • The J-Web Interface |
www.juniper.net |
Introduction to the Junos Operating System
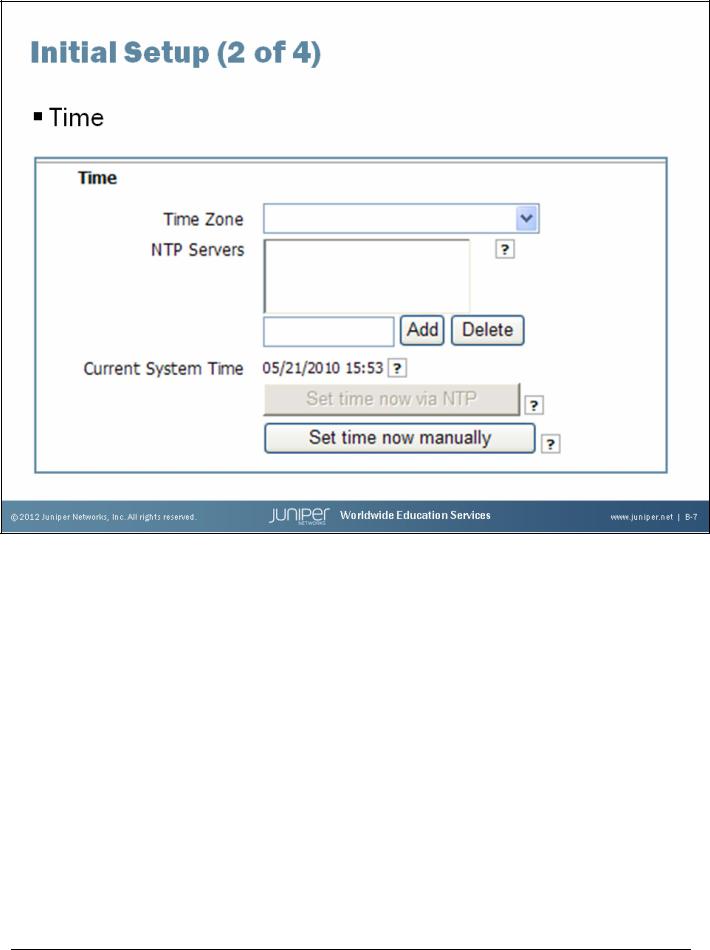
Initial Setup: Part 2
The second section of the initial configuration screen allows you to configure the time. None of these fields are required. We recommend that you configure the time on the device.
www.juniper.net |
The J-Web Interface • Appendix B–7 |
Introduction to the Junos Operating System
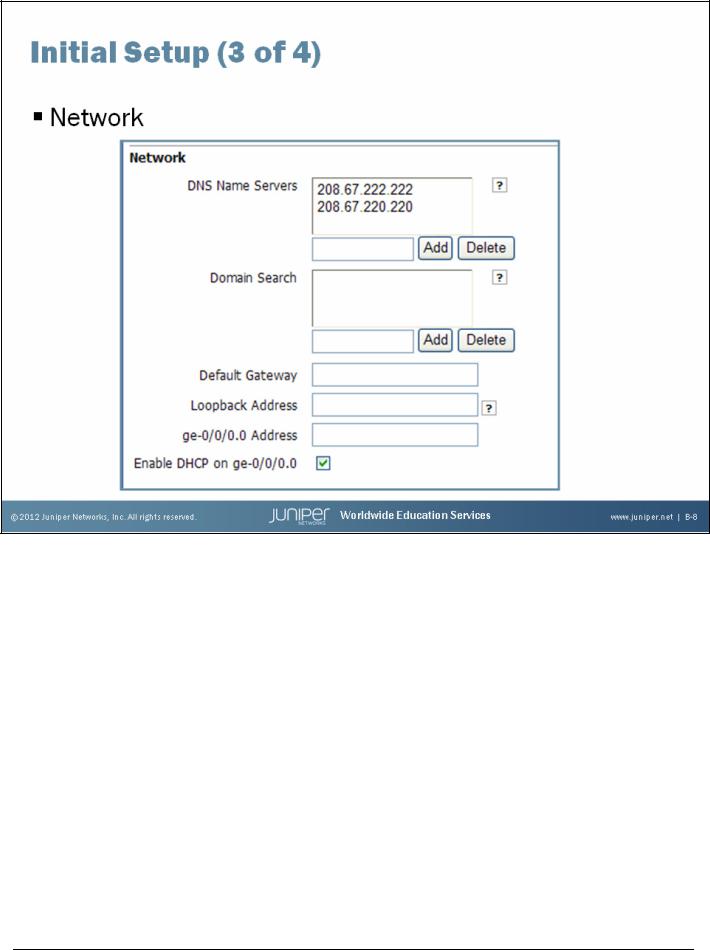
Initial Setup: Part 3
The next part of the initial setup involves a basic network configuration.
Appendix B–8 • The J-Web Interface |
www.juniper.net |
Introduction to the Junos Operating System
Initial Setup: Part 4
The last part of the initial setup screen involves configuring management access.
Ensure that you click Apply at the bottom of the window (not shown on the slide), when you are done with the initial setup.
www.juniper.net |
The J-Web Interface • Appendix B–9 |
Introduction to the Junos Operating System
Quick Verification
The default J-Web tab is the Dashboard tab. The Dashboard provides a quick view of the system’s current status along with other system-specific details.
Appendix B–10 • The J-Web Interface |
www.juniper.net |
Introduction to the Junos Operating System
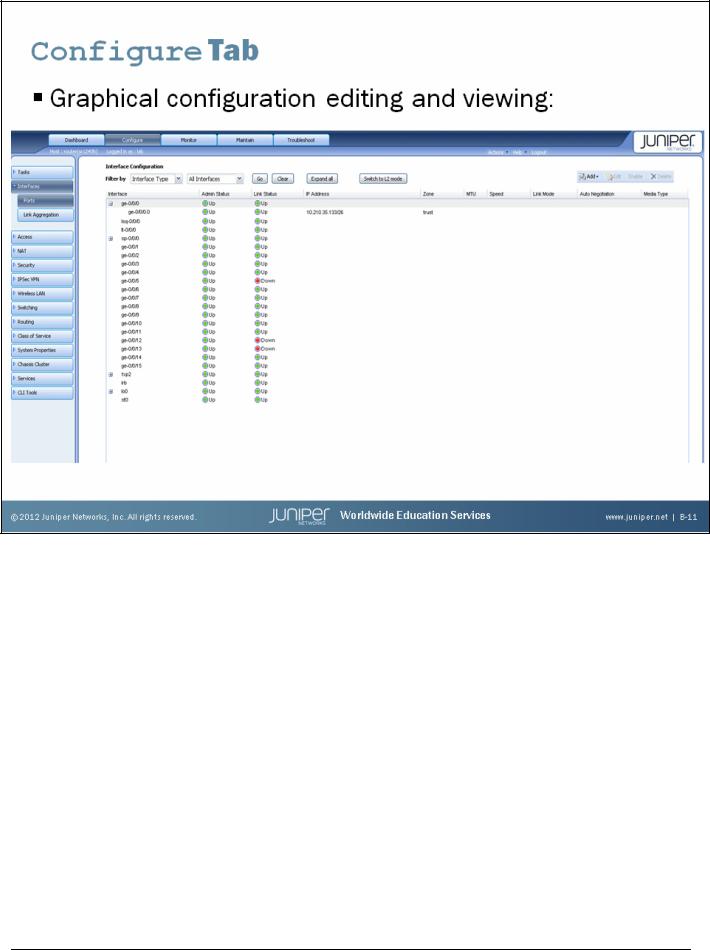
Performing Configuration Tasks with J-Web
J-Web offers an easy-to-use interface for configuring your Junos device. Choose which configuration hierarchy you want to view or edit in the left navigation menu. Information about that hierarchy appears on the main portion of the screen. You can select various options for viewing or editing. You can add new configuration options with the Add button or edit existing configuration options with the Edit button. These buttons and a Delete button are located near the top right of the screen.
If you prefer to manipulate your configuration with a text-based approach, choose the CLI Tools option at the bottom of the navigation menu.
www.juniper.net |
The J-Web Interface • Appendix B–11 |
Introduction to the Junos Operating System
Performance Monitoring
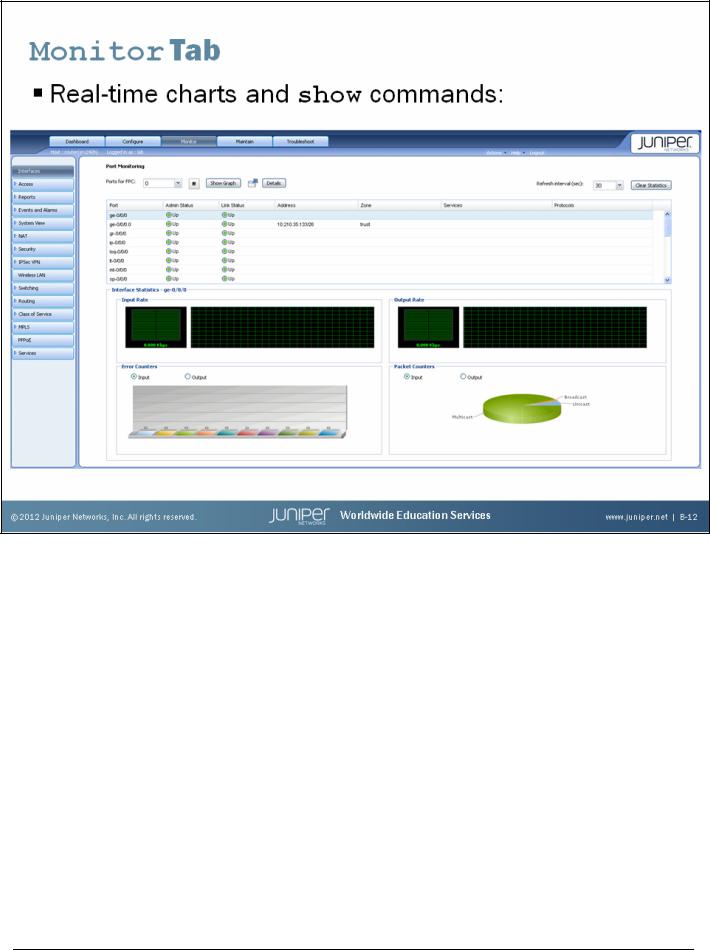
On the Monitor tab, you can view detailed real-time statistics and the results of configuration-related activity. As seen on the slide, the Interfaces hierarchy provides statistics in a graphical fashion using colorful charts and graphs. Use the drop-down menus to customize your view. Hovering the mouse pointer over various parts of the screen presents you with more detailed information. Most of the hierarchies on the left side of the screen are carry-overs from the Configure tab. Selecting these options provides a point-and-click alternative over CLI show commands.
Appendix B–12 • The J-Web Interface |
www.juniper.net |
Introduction to the Junos Operating System
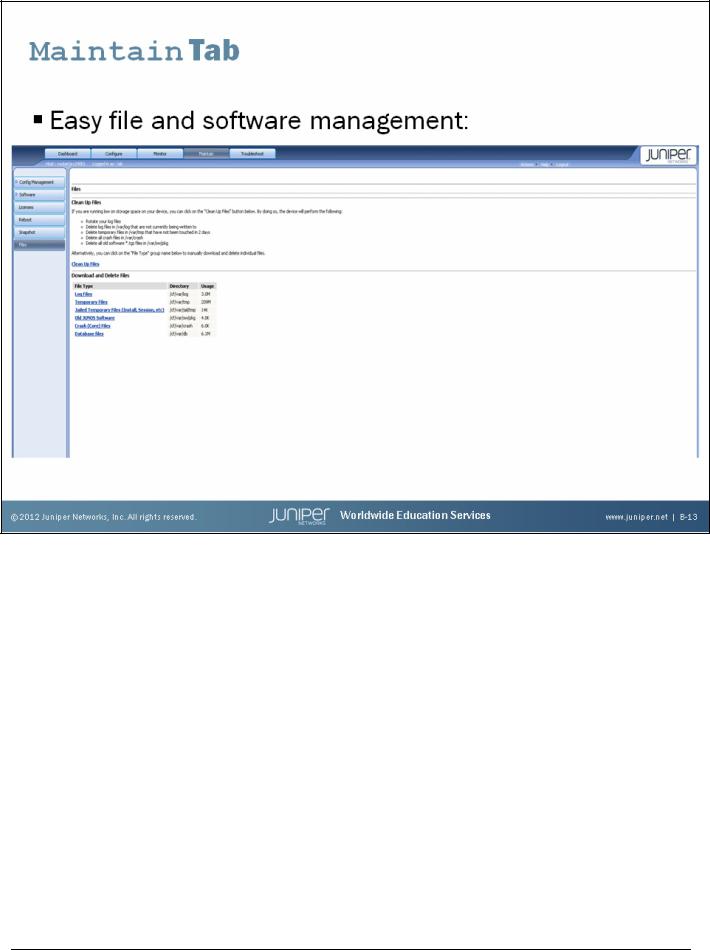
System Maintenance
The Maintain tab provides an interface to manage file systems, the Junos OS, and configuration files. Under the Files section, you can download and delete log files, memory dump files, and other temporary files to keep your flash memory device from becoming too full. Config Management allows you to retrieve historical configuration files and to compare differences between configurations. Choosing Software provides methods for upgrading and downgrading the Junos OS. You can automate the upgrade process by specifying a remote FTP server to retrieve the
Junos OS. The system then upgrades with the retrieved software and issues a reboot of the system to complete the upgrade process. The Licenses section provides the details on installed licenses on the system, allowing you to add licenses. The Reboot section allows you to schedule reboots and provides other options for rebooting the system.
www.juniper.net |
The J-Web Interface • Appendix B–13 |
Introduction to the Junos Operating System
Troubleshooting Tools
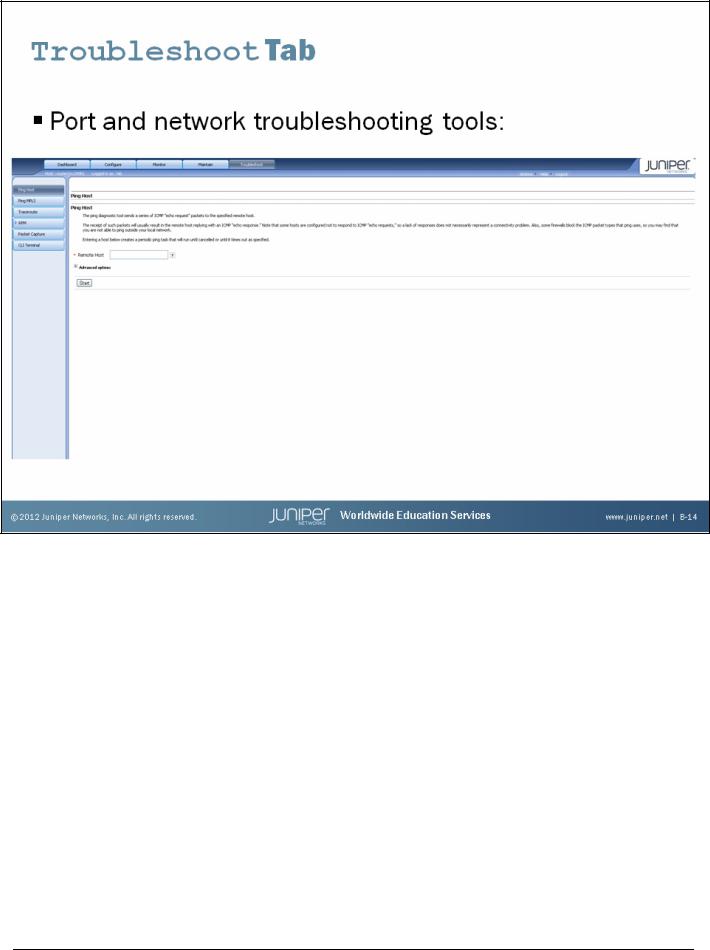
The Troubleshoot tab offers several useful utilities that can ease your troubleshooting efforts. You can troubleshoot individual ports, ping a remote host, perform a traceroute, capture packet dumps, and even open an embedded Java-based terminal session to your system.
Appendix B–14 • The J-Web Interface |
www.juniper.net |