
- •Contents
- •Course Overview
- •Course Agenda
- •Document Conventions
- •Additional Information
- •The Junos CLI (Detailed)
- •Overview
- •Part 1: Logging In and Exploring the CLI
- •Step 1.1
- •Step 1.2
- •Step 1.3
- •Step 1.4
- •Step 1.5
- •Step 1.6
- •Step 1.7
- •Step 1.8
- •Step 1.9
- •Step 1.10
- •Step 1.11
- •Step 1.12
- •Step 1.13
- •Step 1.14
- •Step 1.15
- •Step 1.16
- •Step 1.17
- •Step 1.18
- •Step 1.19
- •Initial System Configuration (Detailed)
- •Overview
- •Part 1: Loading a Factory-Default Configuration and Performing Initial Configuration
- •Step 1.1
- •Step 1.2
- •Step 1.3
- •Step 1.4
- •Step 1.5
- •Step 1.6
- •Step 1.7
- •Step 1.8
- •Step 1.9
- •Step 1.10
- •Step 1.11
- •Step 1.12
- •Step 1.13
- •Step 1.14
- •Step 1.15
- •Step 1.16
- •Part 2: Saving, Displaying, Loading, and Deleting a Rescue Configuration
- •Step 2.1
- •Step 2.2
- •Step 2.3
- •Step 2.4
- •Step 2.5
- •Step 2.6
- •Step 2.7
- •Step 2.8
- •Step 2.9
- •Part 3: Configuring Interfaces and Verifying Operational State
- •Step 3.1
- •Step 3.2
- •Step 3.3
- •Step 3.4
- •Secondary System Configuration (Detailed)
- •Overview
- •Part 1: Configuring User Authentication
- •Step 1.1
- •Step 1.2
- •Step 1.3
- •Step 1.4
- •Step 1.5
- •Step 1.6
- •Step 1.7
- •Step 1.8
- •Step 1.9
- •Step 1.10
- •Step 1.11
- •Step 1.12
- •Step 1.13
- •Step 1.14
- •Step 1.15
- •Step 1.16
- •Step 1.17
- •Step 1.18
- •Step 1.19
- •Part 2: Performing System Management Options
- •Step 2.1
- •Step 2.2
- •Step 2.3
- •Step 2.4
- •Step 2.5
- •Step 2.6
- •Step 2.7
- •Step 2.8
- •Step 2.9
- •Step 2.10
- •Step 2.11
- •Step 2.12
- •Step 2.13
- •Step 2.14
- •Step 2.15
- •Step 2.16
- •Step 2.17
- •Step 2.18
- •Operational Monitoring and Maintenance (Detailed)
- •Overview
- •Part 1: Monitoring System and Chassis Operation
- •Step 1.1
- •Step 1.2
- •Step 1.3
- •Step 1.4
- •Step 1.5
- •Step 1.6
- •Step 1.7
- •Step 1.8
- •Step 1.9
- •Step 1.10
- •Step 1.11
- •Step 1.12
- •Step 1.13
- •Step 1.14
- •Step 1.15
- •Step 1.16
- •Part 2: Using Network Utilities and Monitoring Traffic
- •Step 2.1
- •Step 2.2
- •Step 2.3
- •Step 2.4
- •Step 2.5
- •Step 2.6
- •Part 3: Upgrading the Junos OS
- •Step 3.1
- •Step 3.2
- •Step 3.3
- •Step 3.4
- •Step 3.5
- •Part 4: Recovering the Root Password
- •Step 4.1
- •Step 4.2
- •Step 4.3
- •Step 4.4
- •Step 4.5
- •Step 4.6
- •Step 4.7
- •Step 4.8
- •Lab 5 (Optional)
- •The J-Web Interface (Detailed)
- •Overview
- •Part 1: Logging In to and Exploring the J-Web Interface
- •Step 1.1
- •Step 1.2
- •Step 1.3
- •Step 1.4
- •Step 1.5
- •Step 1.6
- •Step 1.7
- •Step 1.8
- •Step 1.9
- •Part 2: Exploring J-Web Configuration and Diagnostic Capabilities
- •Step 2.1
- •Step 2.2
- •Step 2.3
- •Step 2.4
- •Step 2.5
- •Step 2.6
- •Step 2.7
- •Step 2.8
- •Step 2.9
- •Appendix A: Lab Diagrams

Introduction to the Junos Operating System
Step 1.9
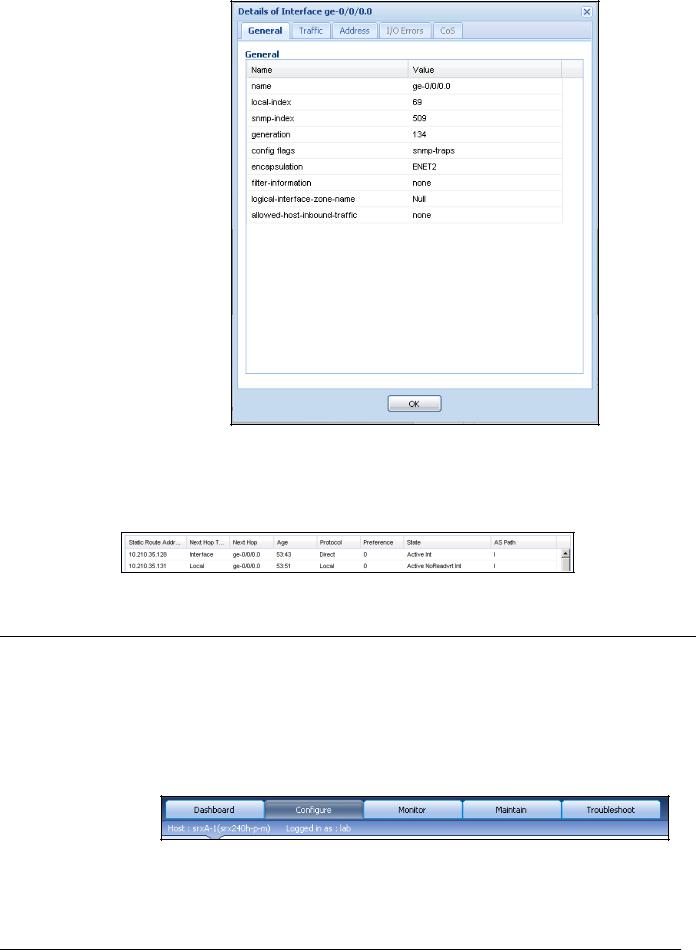
Navigate to Monitor > Routing > Route Information to view the current static routes.
Part 2: Exploring J-Web Configuration and Diagnostic Capabilities
In this lab part, you will familiarize yourself with the configuration and diagnostic capabilities available in the J-Web interface. You will also identify the key pages that relate to those capabilities.
Step 2.1
Access the J-Web configuration page by clicking the Configure tab.
Lab 5–8 • The J-Web Interface (Detailed) |
www.juniper.net |

Introduction to the Junos Operating System
Question: How do you display your station’s current configuration?
Answer: Click CLI Tools, then click the CLI
Viewer link. This example is taken from srxA-1.
Step 2.2
Navigate to Configure > System Properties > User Management.
Step 2.3
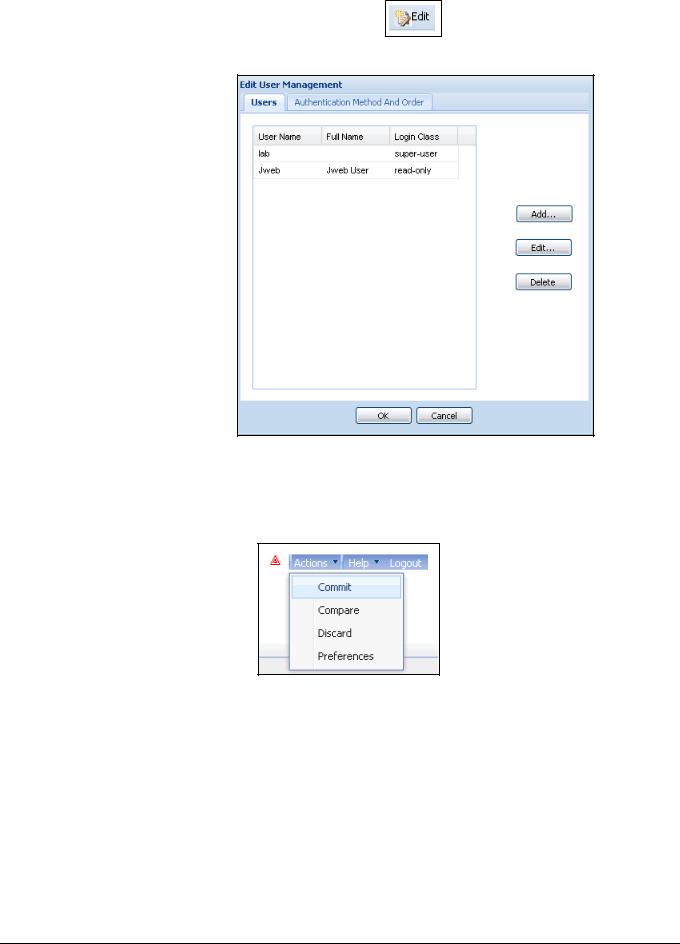
Click Edit. In the Edit User Management window, click Add and create the user Jweb. Use the password lab123 and fullname Jweb User. Keep the login class as read-only. Leave the User ID field blank. Click OK when complete.
www.juniper.net |
The J-Web Interface (Detailed) • Lab 5–9 |

Introduction to the Junos Operating System
Step 2.4
Commit the new user by clicking on Actions in the upper right corner, then click
Commit.
Step 2.5
Return to User Management and remove the Jweb user created earlier.
1.Navigate to Configure > System Properties > User Management.
2.Click Edit.
3.Highlight the Jweb user and click Delete.
4.Click OK.
Step 2.6
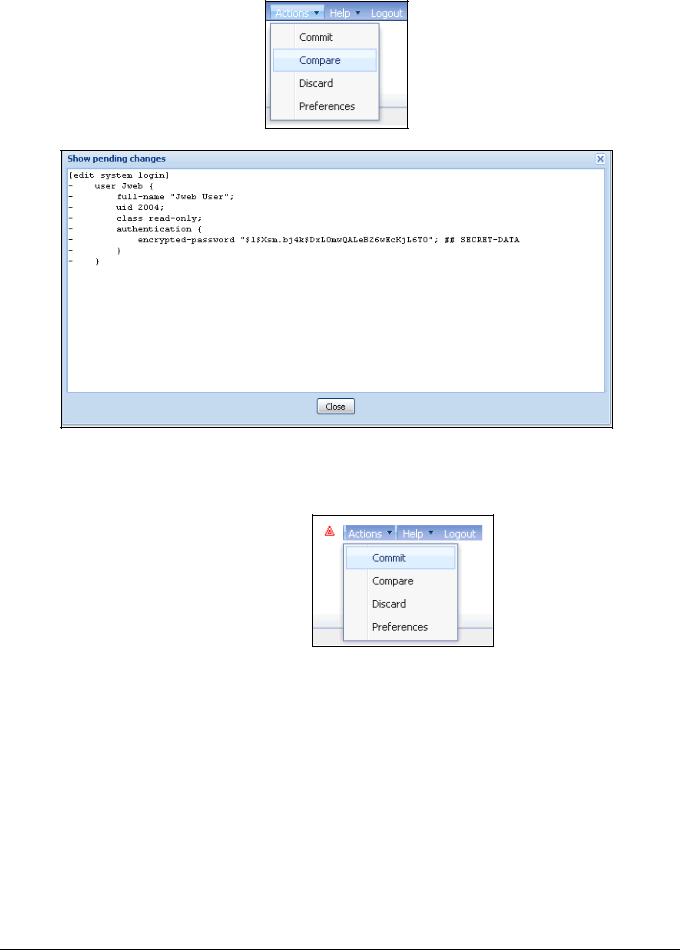
Click Actions, then click Compare to display changes in the configuration.
Lab 5–10 • The J-Web Interface (Detailed) |
www.juniper.net |

Introduction to the Junos Operating System
Step 2.7
Commit the changes by clicking on Actions then Commit.
Step 2.8
Navigate to Troubleshoot > Ping Host. Enter the IP address of the server in the management network and click Start to begin the ping.
www.juniper.net |
The J-Web Interface (Detailed) • Lab 5–11 |