

UM2553
User manual
STM32CubeIDE quick start guide
Introduction
This document is a brief guide for users to get started quickly with STMicroelectronics STM32CubeIDE.
STM32CubeIDE is an integrated development environment (IDE) based on the Eclipse® framework. It is aimed at users developing embedded software in C/C++ for STMicroelectronics STM32 MCUs and MPUs.
This manual provides basic information about:
•Information Center
•Workspace and projects
•Project information
•Debugging
UM2553 - Rev 3 - November 2021 |
www.st.com |
For further information contact your local STMicroelectronics sales office. |
|
|
|
UM2553
Information Center
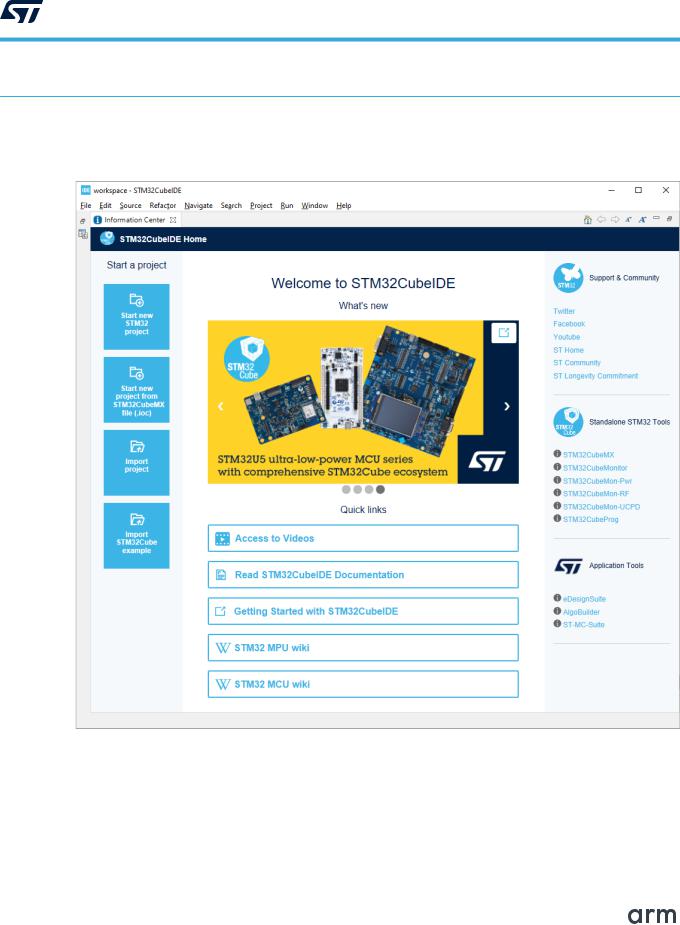
1Information Center
When STM32CubeIDE is started the first time, the Information Center opens.
Figure 1. STM32CubeIDE with Information Center
The Information Center enables the user to quickly reach information about the product and how to use it.
By clicking on the corresponding hypertext links, manuals are opened and latest information is obtained from the STMicroelectronics website at www.st.com.
It is not required to read all material before using STM32CubeIDE for the first time. Rather, it is recommended to consider the Information Center as a collection of reference information to return to.
The Information Center window can be reached at any time via the [Help]>[Information Center] command. When the Information Center tab is closed, the standard views in the C/C++ perspective are opened.
STM32CubeIDE supports STM32 32-bit products based on the Arm® Cortex® processor.
Note: |
Arm is a registered trademark of Arm Limited (or its subsidiaries) in the US and/or elsewhere. |
UM2553 - Rev 3 |
page 2/10 |
|
|

UM2553
Workspace and projects
2Workspace and projects
Figure 2. STM32CubeIDE with C/C++ perspective open, no project defined yet STM32CubeIDE is built using the Eclipse® framework; it inherits characteristics that may be unfamiliar to new users.
The Eclipse® editing environment uses perspectives. A perspective is a set of windows dedicated to a purpose.
The C/C++ perspective is dedicated to writing and editing code,
and navigating through projects. Users spend a lot of time in this perspective.
Another popular perspective is the Debug perspective, where users debug and test. Switching back and forth between perspectives is easy, and can even be automatic in some cases.
Workspace and projects: The next thing to do is create a project, which requires to introduce firstly the concept of workspace. A workspace is a container that includes project folders or information about project folders, and a .metadata folder that contains information about the projects. A workspace is simply a folder on a hard drive, which can be located anywhere in the storage media. When STM32CubeIDE starts up, it asks which workspace must be used. This may be changed at any time by selecting [File]>[Switch Workspace] and navigating to another folder.
Note: workspace and project names must contain only ascii characters. This is also valid for the path to the workspace.
Creating the first project: The easiest way to create a new |
Figure 3. New project wizard |
embedded project is to use the STM32 Project wizard. It |
|
is selected through the [File]>[New]>[STM32 Project] menu |
|
command, and launches the embedded MCUFinder: |
|
1.Select the target MCU or board and go to the next page
2.Enter a project name and select the setting wanted for the project in the dialogue boxes
3.Click on [Finish]. This brings up the STM32CubeMX window for configuring the peripherals, clock, middleware, and the power consumption.
Information gathered by the Project Wizard includes:
1.Target information, such as whether a given evaluation board must be used, or rather a given microcontroller.
2.Name of the project
3.Target language, binary type, and project type
4.Options for code generation
UM2553 - Rev 3 |
page 3/10 |
|
|
|
|
|
UM2553 |
|
|
|
Project information |
|
|
|
|
3 |
Project information |
|
|
|
|
|
|
|
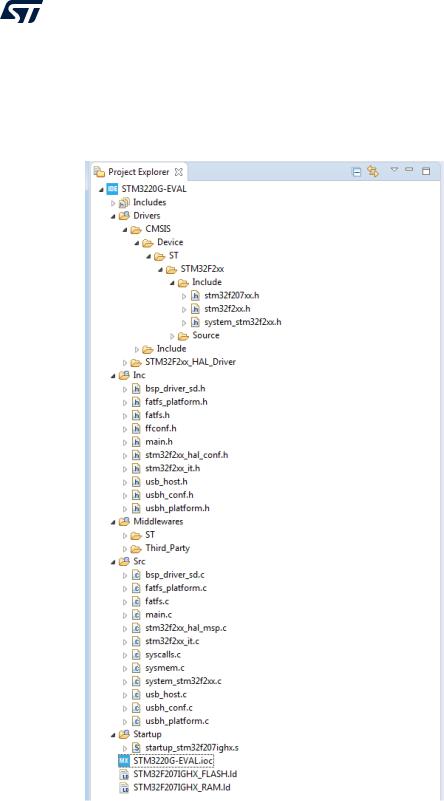
Figure 4. Project Explorer window populated with a project |
Once the information is entered in the wizard, |
|
|
|
it is possible to work in the project itself: |
|
|
|
• |
The Project Explorer docking view is |
|
|
|
populated with the selected project. |
|
|
|
In the Project Explorer window, the |
|
|
|
subfolders can be expanded to any |
|
|
|
desired sublevel. |
|
|
• |
The kind of project created by the |
|
|
|
Project Wizard depends on the device |
|
|
|
family. In any case, the project contains |
|
|
|
all the necessary elements of a |
|
|
|
complete embedded application, ready |
|
|
|
to program into the memory of the part |
|
|
|
and run. |
|
|
• |
When several projects exist in a |
|
|
|
workspace, it is possible to close some |
|
|
|
of them. The actions controlled by the |
|
|
|
icons such as run, or launch debug |
|
|
|
session then apply to the open projects. |
|
|
• |
Projects can be closed or opened by |
|
|
|
first right-clicking on the project name in |
|
|
|
the Project Explorer docking view and |
then selecting [Open Project] or [Close Project].
UM2553 - Rev 3 |
page 4/10 |
|
|
UM2553
Project information
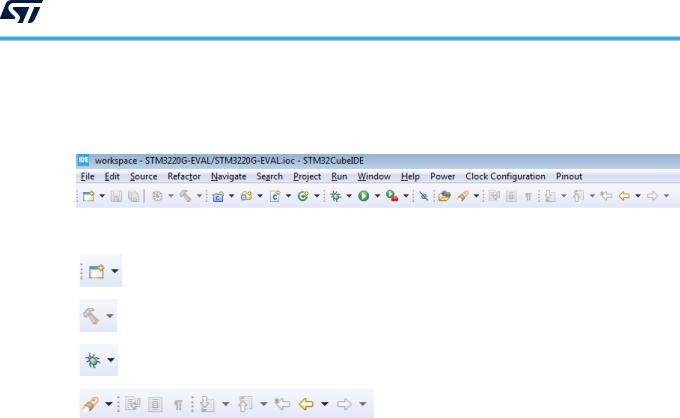
Controls: All control icons have tool tips activated by hovering the mouse over the icon. The icons are shortcuts for the same functions that can be activated from the main menu bar. These icons control specific functions that pertain to code editing, building and project management; they are unique to the C/C++ perspective.
Figure 5. Main control icons for editing, building, and project management
Use this icon to create new C source code module, header files, or new object such as project, library, or repository
([File]>[New] from the main menu options).
Use this icon to build your project.
Use this icon to launch a specific debug configuration, or configure a debug configuration by clicking on the arrow
(Functions can be activated in the [Run] option in the main menu).
The flashlight icon launches various search utilities; the arrows navigate among recently visited places in the project ([Search] and [Navigate] in the main menu options).
UM2553 - Rev 3 |
page 5/10 |
|
|