


Chapter 5 Source Control
Figure 5-33. Branch pushed to the server
The code is now safely on the GitHub repo. How do I get my changes into the master branch? For this, we will be creating a pull request.
Creating and Handling Pull Requests
The term pull request might sound strange to some folks that aren’t used to working with a source control system. The “pull” means to request that your code be pulled into the main working branch of the source code. Some developers also refer to a pull request as a merge request.
In Visual Studio, we can easily create a pull request. By doing this, we are telling the team that our code is ready to be peer-reviewed and, if it’s good, merged into the main master branch.
You will remember that in the previous section, we created a branch and added all our new features to the branch. Then we committed those changes to Git (locally) before pushing them up to GitHub.
To create a pull request, click the Git menu in Visual Studio and select GitHub New Pull Request.
274
Chapter 5 Source Control
Figure 5-34. Create a pull request
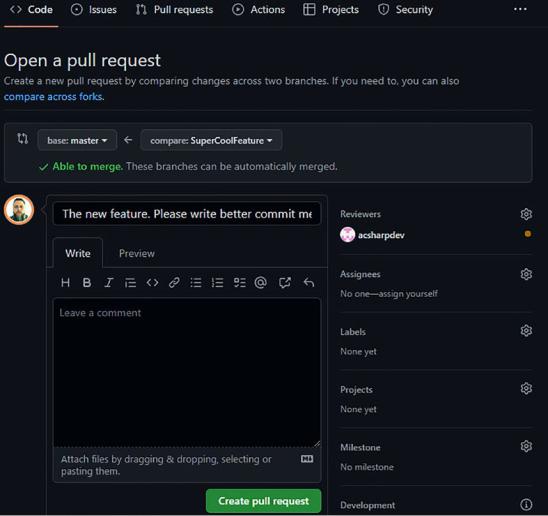
You will see that (Figure 5-34) you are taken to GitHub where you can now create a pull request by clicking the “Create pull request” button. Before doing that, select a reviewer (in this case, the acsharpdev user) and enter some pull request details (Figure 5-35).
275

Chapter 5 Source Control
Figure 5-35. Pull request details
276
Chapter 5 Source Control
When you have added all the required details, you click the Create pull request button. This pull request will now go to the acsharpdev user where he can review my code, add comments, and hopefully approve my changes.
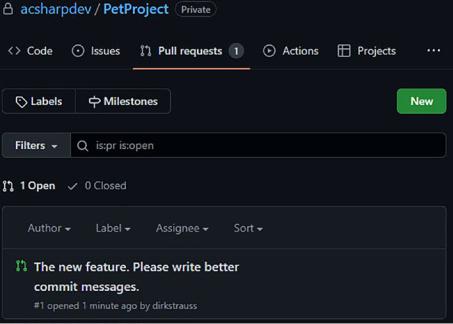
When the pull request is successfully created, you will see the pull request by going to the Pull requests tab on GitHub (Figure 5-36).
Figure 5-36. Pull request created
277
Chapter 5 Source Control
Figure 5-37. New pull request notification
On the other side of the continent, the acsharpdev user has just finished working on some code and sees my pull request on GitHub under the Review requests tab (Figure 5-37).
He can now click the pull request that I created to view the details (Figure 5-38).
278

Chapter 5 Source Control
Figure 5-38. View pull request details
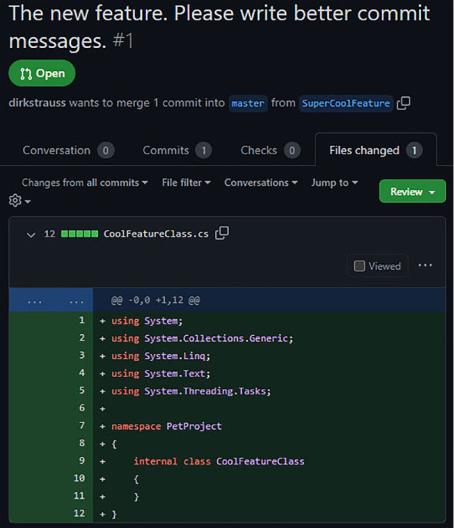
By clicking the Files changed tab (Figure 5-39), he can see that I only added a new class called CoolFeatureClass.
279
Chapter 5 Source Control
Figure 5-39. View differences
Clicking the new class I added, John will not see a diff (because this is a new class), but he is still able to review the code.
280
Chapter 5 Source Control
Figure 5-40. Review code in pull request
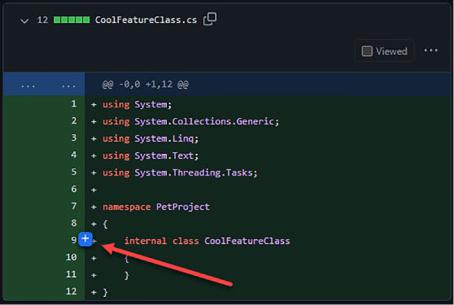
Hovering your mouse over the code, you will see a plus sign appear (Figure 5-40).
281
Chapter 5 Source Control
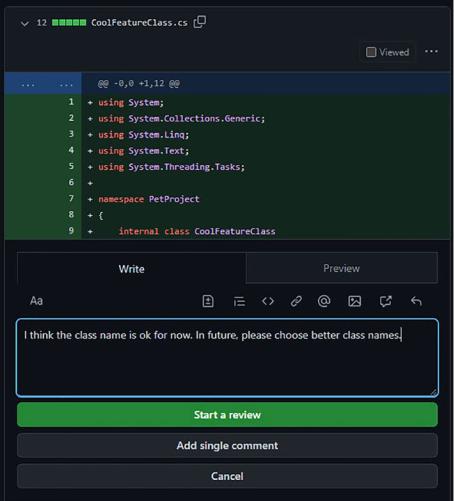
Figure 5-41. Adding comments to pull requests
Clicking the plus sign will allow him to add a comment to the code I have added (Figure 5-41). Once the comments have been added, I can see these in the pull request I created on GitHub (Figure 5-42).
282
Chapter 5 Source Control
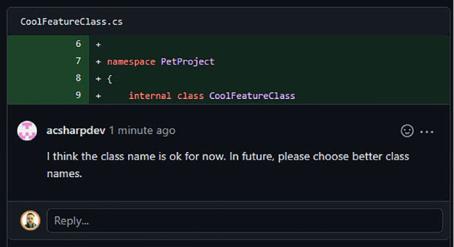
Figure 5-42. View pull request comments
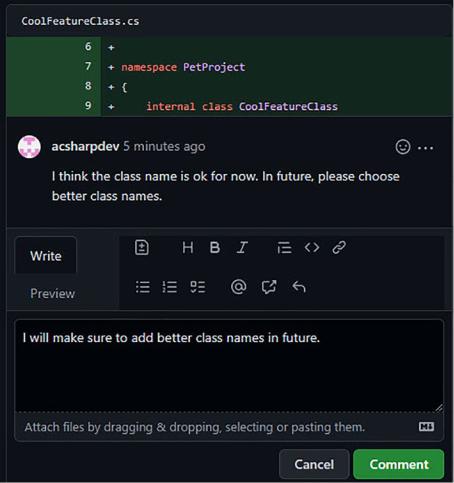
This allows me to see the comments John added and take any action if needed. I can now reply to the comment as seen in Figure 5-43.
283
Chapter 5 Source Control
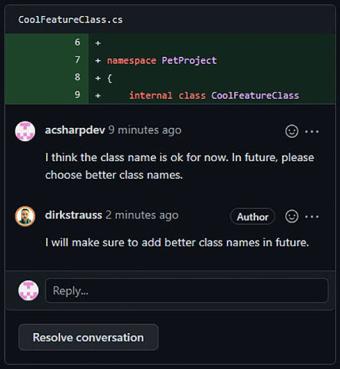
Figure 5-43. View review comments
He can now click the Resolve conversation button under the Conversation tab and then approve the pull request (Figure 5-44).
284
Chapter 5 Source Control
Figure 5-44. Approving a pull request
285
Chapter 5 Source Control
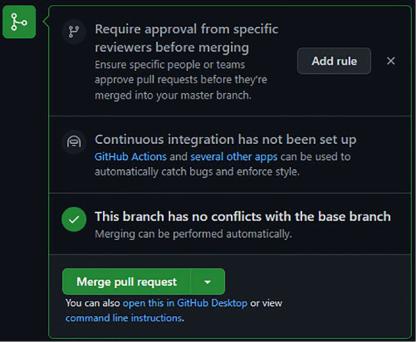
When the conversation is resolved, the pull request can be merged into the master branch. For this, we need to click the Merge pull request button on GitHub to do the merge as seen in Figure 5-45.
Figure 5-45. Merge pull request on GitHub
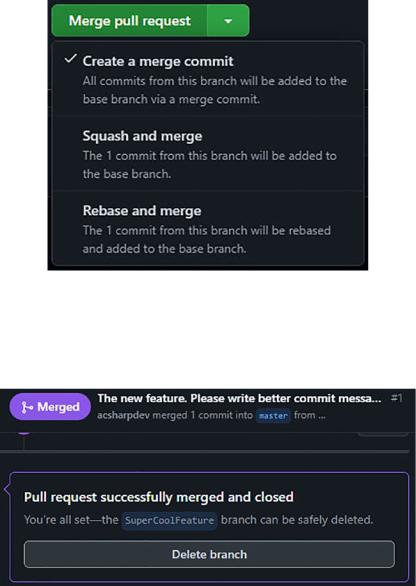
Looking at Figure 5-46, you will see that we have three options when clicking the Merge pull request drop-down. These are
•\ |
Create a merge commit |
•\ |
Squash and merge |
•\ |
Rebase and merge |
286
Chapter 5 Source Control
The default option is Create a merge commit and will take the commits from the pull request and merge them into the master branch creating a new commit in a merge commit. Squashing is a lot like rebasing a branch, because you can take a multiple commit pull request and squash it down into a single commit. Rebasing, on the other hand, provides a way to keep the Git history clean by taking the feature branch and “transplant” the commits on top of the master branch.
Figure 5-46. Merge pull request
After the merge is complete in GitHub, I can safely delete my SuperCoolFeature branch as seen in Figure 5-47.
Figure 5-47. Pull request merged into the master branch
287
Chapter 5 Source Control
I can now switch to my master branch and pull the changes to get the new feature into my local master branch. Switch to your master branch by clicking the branch name in the bottom-right toolbar of Visual Studio and selecting master from there.
Then, click the Fetch arrow in the Git Changes tab and then on the incoming link. There I will see all the incoming commits as seen in Figure 5-48.
Figure 5-48. View incoming commits
Notice that the branch displayed under Branches is the master branch. This is because we switched to our local master branch in Git. The new feature was merged with the remote master branch on GitHub by the acsharpdev user a few minutes ago. I need to pull those changes into my local master branch to get it up to date. To do this, I click the Pull arrow next to the Fetch arrow in the Git Changes tab.
288
Chapter 5 Source Control
Fetch only downloads the changes from the remote repository (GitHub) but does not integrate the code into your local branch. Fetch just really shows you what changes there are that need to be merged into your local branch.
Pull is used to update your local branch with the latest changes on the remote repository. This merge might potentially result in merge conflicts that you need to resolve before continuing.
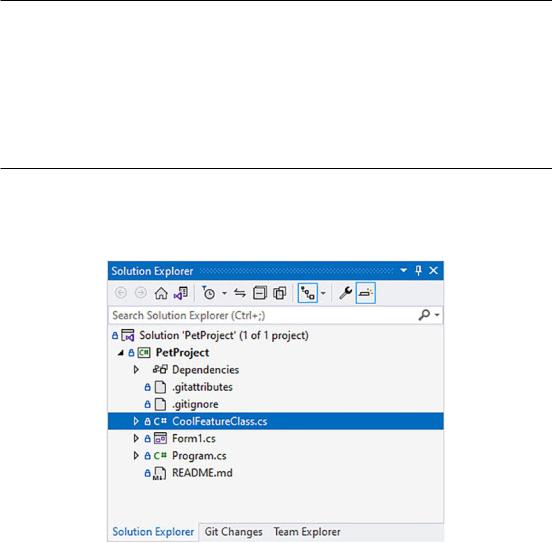
After the pull has completed and the changes have been merged into my local master branch, my Solution Explorer will show the new class I added earlier to my feature branch, in my local master (Figure 5-49).
Figure 5-49. Local master branch merged
At this point, because the changes have been merged into the master branch, and my local master branch has been updated, I can safely delete the feature branch I created earlier.
Using pull requests allows developers to have a lot more control over the code that gets merged into the main working branch of the project. Using branches allows me to make changes to the code in an isolated manner without risking the stability of the master branch.
289
Chapter 5 Source Control
Working withStashes
Sometimes, you might be working on some changes, and you continue to make a whole range of changes without noticing that you are working on the wrong branch.
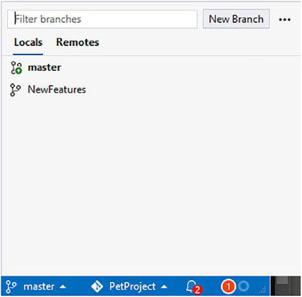
In Figure 5-50, you can see that we are currently working on the master branch. I should be making all my changes on the NewFeatures branch. This is a very easy mistake to make (perhaps not with the master branch), especially if you are working in several different branches in your code.
Figure 5-50. Working in the master branch
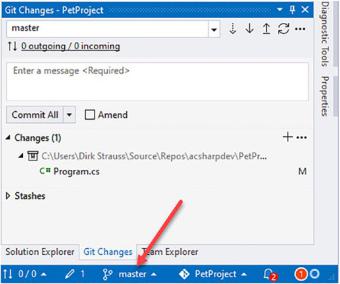
Switching to the Git Changes tab, I notice that I have made all my changes on the master branch (Figure 5-51) instead of on the correct NewFeatures branch.
290
Chapter 5 Source Control
Enter a world of pain, because I now need to backtrack everything I did and remove the code and then go and apply these to the correct branch. This is where stashes come in very handy.
Figure 5-51. Changes in the incorrect branch
Stashing takes all the changes I have made and puts them away locally (Figure 5-52). It then reverts all the changes I had made to the master branch. This means that I have my master branch back to the way it was before the changes were made.
291

Chapter 5 Source Control
Figure 5-52. Stash the changes on master
When I stash my changes, they appear under the Stashes section (Figure 5-53).
Figure 5-53. Changes stashed
I can then go and switch to the correct branch as seen in Figure 5-54.
292

Chapter 5 Source Control
Figure 5-54. Change to correct branch
With my correct branch selected (Figure 5-55), I can view the changes, apply them, pop them, or drop the changes. The options are
•\ |
Apply – Apply the changes to the branch and keep the stash. |
•\ |
Pop – Apply the changes to the branch and drop the stash. |
•\ |
Drop – This will delete the stash without applying anything. |
293