

Chapter 5 Source Control
Figure 5-2. Create a new repository
The next logical step is to create a repository for your new project. Let’s have a look at that in the next section.
Create and Clone a Repository
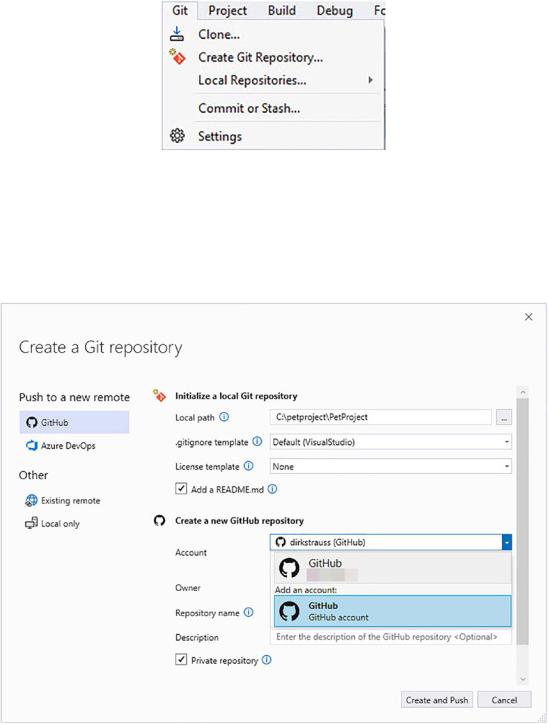
Visual Studio 2022 makes it extremely easy to create a repository on GitHub. I have created a simple Windows Forms application called PetProject in Visual Studio that just contains some boilerplate code. This is only temporary. Before I start writing actual code, I want to set up my GitHub repo. From the menu in Visual Studio, select Git and click Create Git Repository as seen in Figure 5-3.
248
Chapter 5 Source Control
Figure 5-3. Create Git Repository
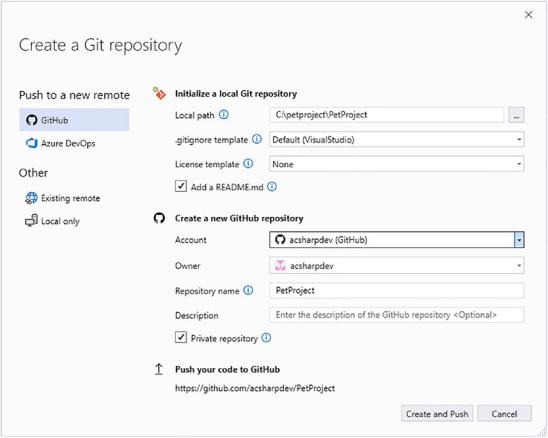
You will then be presented with the Create a Git repository window as seen in Figure 5-4. The window will default the local path to the path that your project is currently saved in. I always add a README file to my repos and keep the rest set to the default options regarding the license template and .gitignore template.
Figure 5-4. Create a Git repository
249
Chapter 5 Source Control
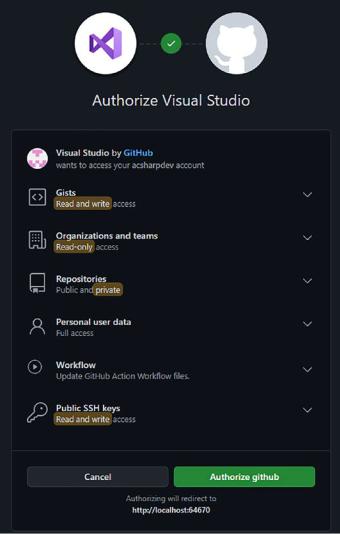
Because I already have a GitHub account, the Account drop-down will default to that account. If you do not have a GitHub account, you can add a GitHub account from the drop-down. When you click Add a GitHub account, you will be taken to your account on GitHub to authorize Visual Studio as seen in Figure 5-5.
Figure 5-5. Authorize Visual Studio in GitHub
After authorizing Visual Studio, you will be prompted for your GitHub password and then redirected back to Visual Studio where the Create a Git repository window will display the connected GitHub account as seen in Figure 5-6.
250
Chapter 5 Source Control
Figure 5-6. Create and push your code
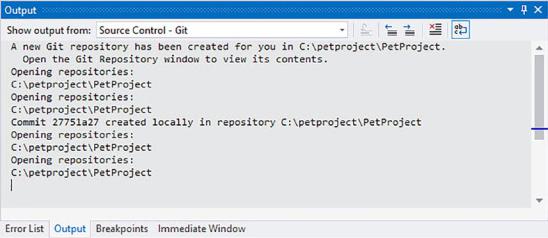
You can now click the Create and Push button that will create the repo on GitHub for you. This will also create a new local Git repository for your solution. Open up the Output Window (Ctrl+Alt+O) from the View menu and click Output. Here, you will see that a new local Git repository has been created (Figure 5-7).
251
Chapter 5 Source Control
Figure 5-7. New Git repository created
It is important to remember that this project is now under source control using Git. Remember that we mentioned earlier that Git is the source control plumbing, the tool that developers install locally on their machines.
If you never want a backup of your code in the cloud, or never want to collaborate with other developers, you can just use Git. This is, however, a quite unlikely scenario, especially now that GitHub allows you free private repositories.
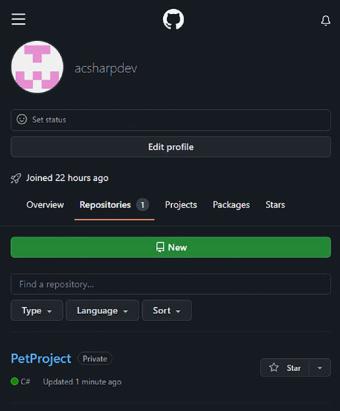
Therefore, you pushed your code to a GitHub repository after connecting your account. You can see that the repository has been created for you by going to your GitHub account as seen in Figure 5-8.
252
Chapter 5 Source Control
Figure 5-8. The created repository on GitHub
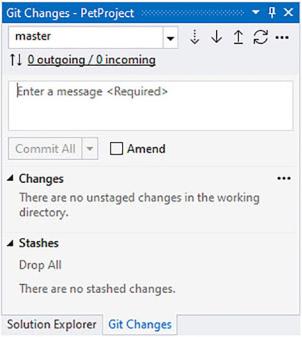
There you will see the Private PetProject repo you just pushed from Visual Studio. Next to the Solution Explorer, you will see the Git Changes tab as seen in Figure 5-9.
Currently, there are no changes in our project to commit.
253
Chapter 5 Source Control
Figure 5-9. The Git Changes
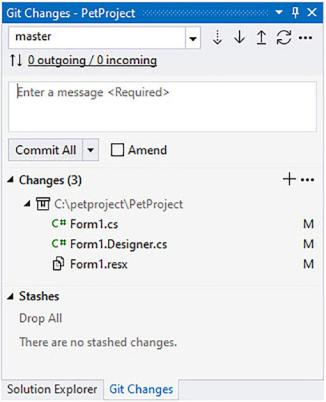
Make some UI or code changes to your project, and you will see that the Git Changes window will be updated to display all the changes that have not been committed to your Git repo as seen in Figure 5-10.
254
Chapter 5 Source Control
Figure 5-10. Git Changes showing changes files
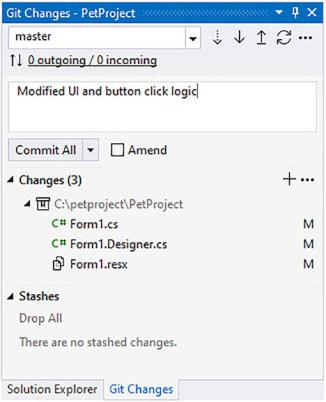
Enter a commit message as seen in Figure 5-11 and then click the drop-down arrow next to the Commit All button.
255
Chapter 5 Source Control
Figure 5-11. Entering a commit message
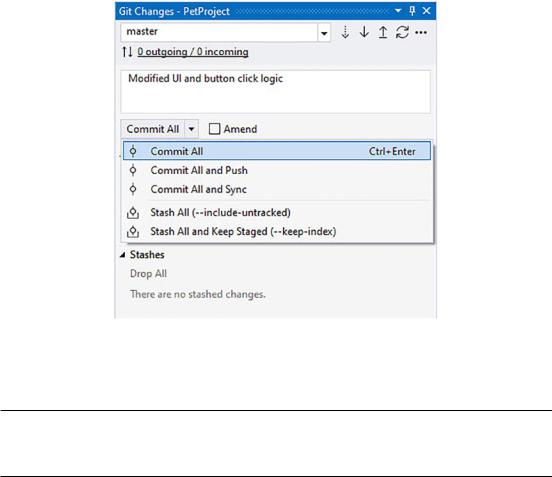
Here, you can see the options for committing your code as seen in Figure 5-12. You can simply commit all your changes, commit and push to the remote repo, commit to the remote repo and do a sync, or stash your code.
256
Chapter 5 Source Control
Figure 5-12. Commit options
We are just going to commit the changes without pushing to the remote repo.
Remember, the Commit All will create the changes locally. Nothing will be created on the remote GitHub repo yet.
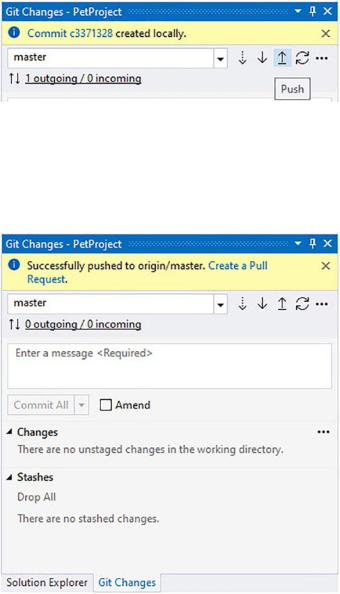
After clicking the Commit All option, the Git Changes tab will tell you that the changes were committed locally and display the commit ID (in this case, c3371328) as seen in Figure 5-13.
257
Chapter 5 Source Control
Figure 5-13. Commit the changes locally
You might want to commit locally while working on code, and you are not quite ready to push the changes to the remote. This is a nice workflow to follow. Make some changes, commit locally with a specific commit message, make some more changes, commit again with another commit message, and so on.
Note Each commit message and ID will also be visible on GitHub along with the files that have changed.
When you have completed the changes, and committed everything locally, you can push these changes to the remote repo by clicking the Push arrow as seen in Figure 5-14.
258
Chapter 5 Source Control
Figure 5-14. Push changes to the remote repo
Doing this will push the changes to GitHub, and you will be notified in the Git Changes tab that your changes have been pushed to the remote repo on GitHub as seen in Figure 5-15.
Figure 5-15. Successful push to the remote repo
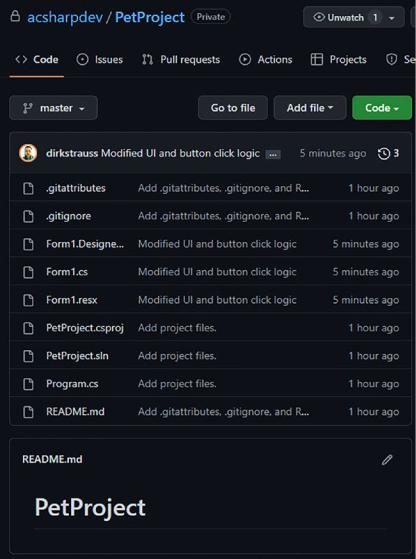
If you go to your GitHub repository, you will see that the code you pushed is displayed in your repo (Figure 5-16) along with the commit message entered earlier in Figure 5-11.
259
Chapter 5 Source Control
Figure 5-16. The pushed changes in GitHub
It is also nice to remember that if you have made changes to a file that you have not committed yet and want to change the file back to the state it was since the last commit, you can undo these changes easily. As seen in Figure 5-17, I have made some changes to the README file that I no longer want.
260
Chapter 5 Source Control
Figure 5-17. Changed files you want to undo
By right-clicking the file as seen in Figure 5-18 and selecting Git Undo Changes from the context menu, you can revert the file back to the state it was after the
last commit.
261
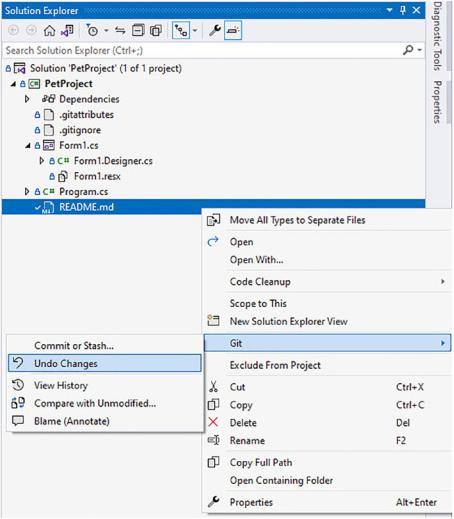
Chapter 5 Source Control
Figure 5-18. The Undo Changes option
This is nice, especially when you have made some debug-specific changes to a config file that you do not want to commit to source control.
Cloning aRepository
What I want to do now is have another colleague of mine contribute to my project. Seeing as this is a private repository, I need to invite him to collaborate. In GitHub, go to the settings tab in your repository. Then click Collaborators as seen in Figure 5-19.
262
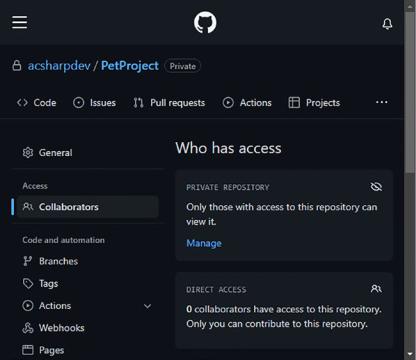
Chapter 5 Source Control
Figure 5-19. Add collaborators
The free account can have three collaborators, so this will be using one of your allotted collaborators. You can now add collaborators to your repository by searching for their GitHub username and adding them as a collaborator. In this example, I will add myself as a collaborator. I will now receive a notification in my inbox that @acsharpdev wants me to work on his project with him (Figure 5-20).
263

Chapter 5 Source Control
Figure 5-20. Invitation to collaborate
Once I accept the invitation, I will have push access to the project. The @acsharpdev user will now see me as a collaborator under the collaborator’s tab in GitHub. To start working on the code, I need to clone the repository to my local machine. Start Visual Studio, and then click the Clone a repository option under the Get started section of the Visual Studio start screen (Figure 5-21).
264
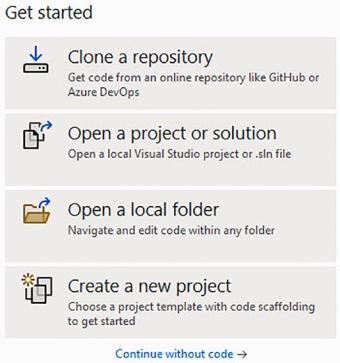
Chapter 5 Source Control
Figure 5-21. Clone or check out code
This will take you to the Clone a repository screen as seen in Figure 5-22.
265
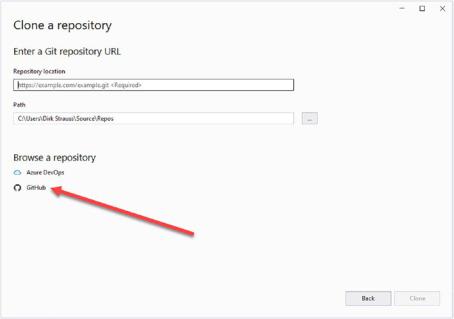
Chapter 5 Source Control
Figure 5-22. Clone from GitHub
From this screen, you can enter the repository location to get the code from, but because I am a collaborator on this GitHub project, I can simply click the GitHub option (Figure 5-22).
This will display the Open from GitHub screen (Figure 5-23).
266
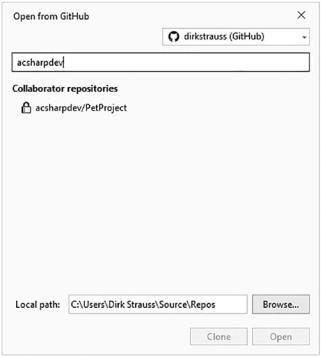
Chapter 5 Source Control
Figure 5-23. Open from GitHub
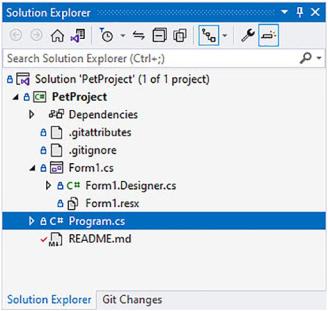
It is here that I will see the project that I have been invited to under the Collaborator repositories. Select the project, ensure that the local path is correct, and click the Clone button. The Visual Studio project is then cloned to my local machine. In previous versions of Visual Studio, you would see the repo in the Team Explorer window. Opening Team Explorer in Visual Studio 2022, you will see that the Git features have moved to their own window (Figure 5-24).
267