

Chapter 2 Working with Visual Studio 2022
Being able to add custom tokens in Visual Studio, as well as applying a priority to each, allows you to be very specific with comments that contain tokens. This way, you can significantly increase the ease and efficiency of navigating a large code base.
The Server Explorer
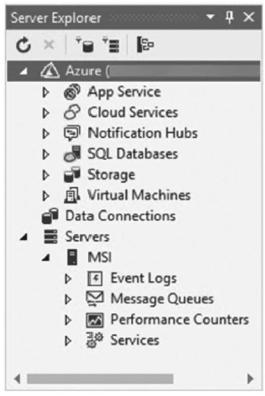
As the name suggests, the Server Explorer provides a quick and easy way of accessing servers. You can use it to test connections and view SQL Server databases or any databases that have the ADO.NET provider installed.
You can access the Server Explorer by holding down Ctrl+Alt+S or by going to the View menu and clicking Server Explorer.
Figure 2-63 shows that the Server Explorer offers access to Event Logs, Message Queues, Performance Counters, and Services on my local machine (MSI). It also provides access to my Azure subscriptions.
Figure 2-63. Server Explorer
140
Chapter 2 Working with Visual Studio 2022
I have a local instance of SQL Server installed, so now I can connect to this instance right from within Visual Studio by clicking Connect to Database.
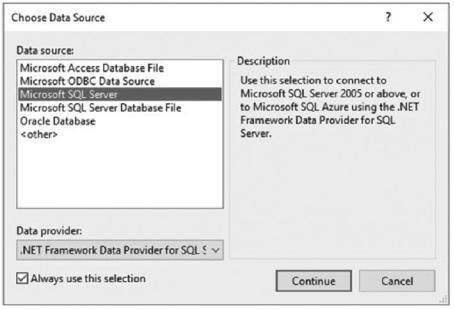
This displays a window allowing you to choose a data source, as seen in Figure 2-64. You can connect to various data sources, but we are only interested in Microsoft SQL Server for now. Select that from the list and click Continue.
Figure 2-64. Choose Data Source
The following window (Figure 2-65) allows you to define your connection to the database. Here, you need to specify the server name and the authentication type, and if SQL Server Authentication is selected, provide the username and password.
141

Chapter 2 Working with Visual Studio 2022
Figure 2-65. Add Connection
This allows you to select a database from the list to connect to. You can click the Test Connection button to check if the connection settings are correct.
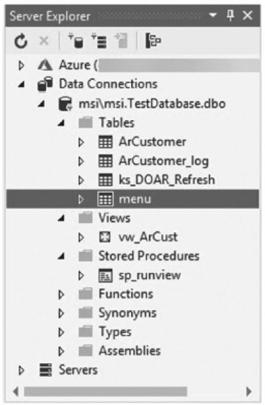
After adding the database to your Server Explorer, you will see the instance added to your list from where you can expand the various nodes to view Tables, Views, and Stored Procedures, as seen in Figure 2-66.
142
Chapter 2 Working with Visual Studio 2022
Figure 2-66. Database added to Server Explorer
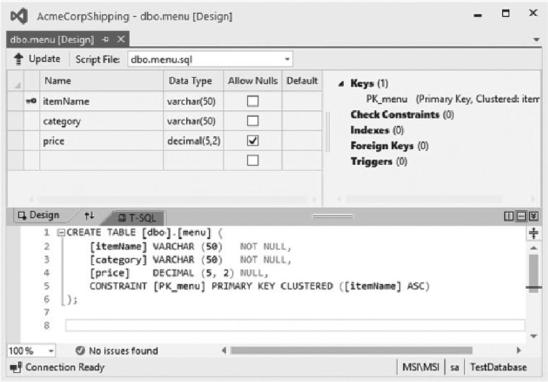
By double-clicking a table, Visual Studio displays the table designer for you and a create table SQL statement, as seen in Figure 2-67.
143
Chapter 2 Working with Visual Studio 2022
Figure 2-67. Table designer
From this window, you can easily update the table. The create table statement in Figure 2-67 is listed in Listing 2-25.
Listing 2-25. Create Table Statement
CREATE TABLE [dbo].[menu] ( |
|
|
[itemName] |
VARCHAR (50) |
NOT NULL, |
[category] |
VARCHAR (50) |
NOT NULL, |
[price] |
DECIMAL (5, 2) NULL, |
|
CONSTRAINT |
[PK_menu] PRIMARY KEY CLUSTERED ([itemName] ASC) |
|
); |
|
|
We can now modify the menu table by altering the SQL statement as shown in Listing 2-26.
144
Chapter 2 Working with Visual Studio 2022
Listing 2-26. Modified Create Table Statement
CREATE TABLE [dbo].[menu] ( |
|
||
[itemName] |
VARCHAR |
(50) |
NOT NULL, |
[category] |
VARCHAR |
(50) |
NOT NULL, |
[price] |
DECIMAL |
(5, 2) NULL, |
|
[priceCategory] |
VARCHAR (5) NULL, |
||
CONSTRAINT |
[PK_menu] PRIMARY KEY CLUSTERED ([itemName] ASC) |
||
); |
|
|
|
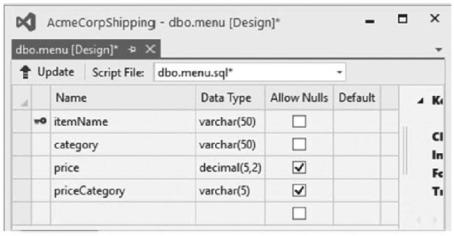
I want to add a price category field to the table. When I modify the create table statement, I see the changes reflected in the table designer, as seen in Figure 2-68.
Figure 2-68. Table design updated
The changes have not been applied to my table yet. To update the table, I need to click the Update button.
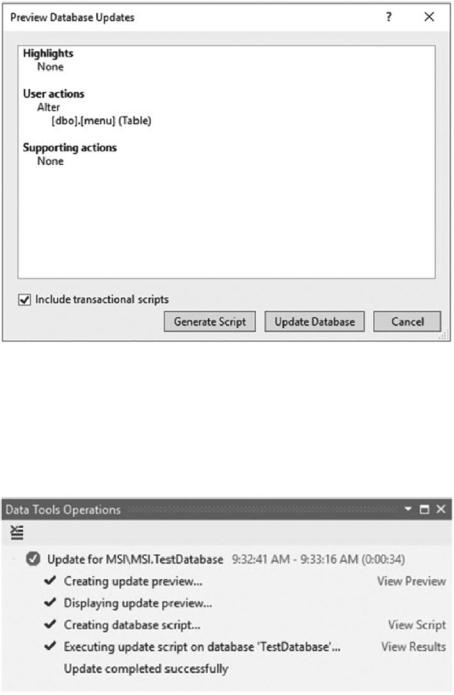
This allows me to preview the database updates, as seen in Figure 2-69. If you do not want to let Visual Studio update the table, you can have it generate the script by clicking the Generate Script button. Alternatively, you can go ahead and click the Update Database button.
145
Chapter 2 Working with Visual Studio 2022
Figure 2-69. Preview Database Updates
This will then start the process of updating the database table with the changes you made.
After the update, you can see the results in the Data Tools Operations window, as seen in Figure 2-70. From here, you can view the script and the results.
Figure 2-70. Data Tools Operations
146