

Chapter 12 Testing
Adding Your Own Unit Tests
There are some steps that you need to follow in order to make sure that you can unit test your .NET MAUI application. Let’s add a test project to the solution and then make the necessary changes.
Adding a Unit Test Project to Your Solution
\1.\ Click the File menu.
\2.\ Click Add.
\3.\ Click New Project.
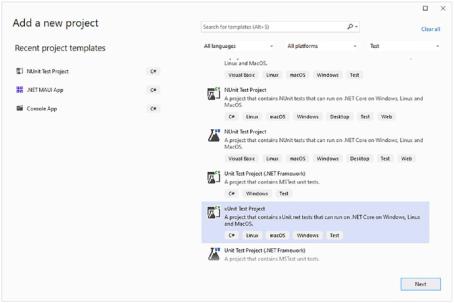
\4.\ Enter Test in the Search for templates box. Figure 12-1 shows the Add a new project dialog in Visual Studio.
Figure 12-1. Add a new project dialog in Visual Studio
368
Chapter 12 Testing
\5.\ Select xUnit Test Project.
\6.\ Click Next.
\7.\ Enter a name for the project. I opted for WidgetBoard.Tests and find that appending .Tests or
.UnitTests provides a common way to distinguish between application and test projects. This is also a common naming convention that simplifies searching for all unit test projects when running in a CI pipeline. I will cover this in more detail in Chapter 14.
\8.\ Click Next.
\9.\ Select the framework. The default should be fine; just make sure it matches the target version of the
.NET MAUI application project.
\10.\ Click Create.
Modify Your Application Project to Target net7.0
Sadly, the current .NET MAUI project template does not include the net7.0 target framework, meaning that it is not initially compatible with a standard unit test project. In order to correct this, you can manually add the net7.0 target framework. Open the WidgetBoard/WidgetBoard. csproj file in Visual Studio Code or your favorite text editor and make the following changes.
Modify the first TargetFrameworks element to include net7.0; changes are in bold:
<TargetFrameworks>net7.0;net7.0-android;net7.0-ios;net7.0- maccatalyst</TargetFrameworks>
369

Chapter 12 Testing
Add a Condition attribute to the OutputType element; changes are in bold:
<OutputType Condition="'$(TargetFramework)' != 'net7.0'">Exe </OutputType>
Without this second change you will see a compilation error reporting that error CS5001: Program does not contain a static 'Main' method suitable for an entry point. This is due to the fact that you are building an application and .NET applications expect to have a static Main method
as the entry point to the application. The OutputType for .NET MAUI applications must be Exe, which might feel slightly confusing as you rarely end up with an exe file that will be delivered.
If you are building against a newer version of .NET MAUI, you can replace net7.0 with the version you are using, such as net8.0.
Adding a Reference to the Project to Test
Now you need to add a reference from your test project onto the main application project.
\1.\ Right-click WidgetBoard.Tests.
\2.\ Click Add.
\3.\ Click Project Reference.
\4.\ Select WidgetBoard from the list. Figure 12-2 shows the Reference Manager dialog in Visual Studio.
370

Chapter 12 Testing
Figure 12-2. Reference Manager in Visual Studio
\ 5.\ Click OK.
Modify Your Test Project to Use MAUI Dependencies
The final step is to make your test project bring in the .NET MAUI dependencies just like the main application project. Open up the
WidgetBoard.Tests/WidgetBoard.Tests.csproj file in Visual Studio Code or your favorite text editor and make the following changes
Add <UseMaui>true</UseMaui> into the top-level PropertyGroup element, which should now look like this; the changes are in bold:
<PropertyGroup>
<TargetFramework>net7.0</TargetFramework>
<ImplicitUsings>enable</ImplicitUsings>
<Nullable>enable</Nullable>
<UseMaui>true</UseMaui>
371