

Основы проектирования защищенных телекоммуникационных систем
..pdf51
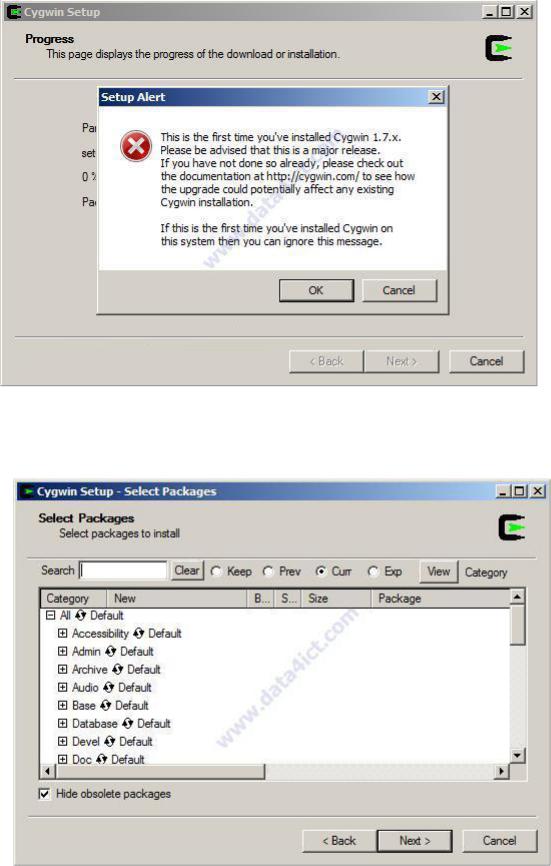
Выбираем сайт, с которого будет идти скачивание
Рис. 2.29. Установка cygwin
Дождитесь до полной скачки файлов
Рисунок 2.30. Установка cygwin
52
При выскакивании ошибки нажмите Ок
Рис. 2.31. Установка cygwin
Нажмите next
Рис. 2.32. Установка cygwin
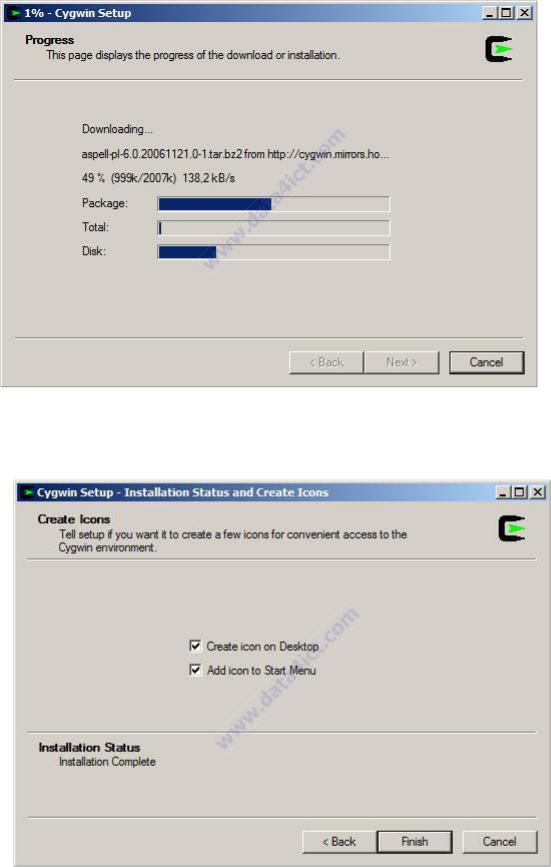
Дождитесь полного скачивания
53
Рис. 2.33. Установка cygwin
Клик finish
Рис. 2.34. Установка cygwin
54
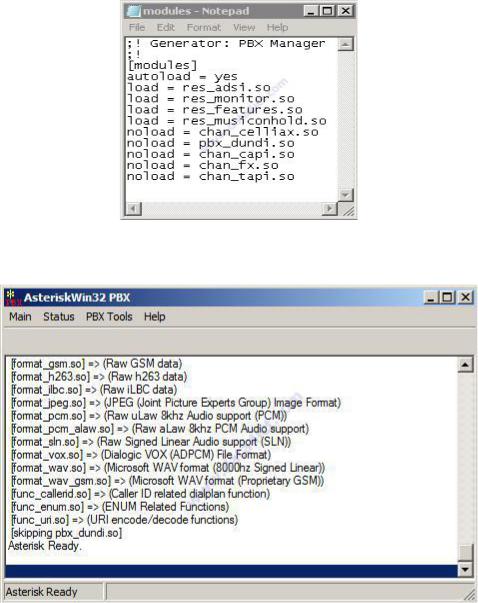
Настройка модулей
Чтобы избежать ошибок при запуске программы, нужно настроить файл "modules.conf".
Откройте "C:\cygroot\asterisk\etc\modules.conf" файл с помощью блокнота и добавьте следующие строки в конце файла:
noload = pbx_dundi.so noload = chan_capi.so noload = chan_fx.so
noload = chan_tapi.so
И удалите:
noload = app_queue.so
В итоге файл должен выглядеть так
Рис. 2.35. Настройка файла "modules.conf
Теперь снова попробуйте запустить AsteriskW32 GUI , ошибок возникнуть не должно.
Рис. 2.36. Запуск AsteriskWin32
55
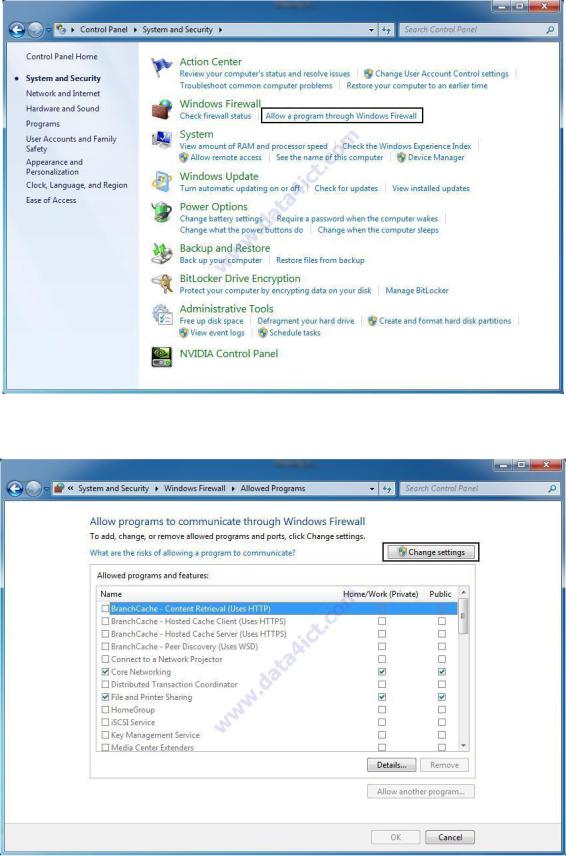
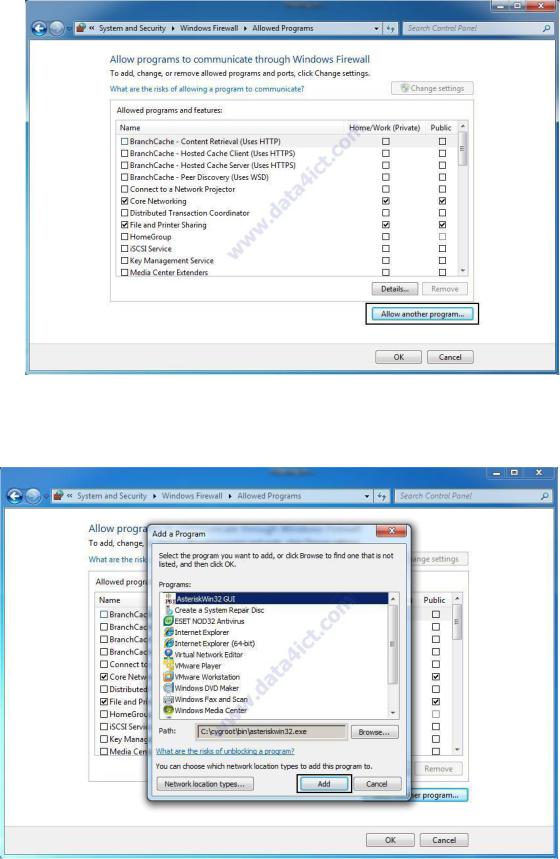
Настройка Windows Firewall
Откройте Windows Firefall
Рис. 2.37. Запуск Windows Firewall
Затем кликните настройки
Рис. 2.38. Запуск Windows Firewall
Выберите добавить другую программу
56
Рис. 2.39. Запуск Windows Firewall
Найдите в списке AsteriskWin32 GUI и нажмите добавить, затем закройте все окна с
Windows Firefall
Рис. 2.40. Запуск Windows Firewall
57
Регистрация в AsteriskWin32
Asterisk имеет различные типы сообщений, которые могут быть зарегистрированы. К
ним относятся:
debug
notice
warning
error
verbose
dtmf
logger.conf
Asterisk предоставляет ряд способов для регистрации . Файл logger.conf (Местонахождение: C:\cygroot\asterisk\etc\logger.conf) содержит элементы конфигурации для регистрирования.
;
; Logging Configuration
;
[general]
;
[logfiles]
debug => debug
messages => warning,error
console => notice,warning,error,debug,verbose,dtmf,fax
Первая строка говорит Asterisk, что войти log debug (правая сторона =>) в файл с именем отладки (на левом фланге из =>), расположенный в C:\cygroot\asterisk\log\.
Вторая строка сообщает Asterisk, что возможно зарегистрировать предупреждения и сообщения об ошибках в файл с именем сообщения, расположенные в C:\cygroot\asterisk\log\.
Третья строка говорит Asterisk отправлять все сообщения в CLI консоли.
asterisk.conf
Каталог журнала может быть изменен путем изменения линия astlogdir => asterisk/log to point, чтобы указать на нужный каталог в файле asterisk.conf
(C:\cygroot\asterisk\etc\asterisk.conf).
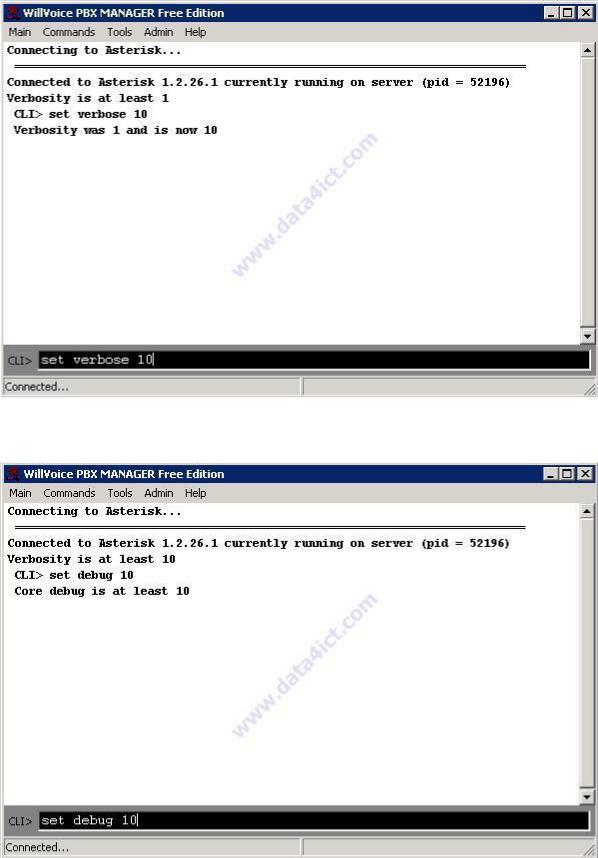
Существуют различные уровни verbosity и debugging. Используйте установить многословным или установить отладки с последующим числовым значением их изменения.
Полезные значения от 0 (disabled) до 10 (maximum) за verbosity и отладки уровнях.
Выставите в окне PBX Manager set verbose 10
58
Рис. 5.41. Настройка PBX Manager
Затем выставите set debug 10
Рис. 5.42. Настройка PBX Manager
Так же возможно активировать другие типы отладки системы: (see asterisk CLI command)debug channel / no debug channel
59
agi debug / agi no debug
iax2 debug / iax2 no debugsip debug / sip no debug
Воспроизведение основных звонков
sip.conf |
|
|
Измените |
название файла sip.conf file (Location: C:\cygroot\asterisk\etc\sip.conf) на |
|
sip_old.conf. Затем создайте новый файл sip.conf и вставьте следующее: |
||
[general] |
|
|
context = asterisk |
; Default context for incoming calls |
|
allowguest = no |
|
; Allow or reject guest calls (default is yes, this can also be set to 'osp' |
realm=data4ict.com |
; Realm for digest authentication |
|
bindport = 5060 |
|
; UDP Port to bind to (SIP standard port is 5060) |
bindaddr = 0.0.0.0 |
; IP address to bind to (0.0.0.0 binds to all) |
|
srvlookup = yes |
|
; Enable DNS SRV lookups on outbound calls |
disallow = all |
; First disallow all codecs |
|
allow = ulaw |
; Allow codecs in order of preference |
|
allow = alaw |
|
|
allow = gsm |
|
|
dtmfmode = rfc2833 |
; Set default dtmfmode for sending DTMF. |
|
canreinvite=no |
|
|
nat=yes |
|
|
[authentication]
[1001]
type=friend
context=asterisk
username=1001
secret=1001
host=dynamic
callerid="Phone1"
[1002]
type=friend
context=asterisk
username=1002
secret=1002
60
host=dynamic
callerid="Phone2"
extensions.conf
The second file to configure is the extensions.conf file (Location: C:\cygroot\asterisk\etc\extensions.conf). Rename it to extensions_old.conf and create a new extensions.conf empty file. Insert the following lines into the file:
Сконфигурируйте файл extensions.conf file (Location: C:\cygroot\asterisk\etc\extensions.conf). Переименуйте его в extensions_old.conf и создайте новый файл extensions.conf, включающий себя :
[general]
;
;If static is set to no, or omitted, then the pbx_config will rewrite
;this file when extensions are modified. Remember that all comments
;made in the file will be lost when that happens.
static=yes
;
;if static=yes and writeprotect=no, you can save dialplan by
;CLI command 'save dialplan' too
;
writeprotect=yes
;
;If autofallthrough is set, then if an extension runs out of
;things to do, it will terminate the call with BUSY, CONGESTION
;or HANGUP depending on Asterisk's best guess (strongly recommended).
autofallthrough=yes
;If clearglobalvars is set, global variables will be cleared
;and reparsed on an extensions reload, or Asterisk reload.
;
clearglobalvars=no
;
;If priorityjumping is set to 'yes', then applications that support
;'jumping' to a different priority based on the result of their operations
;will do so (this is backwards compatible behavior with pre-1.2 releases