

E-Bookshop-master / uploads / file / Think-Java-How-to-Think-Like-a-Computer-Scientist_(1)
.pdf210 |
Chapter 16. GridWorld: Part 3 |
/**
* Counts the number of live neighbors. */
public int countLiveNeighbors()
/**
*Updates the status of the Rock (live or dead) based on the number
*of neighbors.
*/
public void updateStatus()
Start with a simple version of updateStatus that changes live rocks to dead and vice versa. Now run the program and con rm that the Rocks change color. Every two steps in the World correspond to one timestep in the Game of Life.
Now ll in the bodies of countLiveNeighbors and updateStatus according to the rules and see if the system behaves as expected.
16.8Initial conditions
To change the initial conditions, you can use the GridWorld pop-up menus to change the status of the Rocks by invoking setAlive. Or you can write methods to automate the process.
In LifeRunner, add a method called makeRow that creates an initial con g- uration with n live Rock in a row in the middle of the grid. What happens for di erent values of n?
Add a method called makePentomino that creates an r-pentomino in the middle of the Grid. The initial con guration should look like this:
16.8. Initial conditions |
211 |
If you run this con guration for more than a few steps, it reaches the end of the Grid. The boundaries of the Grid change the behavior of the system; in order to see the ll evolution of the r-pentomino, the Grid has to be big enough. You might have to experiment to nd the right size, and depending on the speed of your computer, it might take a while.
The Game of Life web page describes other initial conditions that yield interesting results (http://www.conwaylife.com/). Choose one you like and implement it.
There are also variations of the Game of Life based on di erent rules. Try one out and see if you nd anything interesting.
Exercise 16.3. If you implemented the Game of Life, you are well prepared for Part 4 of the GridWorld Student Manual. Read it and do the exercises.
Congratulations, you're done!
212 |
Chapter 16. GridWorld: Part 3 |
Appendix A
Graphics
A.1 Java 2D Graphics
This appendix provides examples and exercises that demonstrate Java graphics. There are several ways to create graphics in Java; the simplest is to use java.awt.Graphics. Here is a complete example:
import java.awt.Canvas; import java.awt.Graphics; import javax.swing.JFrame;
public class MyCanvas extends Canvas {
public static void main(String[] args) { // make the frame
JFrame frame = new JFrame(); frame.setDefaultCloseOperation(JFrame.EXIT_ON_CLOSE);
// add the canvas
Canvas canvas = new MyCanvas(); canvas.setSize(400, 400); frame.getContentPane().add(canvas);
// show the frame
214 |
Appendix A. Graphics |
frame.pack();
frame.setVisible(true);
}
public void paint(Graphics g) { // draw a circle
g.fillOval(100, 100, 200, 200);
}
}
You can download this code from http://thinkapjava.com/code/ MyCanvas.java.
The rst lines import the classes we need from java.awt and javax.swing.
MyCanvas extends Canvas, which means that a MyCanvas object is a kind of Canvas that provides methods for drawing graphical objects.
In main we
1.Create a JFrame, which is a window that can contain the canvas, buttons, menus and other window components;
2.Create MyCanvas, set its width and height, and add it to the frame; and
3.Display the frame on the screen.
paint is a special method that gets invoked when MyCanvas needs to be drawn. If you run this code, you should see a black circle on a gray background.
A.2 Graphics methods
To draw on the Canvas, you invoke methods on the Graphics object. The previous example uses fillOval. Other methods include drawLine, drawRect and more. You can read the documentation of these methods at http: //download.oracle.com/javase/6/docs/api/java/awt/Graphics.html.
Here is the prototype for fillOval:

A.3. Coordinates |
215 |
public void fillOval(int x, int y, int width, int height)
The parameters specify a bounding box, which is the rectangle in which the oval is drawn (as shown in the gure). The bounding box itself is not drawn.
x and y specify the the location of the upper-left corner of the bounding box in the Graphics coordinate system.
A.3 Coordinates
You are probably familiar with Cartesian coordinates in two dimensions, where each location is identi ed by an x-coordinate (distance along the x- axis) and a y-coordinate. By convention, Cartesian coordinates increase to the right and up, as shown in the gure.
By convention, computer graphics systems to use a coordinate system where the origin is in the upper-left corner, and the direction of the positive y-axis is down. Java follows this convention.
216 |
Appendix A. Graphics |
Coordinates are measured in pixels; each pixel corresponds to a dot on the screen. A typical screen is about 1000 pixels wide. Coordinates are always integers. If you want to use a oating-point value as a coordinate, you have to round it o (see Section 3.2).
A.4 Color
To choose the color of a shape, invoke setColor on the Graphics object:
g.setColor(Color.red);
setColor changes the current color; everything that gets drawn is the current color.
Color.red is a value provided by the Color class; to use it you have to import java.awt.Color. Other colors include:
black |
blue |
cyan |
darkGray |
gray |
lightGray |
magenta |
orange |
pink |
red |
white |
yellow |
You can create other colors by specifying red, green and blue (RGB) components. See http://download.oracle.com/javase/6/docs/api/java/awt/ Color.html.
You can control the background color of the Canvas by invoking
Canvas.setBackground.
Exercise A.1. Draw the ag of Japan, a red circle on white background that is wider than it is tall.
A.5 Mickey Mouse
Let's say we want to draw a picture of Mickey Mouse. We can use the oval we just drew as the face, and then add ears. To make the code more readable, let's use Rectangles to represent bounding boxes.
Here's a method that takes a Rectangle and invokes fillOval.
public void boxOval(Graphics g, Rectangle bb) { g.fillOval(bb.x, bb.y, bb.width, bb.height);
}

A.5. Mickey Mouse |
217 |
And here's a method that draws Mickey:
public void mickey(Graphics g, Rectangle bb) { boxOval(g, bb);
int dx = bb.width/2; int dy = bb.height/2;
Rectangle half = new Rectangle(bb.x, bb.y, dx, dy);
half.translate(-dx/2, -dy/2); boxOval(g, half);
half.translate(dx*2, 0); boxOval(g, half);
}
The rst line draws the face. The next three lines create a smaller rectangle for the ears. We translate the rectangle up and left for the rst ear, then right for the second ear.
The result looks like this:
You can download this code from http://thinkapjava.com/code/Mickey. java.
Exercise A.2. Modify Mickey.java to draw ears on the ears, and ears on those ears, and more ears all the way down until the smallest ears are only 3 pixels wide.
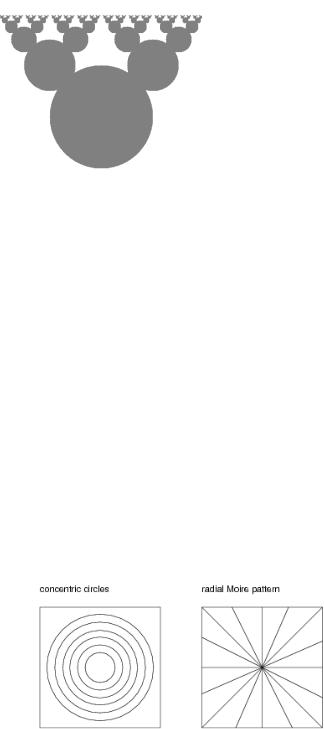
The result should look like Mickey Moose:
218 |
Appendix A. Graphics |
Hint: you should only have to add or modify a few lines of code.
You can download a solution |
from http: // thinkapjava. com/ code/ |
MickeySoln. java . |
|
Exercise A.3. 1. Download |
http: // thinkapjava. com/ code/ |
Moire. java and import it into your development environment.
2.Read the paint method and draw a sketch of what you expect it to do. Now run it. Did you get what you expected? For an explanation of what is going on, see http: // en. wikipedia. org/ wiki/ Moire_ pattern .
3.Modify the program so that the space between the circles is larger or smaller. See what happens to the image.
4.Modify the program so that the circles are drawn in the center of the screen and concentric, as in the following gure (left). The distance between the circles should be small enough that the Moire interference is apparent.
A.5. Mickey Mouse |
219 |
5.Write a method named radial that draws a radial set of line segments as shown in the gure (right), but they should be close enough together to create a Moire pattern.
6.Just about any kind of graphical pattern can generate Moire-like interference patterns. Play around and see what you can create.