Setting the Fuel Float Height
found it's almost impossible to get the correct fuel float height using the procedures detailed in the Suzuki Service Manual. Talk about an eyeball measurement!!! To do it the way the manual details requires you to fully strip (and I mean fully strip) the carburetor just so you can get a vernier caliper into the correct position to make the measurement. I ended up making my own Fuel Float Height Measuring Tool out of a thin piece of wire.
Making your own Float Height Adjument Tool
Wire
![]()
▲
7.0 mm
▼
Float Level Adjustment
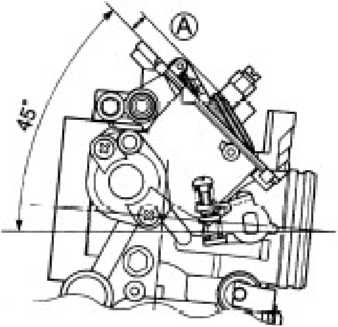
Hold the carburetor at a 45 degree angle as shown in the diagram below.
Measure the distance from the carburetors float bowl gasket surface to the highest point of the float using vernier calipers or a home-made tool like the one I designed above (measurement A should be 7mm, plus or minus 0.5 mm).
If the float tab is just touching the spring-loaded pin in the needle valve and not depressing the pin, you have the correct height.
If the float tab is depressing the needle valve, or the needle valve is proud of the hole, bend the float tab to adjust float level to within the specified range.
Low End Power Test (Full Throttle)
To test to see if you have the best float height selected, do a couple of 2nd gear full throttle runs from 1500 - 3500 rpm. You should be able to apply full throttle without the engine missing or stumbling.
Too Rich - If the engine appears to pull harder in this range when you first do this test but not as hard after a further 15 minutes of hard use, then the Float Level is probably set too rich and needs to be leaned out. One of the signs to look for that indicates a high fuel float level is the engine feeling "soft" and boggy at part throttle operations. If this occurs, bend the float tab down so that the Float Level adjustment reads 7.5 - 8.0 mm and repeat the test.
Too Lean - If the engine doesn't feel like it's pulling as hard as it should in this range based on your stock test ride (it may stumble and feel like the engine is taking a while to wind up to 3500 rpm), then it's likely the Float Level has been set too lean. Bend the float tab up so that the Float Level adjustment reads 6.0 - 6.5 mm and repeat the test.
NOTE: If there are low-end richness problems, even after lowering the fuel level in the bowl by more than 1.5mm from your initial settings (i.e. a Float Level Adjustment 8.5 mm or more), check for wear of jet needle and needle jet (part of the emulsion tube).Step 6 - Synchronise the Carburetors
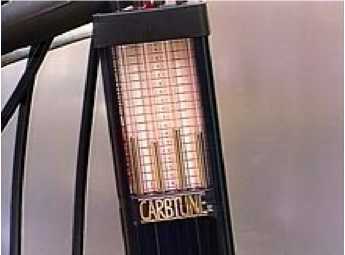
It's important that each carburetor works as hard as the other or it will create an imbalance in engine performance effecting the response, smoothness, mileage, performance and running temperature of your engine. Carburetor synchronisation on the SV650 consists of adjusting the rear throttle valve so that it passes the same fuel-air mixture as the front. Carburetor Synchonisation is also known as Throttle Valve Synchronisation. To get carburetors working equally, we synchronise them with each other using a vacuum gauge. There are several types of vacuum gauges available, but the one I found the easiest to use and set up was the Morgan Carbtune II available from http://www.carbtune.com/carbdtls.html.