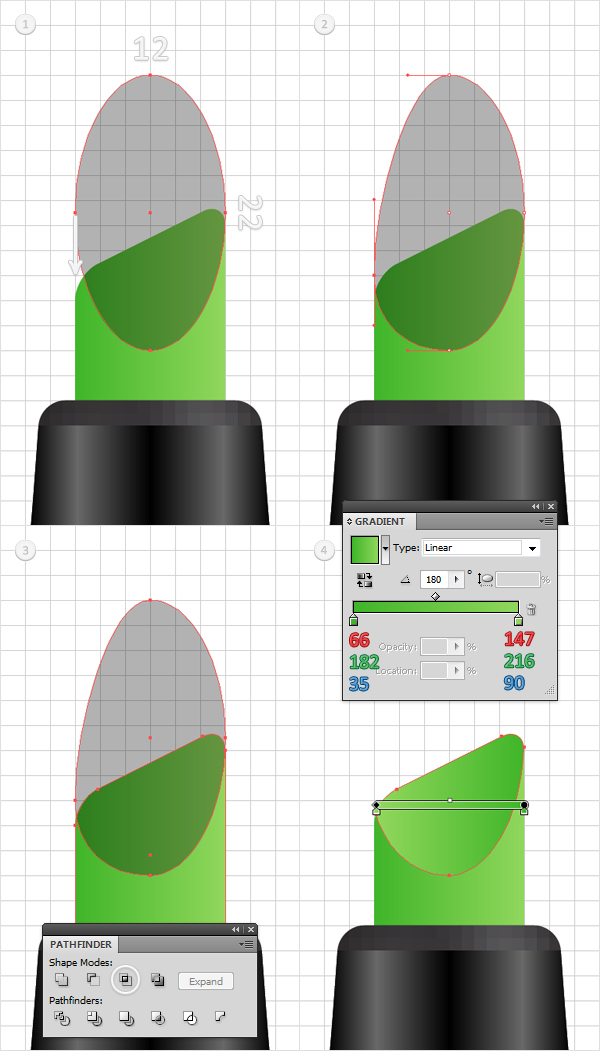
Step 18
Pick the Ellipse Tool (L), create a 12px by 22px shape, and place it as shown in the first image. Grab the Direct Selection Tool (A), select the left anchor point, and move it 6px down. Now your shape should look like the second image shown. Select it along with the copy made in the previous step and click on the Intersect button from the Pathfinder panel. Fill the resulting shape with the linear gradient shown in the fourth image.
Выберите Ellipse Tool (L), создать 12px по 22px формы и поместите его так, как показано на первом рисунке. Схватить Direct Selection Tool (A), выберите в левой точки привязки, и переместить его 6px вниз. Теперь ваша форма должна выглядеть как на втором рисунке. Выберите ее вместе с копией, выполненной на предыдущем шаге, и нажмите на пересекаются кнопку " обработка контуров". Заполнить полученную форму с линейный градиент показан в четвертом изображения.
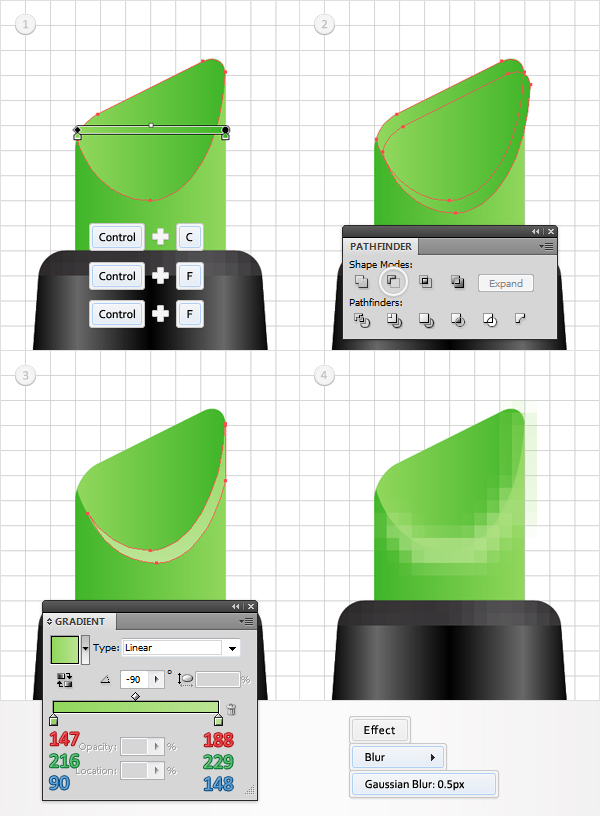
Step 19
Disable the Snap to Grid. Select the shape made in the previous step and make two copies in front (Control + C > Control + F > Control + F). Select the bottom copy, then hit the right arrow once and the down arrow twice. Reselect both copies and click on the Minus Front button from the Pathfinder panel. Fill the resulting shape with the linear gradient shown in the third image and go to Effect > Blur > Gaussian Blur. Enter a 0.5px radius and click OK.
Отключить привязку к сетке. Выбор формы, сделанных на предыдущем шаге, и сделайте две копии спереди (Control + C - > Ctrl + F > Control + F). Выберите нижнюю копировать, а затем нажмите стрелку вправо один раз и на стрелку вниз в два раза. Снова выберите обе копии и щелкните знак " минус " перед кнопку " обработка контуров". Заполнить полученную форму с линейный градиент показан в третьем изображения и перейти к эффекта > Blur - > Gaussian Blur. Введите 0.5px radius и нажмите кнопку ОК.
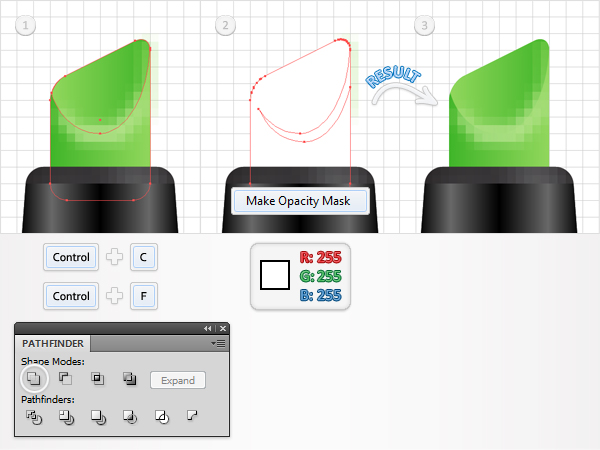
Step 20
Duplicate the shapes made in the seventeenth and eighteenth steps. Select these copies and click on the Unite button from the Pathfinder panel. Fill the resulting shape with white and bring it to front (Shift + Control + Right Bracket key). Select it along with the blurred shape made in the previous step, open the fly-out menu of the Transparency panel and click on Make Opacity Mask.
Повторяющиеся фигуры в семнадцатом и восемнадцатом шаги. Выберите эти копии и нажмите на кнопку объединить с Pathfinder панели. Заполнить полученную форму с белыми и довести его до передней (Shift + Control + кронштейн правый ключ). Выберите его вместе с размытые фигуры, сделанные в предыдущем шаге, откройте раскрывающееся меню палитры " прозрачность " и нажмите кнопку " Создать маски прозрачности.
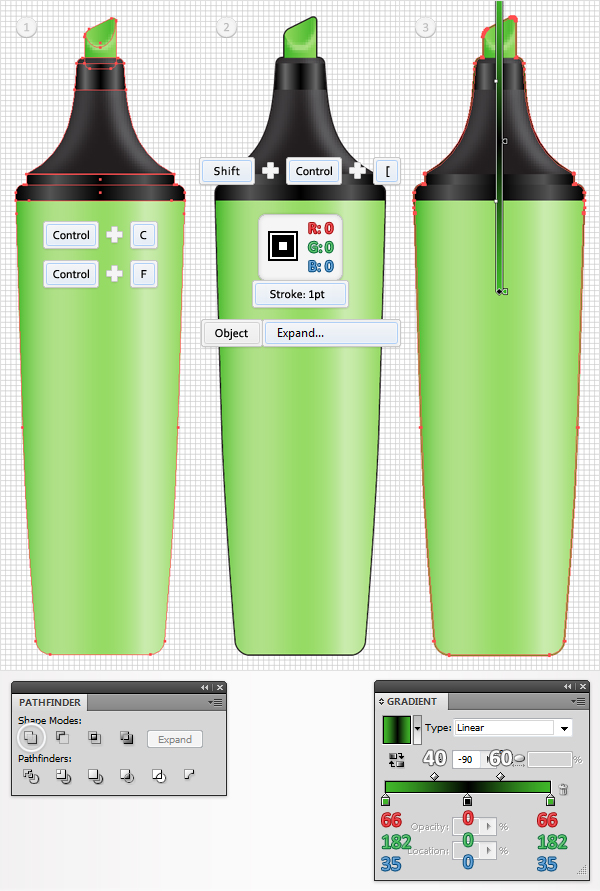
Step 21
Duplicate all the shapes created so far, except the masked ones. Select all these copies and click on the Unite button from the Pathfinder panel. Fill the resulting shape with none and add a 1pt, black, aligned to outside stroke. Select it and go to Object > Expand, then fill the resulting path with the linear gradient shown in the following image.
Продублировать все фигуры, созданные до сих пор, за исключением того, замаскированные флаги. Выберите все эти копии и нажмите на кнопку объединить с Pathfinder панели. Заполнить полученную форму ни с кем и добавить 1 очко, черный, выравнивание по снаружи инсульта. Выберите и выберите " объект " > " развернуть", затем ший путь с линейного градиента показано на следующем рисунке.