

If dirt or dust is allowed to pass through into the throttle assy, the throttle may become stuck, possibly causing an accident. Caution
If dirt gets through into the engine, excessive engine wear and possibly engine damage will occur.
Coolant Change
Coolant Draining
The coolant should be changed periodically to ensure long engine life.
Caution
Use coolant containing corrosion inhibitors made specifically for aluminum engines and radiators in accordance with the instructions of the manufacturers (see Coolant Filling).
WARNING
To avoid burns do not remove the radiator cap or try
to change the coolant when the engine is still hot.
Wait until it cools down.
Coolant on tires will make them slippery and can
cause an accident and injury. Immediately wipe up
or wash away any coolant that spills on the frame,
engine, or other painted parts.
Since coolant is harmful to the human body, do not
use for drinking.
Situate the motorcycle so that it is perpendicular to the ground.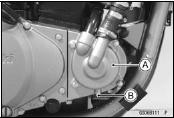
Remove the engine guard (see engine Guard Removal in the Frame chapter).
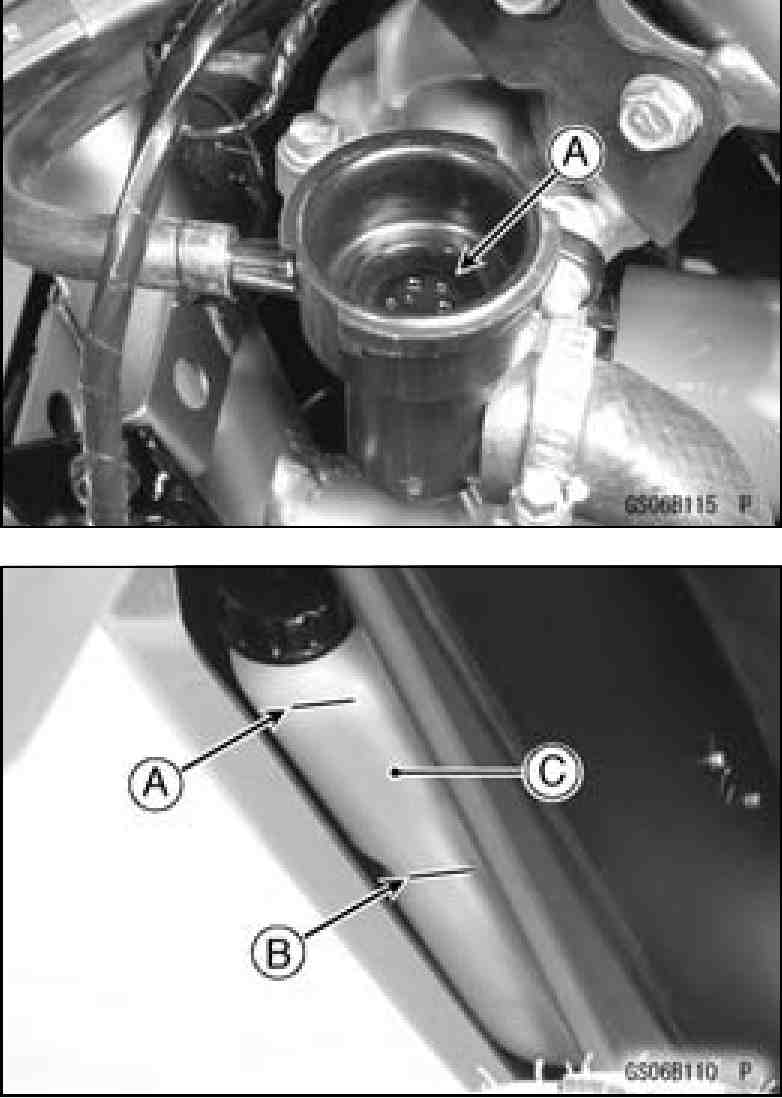
Place a container under the water pump [A].
Remove the drain plug [B], and drain the coolant.
Remove the left lower fairing (see Lower Fairing Removal in the Frame chapter).
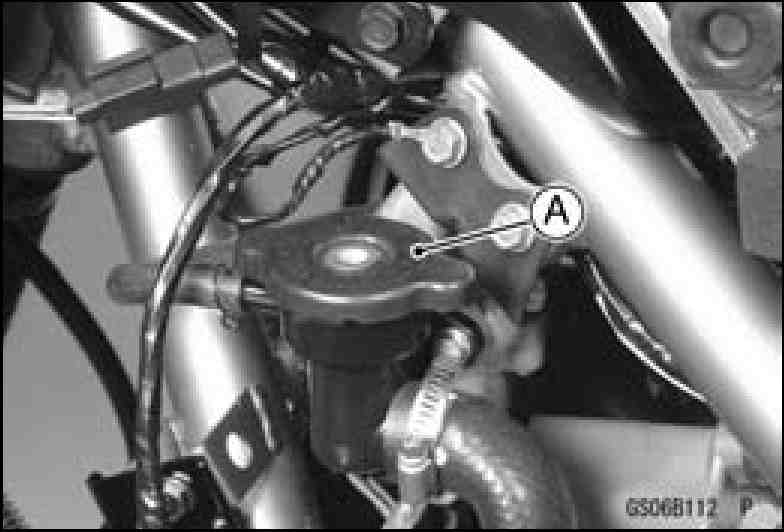
• Remove the radiator cap [A] in two steps. First turn the cap counterclockwise to the first stop and wait there for a few seconds. Then push down and turn it further in the same direction and remove the cap.
○The coolant will drain from the radiator and engine.
Remove the left side cover (see Side Covers Removal in the Frame chapter).
Pull off the air vent hose [A], unscrew the bolts [B] and remove the reserve tank [C] with the lower hose attached.
Unscrew the cap [D] and pour the coolant into a container.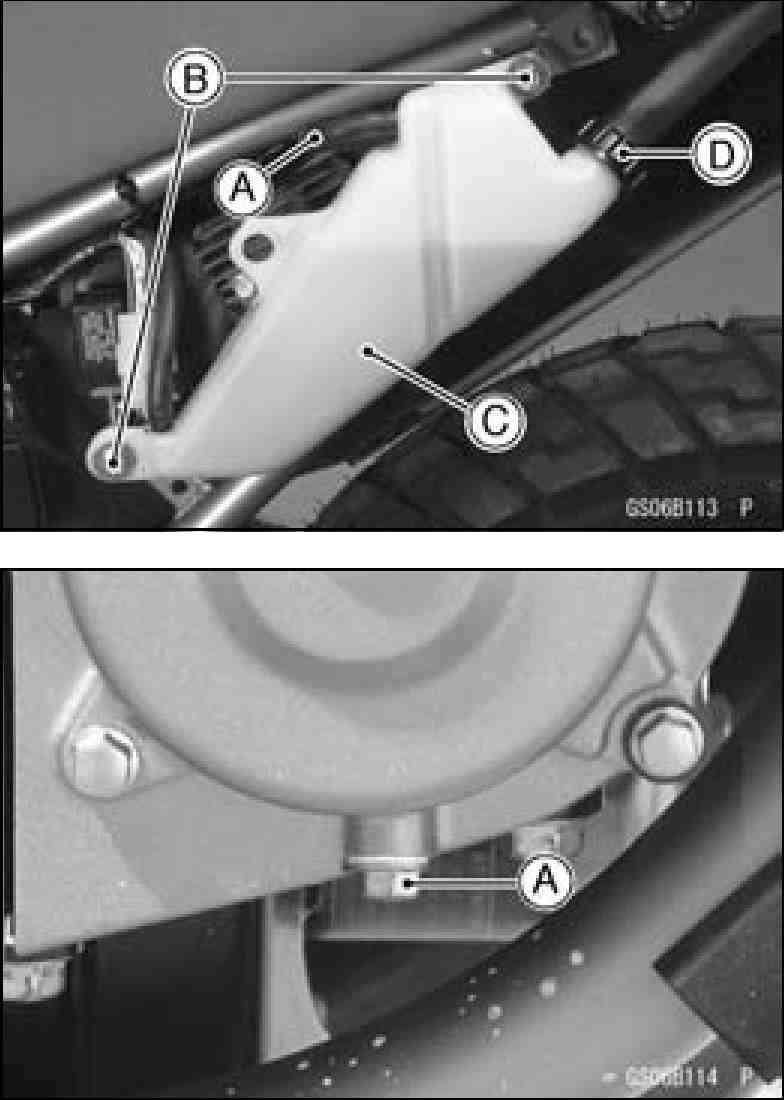
Inspect the old coolant for color and smell (mentioned above).
Coolant Filling
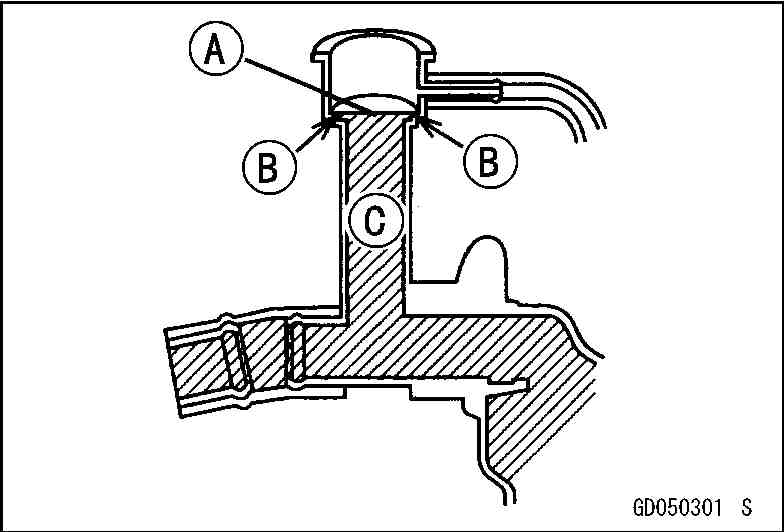
Install the drain plug [A]. Always replace the gasket with a new one.
Tighten the drain plug.
Torque -Coolant Drain Plug: 11 N·m (1.1 kgf·m, 95 in·lb)
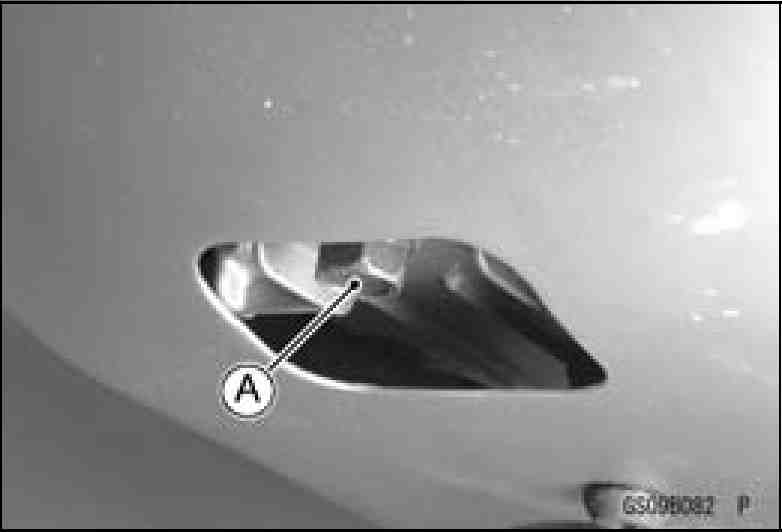
• Fill [A] the radiator up to the bottom of the radiator filler neck [B] with coolant [C], and install the cap turning it clockwise about 1/4 turn.
NOTE
○Pour in the coolant slowly so that it can expel the air
from the engine and radiator. ○The radiator cap must be installed in two steps. First
turn the cap clockwise to the first stop. Then push down
Caution
Soft or distilled water must be used with the antifreeze (see Specifications) in the cooling system. If hard water is used in the system, it causes scales accumulation in the water passages, and considerably reduces the efficiency of the cooling system.
Периодический ремонт 2-43
Maintenance Procedure
Coolant 50%
Freezing Point –35°C (–31°F)
Total Amount 1.7 L (1.8 US qt)
NOTE
○Choose a suitable mixture ratio by referring to the coolant manufacturer’s directions.
• Bleed the air from the cooling system while the engine is running.
○Start the engine with the radiator cap removed and run it until no more air bubbles [A] can be seen in the coolant.
○Tap the radiator hoses to force any air bubbles caught inside.
○Stop the engine and add coolant up to the radiator filler neck.
CAUTION
Do not add more coolant above the F level.
• Install:
Engine Guard Left Side Cover Left Lower Fairing
Install the radiator cap.Remove the reserve tank cap.
Fill the reserve tank up to the H level [A] with coolant and install the cap.
2-44 Периодический ремонт
Maintenance Procedure
Drain the coolant (see Coolant Draining).
Remove:
Lower Fairings (see Lower Fairing Removal in the Frame
chapter)
Spark Plug Caps
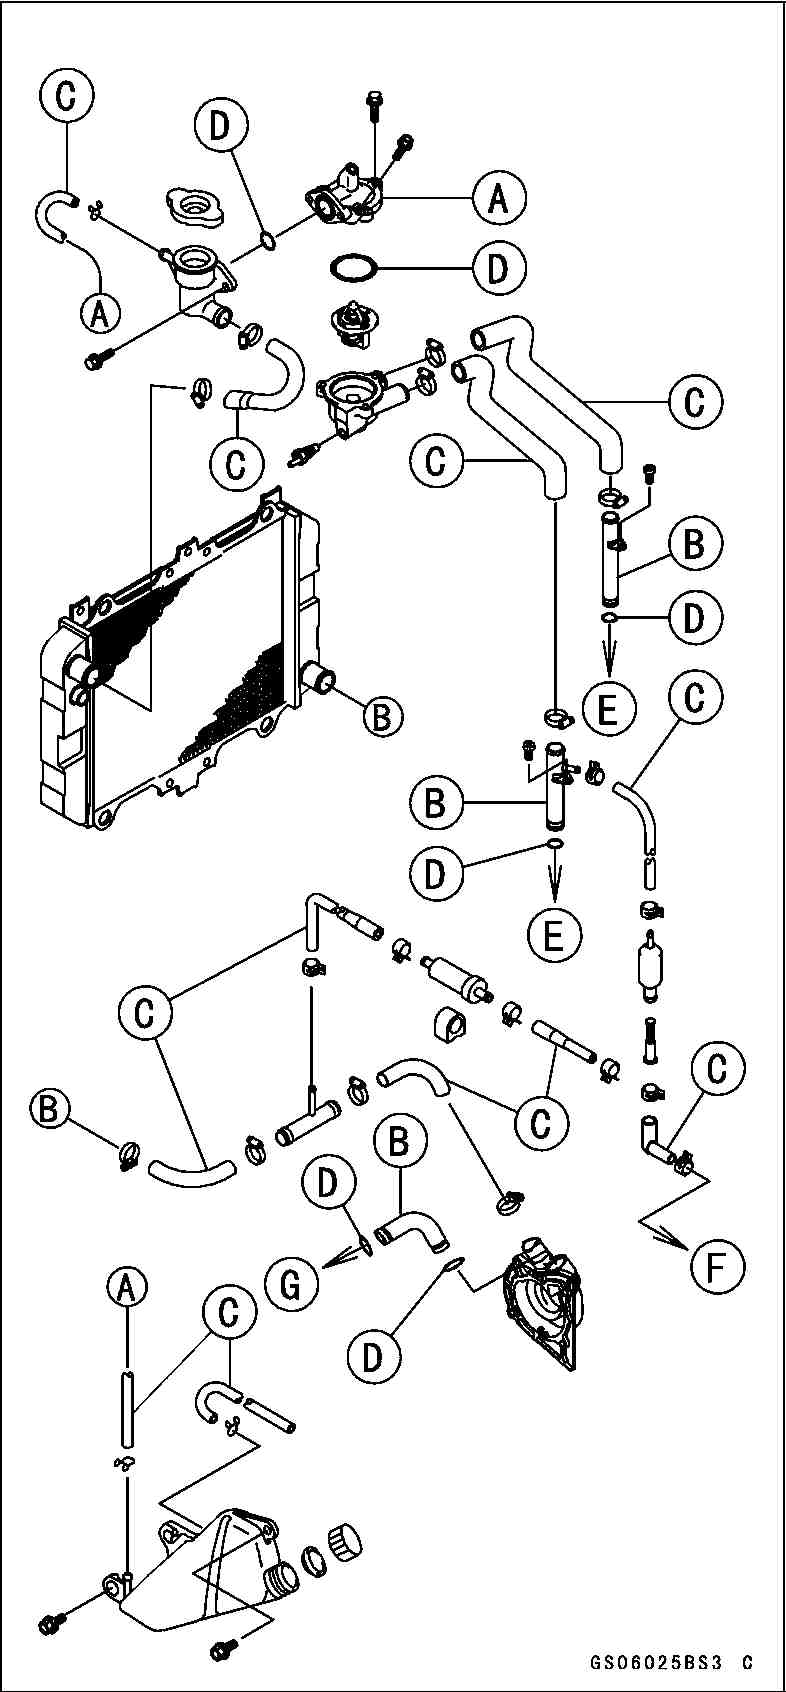
Thermostat Housing Cover [A]
Pipe [B]
Hoses [C]
O-rings [D]
To Cylinder Head [E]
To Carburetor [F]
To Cylinder [G]
Apply grease to the new O-rings and install them.
Install the hoses and tighten the clamps securely.
Fill the coolant (see Coolant Filling). Check the cooling system for leaks.
Warm up the engine so that the oil will pick up any sediment and drain easily. Then stop the engine.
Support the motorcycle perpendicular to the ground, and place an oil pan beneath the engine.
Remove the engine oil drain plug [A], and let the oil drain completely.
If the oil filter is to be changed, replace it with a new one.
Check the gasket at the drain plug for damage.
Replace the gasket with a new one if it is damaged. After the oil has completely drained out, install the drain plug with the gasket, and tighten it.
Torque - Engine Oil Drain Plug: 29 N-m (3.0 kgf-m, 22 ft-lb)
Периодический ремонт 2-45 Maintenance Procedure

• Fill the engine with a good quality motor oil specified in the table.
Torque - Oil Filler Plug: 1.5 N·m (0.15 kgf·m, 13 in·lb)
• Check the oil level.
Engine Oil
Grade: API SE, SF, SG or
API SH or SJ with JASO MA Viscosity: SAE 10W40 Capacity: 2.8 L (When filter is not removed)