

Java Game Programming For Dummies - W. Holder, D. Bell
.pdfChapter 6: Blackjack 115
BlackjackHand () I
resize(preferredSize()); |
|
i nt cardCount () |
i return hand.size(); I |
protected boolean isDealer () I return true; I boolean blackjack () ( // is a blackjack?
return hand.size() == 2 && value() == 21;
boolean isSoft ()"( // has an 11-point ace in the hand? value();. // sets <soft> field
return soft;
void setActive (boolean on) f // highlight this hand active = on;
repaint():
void expose () I // expose the dealer s hole card exposed = true;
repaint();
I
void clearHand () I // remove all cards from hand hand.removeAllElements();
exposed = active = soft =,false; repaint();
Thread.yieldf7:'
void deal (Card card) ( // deal a card to the hand hand.addElement(card);
repaint();
public void paint (Graphics g) f if (offscreenImage == null) I
offscreenImage = createlmage(size().width, size().height);
offscr = offscreenlmage.getGraphics();
(continued)

116 Part II: Up to Speed
(continued)
offscr.setColor(aetive ? Color.yellow : Color.gray); offscr.fillRect(0, 0, size().width, size().height); i nt handsize = hand.size():
i f (handsize > 0)
int overlap = Math.min(Card.getCardWidth().
( size().width - Card.getCardWidth() -
2*horizinset) l Math.max(1, handsize-1));
Enumeration deal = hand.elements(); i nt xoff = horizInset;
while (deal.hasMoreElements())
Card card = (Card)deal.nextElement();
if (!exposed && isDealer() && xoff == horizInset)
Card.drawCardBack(offscr, xoff, 0);
else
card.draw(offscr, xoff, 0);
xoff += overlap; |
|
l |
|
9 . drawlmage(offscreenImage, 0, |
this); |
.,ublic void update (Graphics g) I paint(g); }
/ returns the point value for the hand
;nt value () I
int val = 0;
boolean ace = false;
for (int ii = hand.size(); --ii >= 0; ) I i nt v = value(ii);
Val += v;
i f (v ==Card.ACE) ace = true;
i f (soft = (val <= 11 && ace)) Val += 10;
return val;,
I returns base point value of card <cardNum> in the hand [ ^otected int value (int cardNum)
i nt rank = ((Card)hand.elementAt(cardNum)).getRank(); return Math.min(Card.TEN, rank); // face cards are 10's
I // end class BlackjackHand
Chapter 6: Blackjack 117
Here are the key elements in B 1 a c k j a c k H and:
v BlackjackHand extends java.awt. Canvas so that it can display itself
on the screen.
V The B 1 a c k j a c kH a n d ( ) constructor sets the size of the canvas - necessary because by default a canvas is zero pixels wide and zero pixels tall.
r The j a v a . u t i 1 . V e c t o r field h a n d stores the cards. (Remember, a Vector works like an array that automatically reslzes itself as more objects are added to it) Using a vector allows a hand to accept any number of cards dealt to it. d e a 1 ( ) adds cards to the vector and
c l e a r H a n d ( ) removes all the cards from the vector.
rr B 1 a c k j a c k H a n d overrides pa i n t ( ) to create the display for the hand. If necessary, p a i n t ( ) overlaps the cards to fit within the display area - this makes the cards look like they are "fanned out" on the table, as shown back in Figure 6-1.
W p a i n t ( ) uses the graphics context o f f s c r to draw to the offscreen image. o f f screen Image. p a i n t ( ) copies the offscreen image to the screen to smoothly draw the hand to the screen in a single operation.
p a i n t ( ) initializes the offscreen buffer the first time it runs. (Chapter 1 discusses the details of using an offscreen image.)
v h o r i z I n s e t holds the number of pixels to inset the hand from the left and right edges of the canvas. The Blackjack applet uses the inset space to highlight the active hand. setActi ve() sets or clears the hand's active state.
Arranging the User Interface
Like the Web pages in which Java runs, Java configures its screen area to fit the available space and allows a Java applet to automatically adapt to smaller or larger screens. Creating an interface that configures itself presents challenges. On the one hand, you don't have to worry about specifying the pixel location of each interface component. On the other hand, trying to get your game to look just the way you want can be frustrating. Compounding this frustration is the fact that the size and look of the individual components vary between platforms. But rest assured, with a little work you can create a user interface that looks good and intelligently configures itself to fit a variety of screen sizes.

Part II: Up to Speed
Positioning components With a
LayoutManager
The AWT uses classes that implement the j
interface to determine what size to make AWT components and where to place them. Each container -a
-has its own layout manager to accomplish this task.
A layout manager positions each of the components in the container and can also set the sizes of the contained components. The layout manager calls a component's mo v e ( ) method to position the component, calls r e s i z e ( ) tf set the component's size, and calls r e s h a p e ( ) to set both the size and position. Most layout managers use the component's p
methods to determine its dimensions, but some layout managers ignore these suggested sizes (see Table 6-3).
You can subclass L a b e 1, B u t t o n, and other AWT components to override
the preferredSize() and minimumSize() methods. By doing so, you can
explicitly control the size of the laid-out component.
The AWT provides five layout managers - B o r d e r Layout, C a r d Layout,
F1 ow Layout, Gri d Layout, Gri dBagLayout. Table 6-3 lists types of layout
managers assigned by default to each type of container.
Table 6-3 |
Default Layout Managers |
||||||
|
Container |
Layout Manager |
|
Comments |
|||
|
Panel |
FlowLayout |
|
|
|
||
|
Applet |
|
FlowLayout |
|
|
|
|
|
|
|
|
|
|
|
|
|
Window |
|
BorderLayout |
|
(ignores suggested size) |
|
|
|
|
|
|
||||
|
|
|
|
|
|
|
|
|
Frame |
|
BorderLayout |
|
(ignores suggested size) |
|
|
|
|
|
|
|
|||
|
Di al og |
|
BorderLayout |
|
(ignores suggested size) |
|
|
|
|
|
|
|
|||
|
|
|
|
|
|
|
|
|
Fi IeDialog |
null |
|
|
|
||
A container can have a n u 1 1 layout manager for which you must explicitly position its components. A container with a layout that doesn't need to adapt to different screen sizes - for example, a container that conforms b background graphic - may be best with a n u 1 1 layout manager.
If you want to use a different layout manager than the default, pass the nei layout manager to the container's ( ) method. For example, if y want to have an applet use a B o r d e r L a y o u t, place the following in the applet's method:

Chapter 6: Blackjack 11 9
If you change a container's layout manager after it has already been laid out, you need to tell the container. To do so, call i n v a 1 i d a t e ( ) to tell the container to invalidate its current layout and then call v a 1 i d a t e ( ) to have the container recursively layout itself along with any nested containers.
You use a F 1 ow L a y o u t manager to arrange the components from left to right and top to bottom. Each horizontal row aligns its components LEFT, CENTER, or R I GHT. The default alignment is CENTER.
The following code produces the applet that Figure 6-8 shows:
public class Flow extends java.applet.Applet 1 public void init () f
for (int i = 1; i < 10; i++)
add(new java.awt.Button(Integer.toString(i)));
1
applet using -ut.
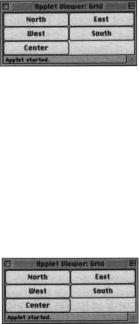
B o r d e r L a y o u t arranges as many as five components: one along each of the four sides and one in the center of the container. You call the container's
method with the name of the location ( North , South , East , West , or Center ) at which to add a component to a BorderLayout container. If you don't specify a location, the layout manager places the component in the center location.
B o r d e r Layout resizes the components according to the following rules:
-The north and south components use their preferred height but are resized as wide as the container.
The east and west components use their preferred width but are resized to be, as tall as the container minus the heights of the north and south components.
120 Part II: Up to Speed
-The center component is resized to fill the remaining space not used by the other components in the container. It is as tall as the east and west components, and as wide as the container minus the widths of the east and west components.
The following code produces the applet shown in Figure 6-9:
public class Border extends java.applet.Applet {
public void init () {
setLayout(new java.awt.BorderLayout()); add( North , new java.awt.Button( North ));
add( East , |
new |
java.awt.Button( |
East |
)): |
add( West , |
new |
java.awt.Button( |
West |
)); |
add( South , new java.awt.Button( South )3;
add( Center , new java.awt.Button( Center ));
I
Figure 6-9:
An applet
using
BorderLayout
GridLayout
You use a Gri dLayout
grid. resizes each component to fit the grid. You can create the applet Figure 6-10 shows by replacing the s e t Lay o u t ( ) call in the preceding
B o r d e r example with
Figure 6-10:
An applet
using
GridLayout.
Your own LayoutManager
If none of the layout managers supplied by the AWT is right for your container, you can always write your own. You create a layout manager by implementing the Lay o u t M a n a g e r interface in your class.
Chapter 6: Blackjack 12 1
vDetermine the preferred and minimum sizes needed to layout the components in a container.
tr Lay out a container's components, which requires positioning and possibly sizing the components.
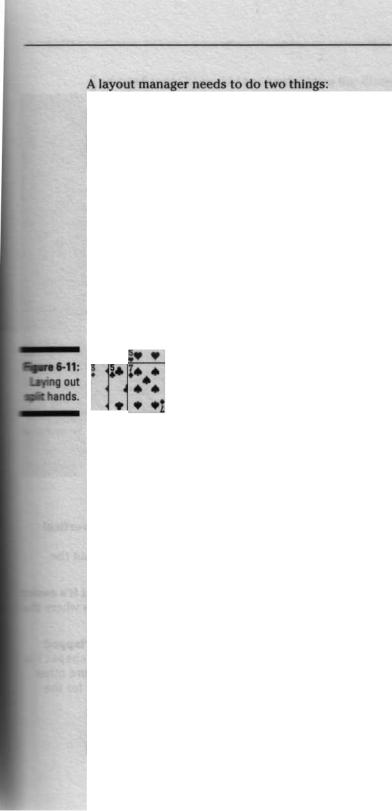
The Blackjack applet uses a custom layout manager to arrange the hands for a player. A Blackjack player starts out with a single hand of cards. When a player splits a hand, the hand becomes two new hands. (Remember. The player may split a hand into two hands if the first two cards have the same point value.) Further, the player can potentially split either or both of the new hands. Because it takes a lot of space to display each hand, reserving space for the unlikely possibility that each player would end up with four hands more than doubles the size of the applet. A better solution is to overlap the hands to cover up part of the hand, as Figure 6-11 shows.
The following custom layout manager lays out the hands as Figure 6-11 shows:
i mport java.awt.
class PlayerHandLayout implements layoutManager i private BlackjackPlayer player;
private float overlap;
public PlayerHandLayout (BlackjackPlayer player, float overlap) {
this.player = player; this.overlap = overlap;
public void addLayoutComponent (String nm, Component c) {) public void removeLayoutComponent (Component c) t)
public Dimension preferredLayoutSize (Container parent) S
Dimension ds = ((BlackjackHand)parent.getComponent(0)). preferreaSize l; int numHands = parent.countComponents();
i f (numHands <-- 2)
return new Dimension(ds.width, ds.height * numHands);
(continued)
122 Part II: Up to Speed
(continued)
else
return new Dimension(ds.width, (ds.height * 2) +
( numHands - 2) * (int)(overlap * ds.height));
public Dimension minimumLayoutsize (Container parent) I return preferredLayoutSize(parent);
public void layoutContainer (Container parent) I
Dimension hsize = ((BlackjackHand)parent.getComponent(O)).preferredSize(); int numHands = parent.countComponents();
int h, y = D; |
|
for (int ii = 0; ii < numHands |
i i++) |
if (ii == player.getHandlndex() |
1 1 |
ii == player.getActiveHandCount(3-1) h = hsize.height;
else
h = (int)(hsize.height * overlap); parent.getComponent(ii).
reshape(0, y, hsize.width, hsize.height): y += h ;
class PlayerHandLayout
The prevalent aspects of P1 ayerHandLayout are
r The B 1 a c k j a c k P 1 a y e r passes a reference to itself and the vertical overl ap ratio to the P1 ayerHandLayout ( ) constructor.
1 ayoutConta i ner () uses pl ayer to access information about the hand.
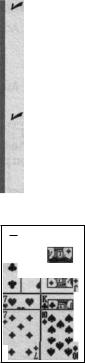
v 1 a y o u t C o n t a i n e r ( ) leaves the active hand exposed so that it's easier to recognize. Figure 6-12 shows the layout of four split hands where the second hand is the exposed, active hand.
V 1 ayoutContai ner( ) calls reshape( ) to set the size of overlapped hands to the size of the exposed area of the hand. Using r e s h a p e ( ) is important, because you can't rely on the draw order to obscure other hands; the AWT doesn't guarantee any particular draw order for the components.
Chapter 6: Blackjack |
123 |
|
preferred Layout Si ze( ) calculates the dimensions needed to display n u mH a n d s hands by assuming two exposed hands: the active hand and the last hand. If the active hand is the last hand, only one hand is exposed, but the calculation still sets the size of the hands as if two hands were exposed. The result of this calculation allows the container to size itself based on the maximum number of hands a player can have.
Layouts such as BorderLayout, which separate the components into different named groups, use the addLayoutComponent( ) and removeLayoutComponent( ) methods to organize the components into groups. However, P 1 aye r H a n d Lay o u t doesn't use these methods and just needs to include empty methods to complete the
LayoutManager interface.
7 * 4 rw *1 aA i s
Figure 6-12:
Exposing
active
hand.
Dividinq the screen with panels
Frequently, you cannot arrange an applet or other container with a single layout manager. In these cases, you can arrange your interface hierarchically by grouping components within P a n e 1 containers and using the panel's layout manager to arrange the components inside the panel. The panel itself is a single component arranged by the layout manager for the container containing the panel.
For example, consider an applet with four groups of radio buttons and several standard buttons. You can use these steps to arrange the radio buttons into separate columns and the standard buttons into a row across the bottom:
1. Create a panel for each column of radio buttons.
Give each of these panels a G r i d Layout (0, 1) layout manager. Add the radio button C h e c k b ox components to their respective groups.

12 4 Part II: Up to Speed
2.Create a panel to hold the radio button column panels.
Leave its layout manager set to the default F1 owLayout. Add the column panels to this group.
3.Create a panel for the standard buttons.
Leave its layout manager set to the default F1 ow Layout. Add the B u t t o n components to this group.
4.Give the applet a BorderLayout layout manager.
Add the panel from Step 2 to the Center |
location of the border |
layout. Add the panel from Step 3 to the |
South location of the border |
layout. |
|
Figure 6-13 shows the hierarchical organization these steps produce.
Panel with Grid Layout ( 1,0)
Figure 6-13: Nested panels.
ouu. |
oae. oon. Sao. |
|
|
Oa. |
0 oa. a err o w+ |
|
|
o a~. |
o oa. ~ a oe. 13Oft |
-Applet BorderLayout |
Center" |
O oer |
a a.. a o.. |
||
ow. |
oar |
|
|
00000 ]--AppIetBorderLayout South
Panel with F1 owl-ayout
You can also arrange this example with a Gri dBagLayout. A
G r i d B a g L a y o u t is a powerful layout manager for creating complex arrangements. Unfortunately, using a G r i d B a g L a y o u t is a fairly complicated process, and nested panels, as in this example, are usually easier to create and maintain.
Laying out a game of Blackjack
Figure 6-2 earlier in this chapter shows the logical organization of the Blackjack applet. This organization translates to a physical organization on the screen, as Figure 6-14 shows.
The top-level applet
The Blackjack applet that implements the top level of the game is as follows: