

1.2.3The Controls property
The final lines in the MyForm constructor add the button and picture box controls to the form using the Controls property. The Controls property returns an instance of the Control.ControlCollection class. The ControlCollection class is defined within the Form class, and defines an Add method that adds a control to a form. Note that the Controls property can be used to retrieve the controls on a form as well.
public MyForm()
{
. . .
// Add our new controls to the Form this.Controls.Add(btnLoad); this.Controls.Add(pboxPhoto);
}
When a control is added to a form, it is placed at the end of the z-order of the stack of controls on the form. The term z-order is used for both the set of forms in the application and the set of controls on a particular form, and indicates the order of windows stacked on the screen or controls stacked on a form, much like stacking dishes on a table.
The end of the z-order is bottom of the stack. You can think of this as the view a chandelier has of a table. If the tabletop is the form, and a cup and saucer are controls, in your code you would first add the cup control to the table, then add the saucer control so that it appears underneath the cup. This can be a bit unintuitive, so make sure you understand this point when programmatically adding controls to your forms.
The term z-order comes from the fact that the screen is two-dimensional, and is often treated as a two-axis coordinate system in the X and Y directions. The imaginary axis perpendicular to the screen is called the z-axis. This concept of z-order will be important later in the chapter when we have overlapping controls.
Now that our controls are placed on the form, we can use them to load and display an image.
1.3Loading files
The next change to our little program will permit the user to click the Load button and display a selected file in the picture box control. The result appears in figure 1.4, and looks very much like our previous screen, with the addition of the selected image.
18 |
CHAPTER 1 GETTING STARTED WITH WINDOWS FORMS |
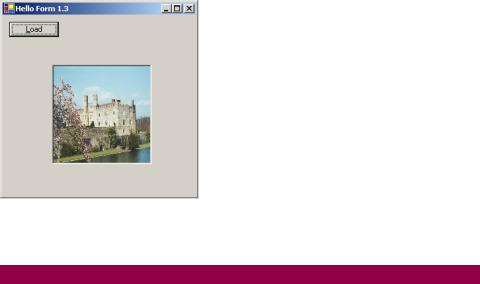
Figure 1.4
The image loaded into the PictureBox control here is stretched to exactly fit the control’s display area.
Revise your program in accordance with listing 1.3. Once again the changes are shown in bold type, and the version number has been incremented, this time to 1.3.
Listing 1.3 The OpenFileDialog class is now used to load an image file
[assembly: System.Reflection.AssemblyVersion("1.3")]
namespace MyNamespace
{
using System;
using System.Drawing;
using System.Windows.Forms;
public class MyForm : System.Windows.Forms.Form
{
Button btnLoad;
PictureBox pboxPhoto;
public MyForm()
{
this.Text = "Hello Form 1.3";
// Create and configure the Button btnLoad = new Button(); btnLoad.Text = "&Load"; btnLoad.Left = 10;
btnLoad.Top = 10;
btnLoad.Click += new System.EventHandler(this.OnLoadClick);
// Create and configure the PictureBox pboxPhoto = new PictureBox();
pboxPhoto.BorderStyle = System.Windows.Forms.BorderStyle.Fixed3D; pboxPhoto.Width = this.Width / 3;
pboxPhoto.Height = this.Height / 3;
pboxPhoto.Left = (this.Width - pboxPhoto.Width) / 2; pboxPhoto.Top = (this.Height - pboxPhoto.Height) / 2;
pboxPhoto.SizeMode = PictureBoxSizeMode.StretchImage;
LOADING FILES |
19 |

// Add our new controls to the Form
this.Controls.Add(btnLoad);
this.Controls.Add(pboxPhoto);
}
private void OnLoadClick(object sender, System.EventArgs e)
{
OpenFileDialog dlg = new OpenFileDialog();
dlg.Title = "Open Photo";
dlg.Filter = "jpg files (*.jpg)|*.jpg|All files (*.*)|*.*" ;
if (dlg.ShowDialog() == DialogResult.OK)
{
pboxPhoto.Image = new Bitmap(dlg.OpenFile());
}
dlg.Dispose();
}
public static void Main()
{
Application.Run(new MyForm());
}
}
}
Note that there is a new namespace reference:
using System.Drawing;
This is required for the Bitmap class used to load the image file. As you’ll recall, the using keyword allows us to shorten to fully qualified name System.Drawing.Bitmap to the more manageable Bitmap. To include the definition of the Bitmap class, the System.Drawing.dll assembly is required when the program is compiled. The new compiler command for our program is below. Note that we use the short form /r of the /reference switch.
>csc MyForm.cs /r:System.dll /r:System.Windows.Forms.dll /r:System.Drawing.dll
Run the new program. Click the Load button and you will be prompted to locate a JPEG image file. If you do not have any such files, you can download some sample images from the book’s website at www.manning.com/eebrown. Select an image, and it will be loaded into the image window. Figure 1.4 shows a window with a selected image loaded. If you think this image looks a little distorted, you are correct. We’ll discuss this point in more detail later in the chapter.
As before, let’s take a look at our changes in some detail.
1.3.1Events
If you think about it, Windows applications spend a large amount of time doing nothing. In our example, once the window is initialized and controls drawn, the
20 |
CHAPTER 1 GETTING STARTED WITH WINDOWS FORMS |
application waits for the user to click the Load button. This could happen immediately or hours later. How an application waits for such user interactions to occur is an important aspect of the environment in which it runs. There are really only two possible solutions: either the application has to check for such actions at regular intervals, or the application does nothing and the operating system kicks the program awake whenever such an action occurs.
Waiting for a user action can be compared to answering the phone. Imagine if there were no ringer and you had to pick up your phone and listen for a caller every couple of minutes to see if someone was calling. Even ignoring the extra time a caller might have to wait before you happened to pick up the receiver, it would be difficult to perform any other activities because you would constantly have to interrupt your work to check the phone. The ringer allows you to ignore the phone until it rings. You can fall asleep on the couch while reading this book (not that you would, of course) and rely on the phone to wake you up when someone calls (unless you turn off the ringer, but that is a separate discussion).
Similarly, Windows would grind to a halt if applications were actively looking for user actions all the time. Instead, applications wait quietly on the screen, and rely on the operating system to notify them when an action requires a response. This permits other applications to perform tasks such as checking for new email and playing your music CD between the time you run a program and actually do something with it. The interval between running the program and using it may only be seconds, but to a computer every fraction of a second counts.
Internally, the Windows operating system passes messages around for this purpose. When the user clicks the Load button, a message occurs that indicates a button has been pressed. The Application.Run method arranges for the application to wait for such messages in an efficient manner.
The .NET Framework defines such actions as events. Events are pre-defined situations that may occur. Examples include the user clicking the mouse or typing on the keyboard, or an alarm going off for an internal timer. Events can also be triggered by external programs, such as a web server receiving a message, or the creation of a new file on disk. In C#, the concept of an event is built in, and classes can define events that may occur on instances of that class, and enable such instances to specify functions that receive and process these events.
While this may seem complicated, the result is simply this: when the user clicks the mouse or types on the keyboard, your program can wake up and do something. In our program, we want to do something when the user clicks the Load button. The Button class defines an event called Click. Our program defines a method called OnLoadClick to handle this event. We link these two together by registering our method as an event handler for the Click event.
btnLoad.Click += new System.EventHandler(this.OnLoadClick);
LOADING FILES |
21 |