

Part 3: Managing Processes, and Regional and Language Settings in Windows 7
In this part of the lab, you will examine regional and language settings, and explore how to manage processes in Task Manager.
Recommended Equipment
A computer running Windows 7
Step 1
Log on to Windows as an administrator.
Press keys Ctrl-Alt-Delete > click Start Task Manager > Processes tab.
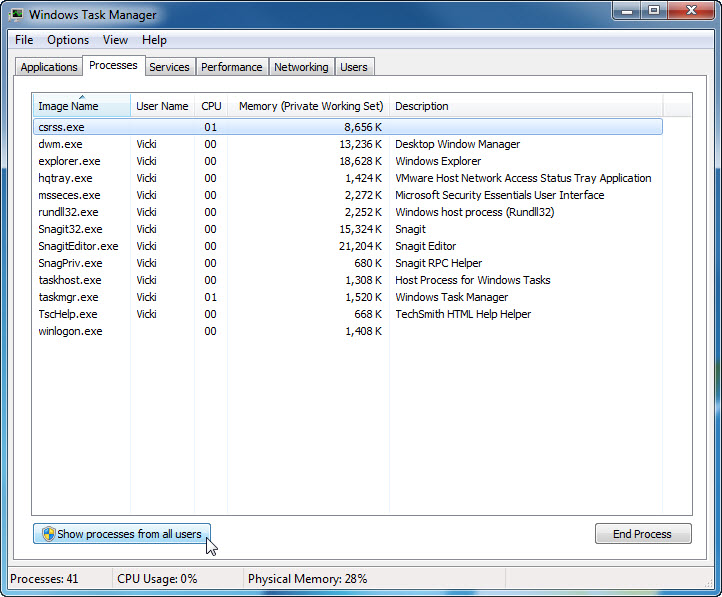
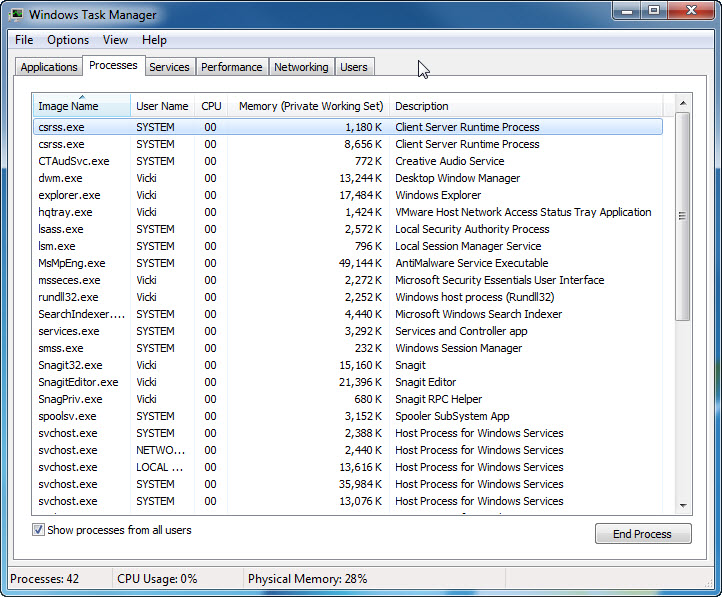
Click Show processes from all users.
Double-click the border around the tabs.
Windows Task Manager is now in compact mode.

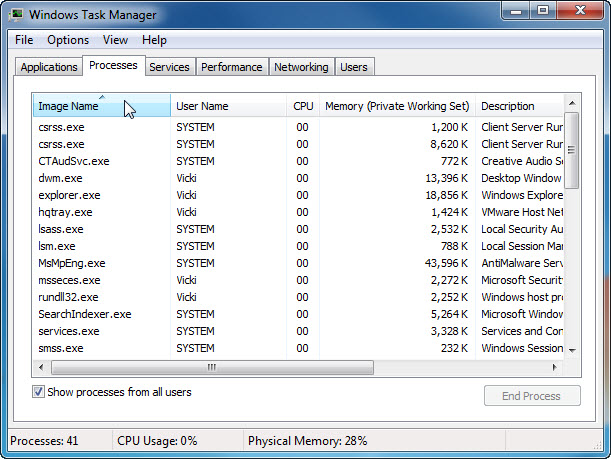
Click Image Name.

Click Image Name again.
What effect does this have on the columns?
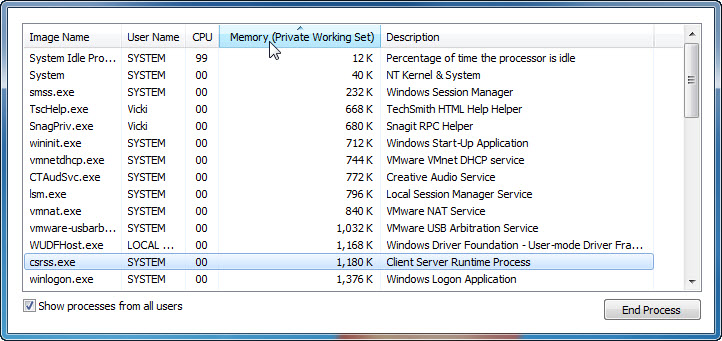
Click Memory (Private Working Set).
What affect does this have on the columns?
Double-click the outside border again to return to tabs mode.
Step 2
Open a browser.
Note: Firefox is used in this lab. However, any browser will work. Just substitute your browser name whenever you see the word Firefox.
Return to the Windows Task Manager.

Click Image Name so the list is in alphabetical order, then locate and select firefox.exe.

Right-click firefox.exe > Set Priority.
What is the default priority for the browser?
Set the priority to Above Normal.

Click Change priority to the Windows Task Manager warning message.
Step 3
Click View > Select Columns.
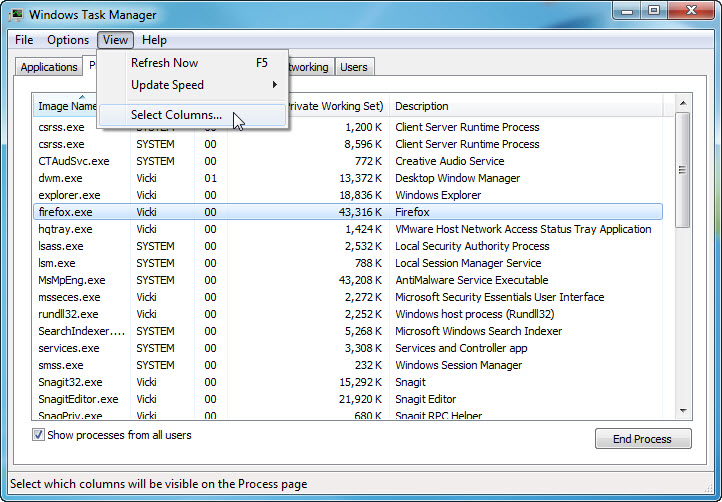
The “Select Process Page Columns” window appears.
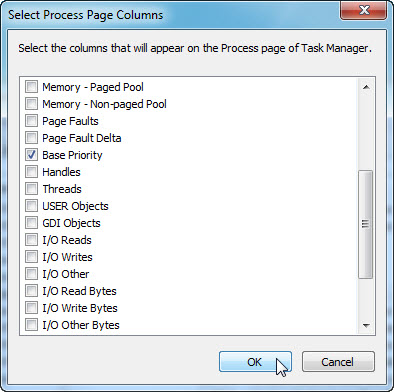
Place a check mark next to Base Priority > click OK.
Expand the width of the “Windows Task Manager” so the “Base Priority” column is visible.
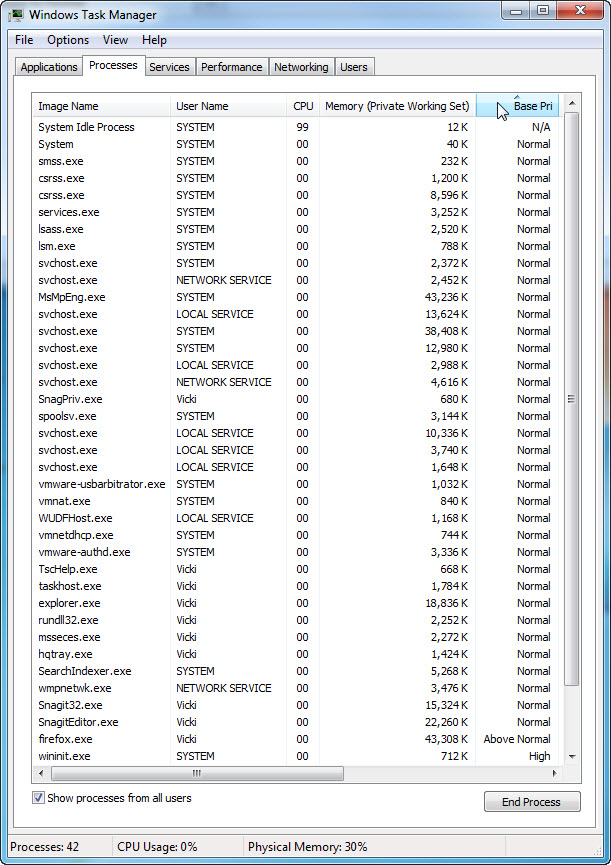
Click Base Pri.
Which image name has a base priority of N/A?
List the image name that has a base priority of Above Normal?
Step 4
Reset Firefox.exe base priority to normal. Right-click firefox.exe > Set Priority > Normal > Change priority.
Click View > Select Columns > uncheck Base Priority > OK.

Close Firefox.
Is Firefox listed as a process?
Close all open windows.
Step 5
Click Start > Control Panel > Clock, Language, and Region > Region and Language.

The “Regional and Language” window appears.

What regional format is being used?
Click Additional settings.

What are the tabs that can be customized?
Click Cancel.
Click the drop-down menu in “Formats” area. Select Belarusian (Belarus).

Notice the changes to the output in the “Example” area of how data is displayed using this format.
Click the drop-down menu in the “Format” area.
Return the setting to the original format.
Click Keyboards and Languages tab > Change keyboards.

Click Add.
Scroll down the list of options and expand Belarusian (Belarus) > Keyboard > select US > OK.

Click Apply to accept the changes.
Close all opened windows
Step 6
Right-click the Taskbar.
Select Toolbars > Language bar to ensure that the Language bar is shown in the Taskbar.

Right-click the Language bar in the Taskbar.
Select Settings.

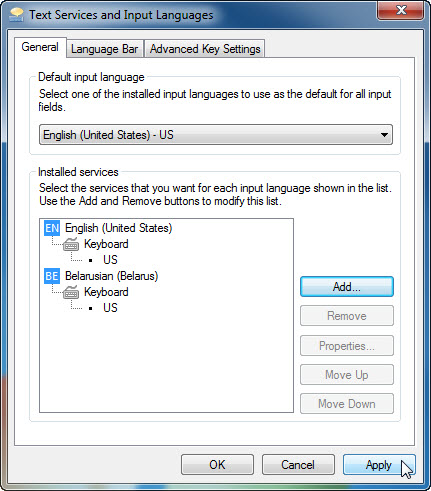
The “Text Service and Input Languages” window appears.
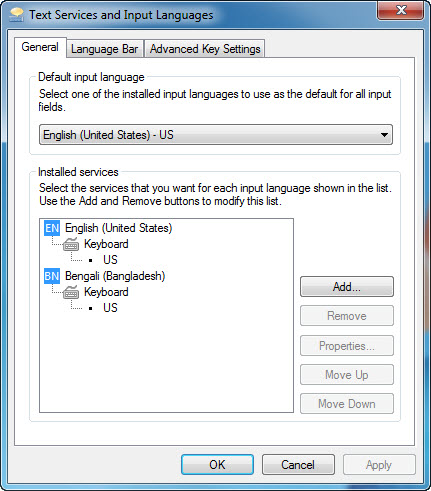
What is the Default input language?
Close all opened windows.
Part 4: Managing Windows 7 System Performance
In this part of the lab, you will manage and monitor Windows 7 system performance.
Recommended Equipment
A computer running Windows 7
Step 1
Log on to Windows as an administrator.
Note: Some antivirus or antispyware programs must be uninstalled on the computer for Windows Defender to work.
To see if Windows Defender is turned off click Start > in Search programs and files type Defender > select Windows Defender.
If the “This program is turned off” screen appears, click click here to turn it on.

Windows Defender should start, if not, uninstall any antivirus or antispyware programs and then click Start > in Search programs and files type Defender > select Windows Defender.
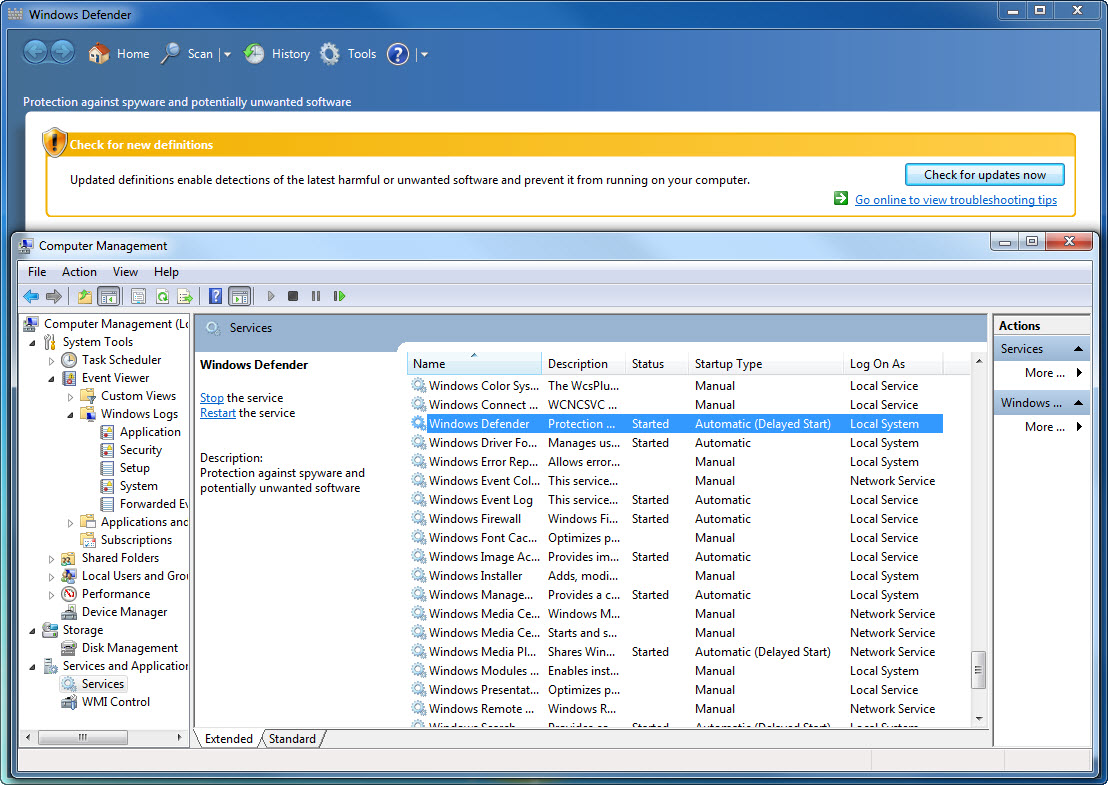
Click Start > Control Panel > System and Security > Administrative Tools > Computer Management > expand Services and Applications > select Services.
Close the Administrative Tools window.
Resize and position both windows so they can be seen at the same time.
Can Windows Defender check for updates?
Scroll the “Computer Management” window so you see the “Windows Defender” service.
What is the Status of the service?
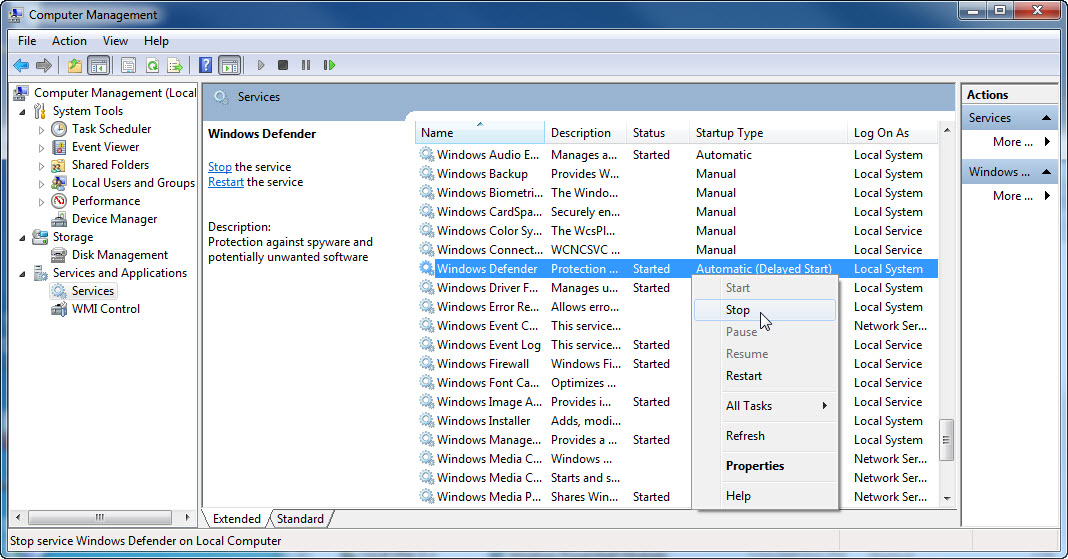
Right-click Windows Defender service > select Stop.
Note: The reason this service will be stopped is so you can easily see the results. When stopping a service, to free up system resources the service uses, it is important to understand how the overall system operation will be affected.
The “Service Control” window appears and closes.
Select the Windows Defender window so it is active.

What must be done so Windows Defender can run?
Start the Windows Defender service, click Start now.
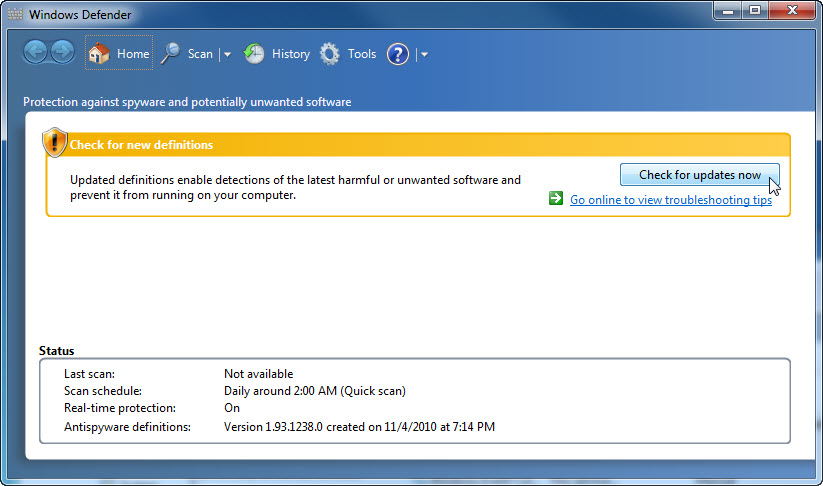
Can Windows Defender check for updates?
Close the Windows Defender window.
Step 2
Make sure the Computer Management window is open.
Expand Event Viewer > Windows Logs > select System.
Select the second event in the list.
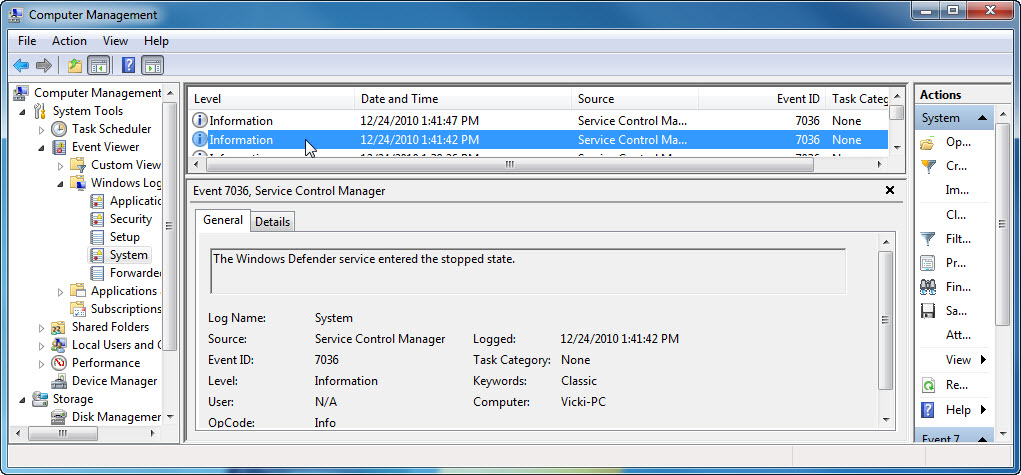
Look below the General tab then explain what has happened to the Windows Defender service.
Click the up arrow button on the keyboard or select the event above this one.

Look below the General tab then explain what has happened to the Windows Defender service.
Close all opened windows.
Step 3
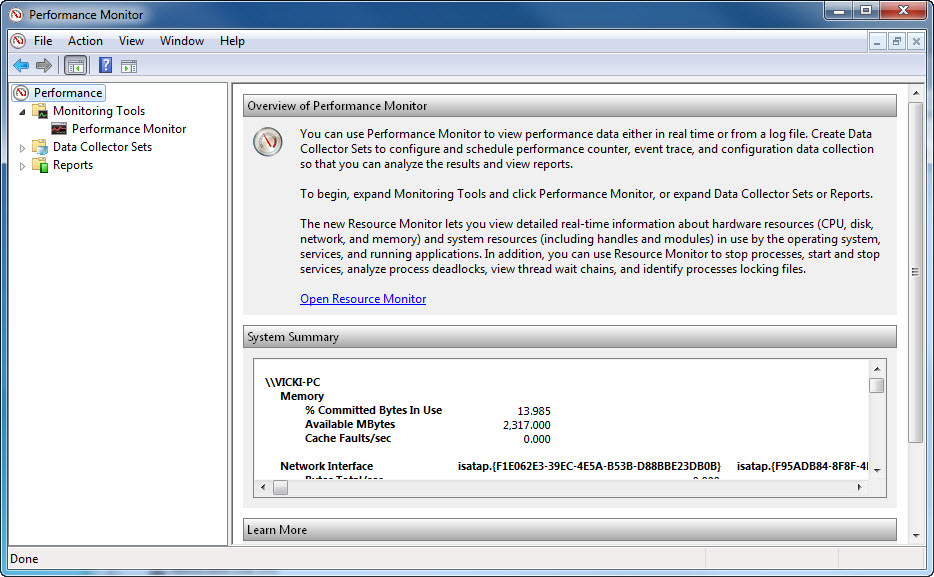
Click Start > Control Panel > System and Security > Administrative Tools > Performance Monitor.
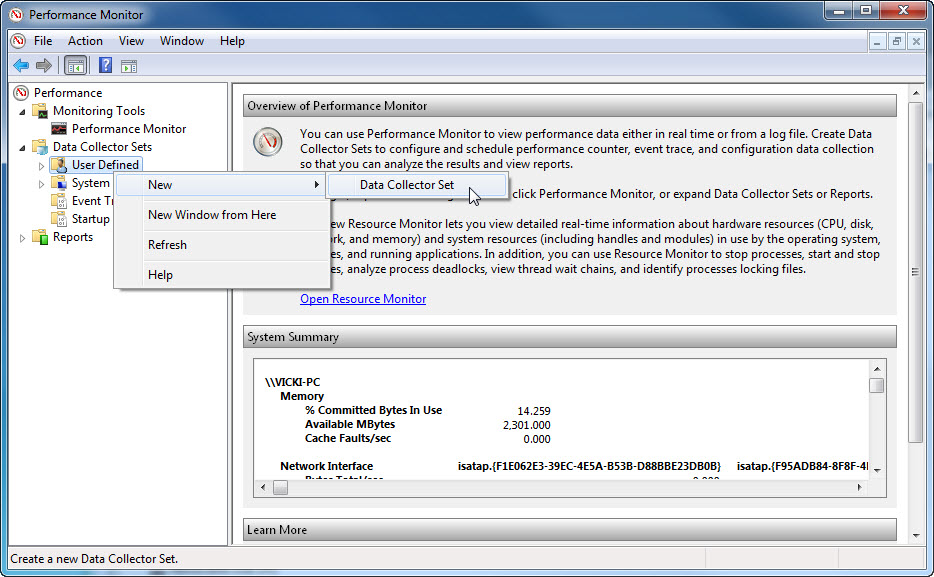
Expand Data Collector Sets > right-click User Defined > New > Data Collector Set.
The “Create new Data Collector Set” window appears.

In the Name field, type Memory Logs. Select the Create manually (Advanced) radio button > Next.
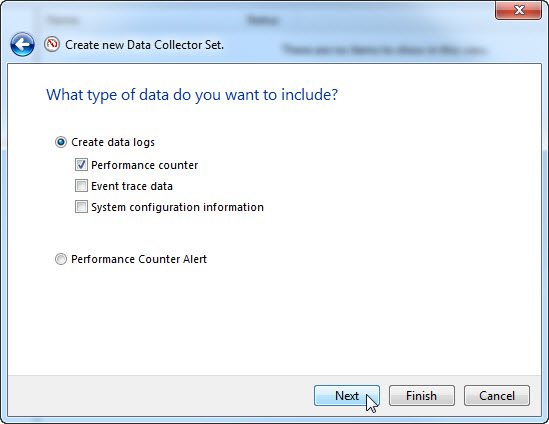
Select Performance counter > Next.

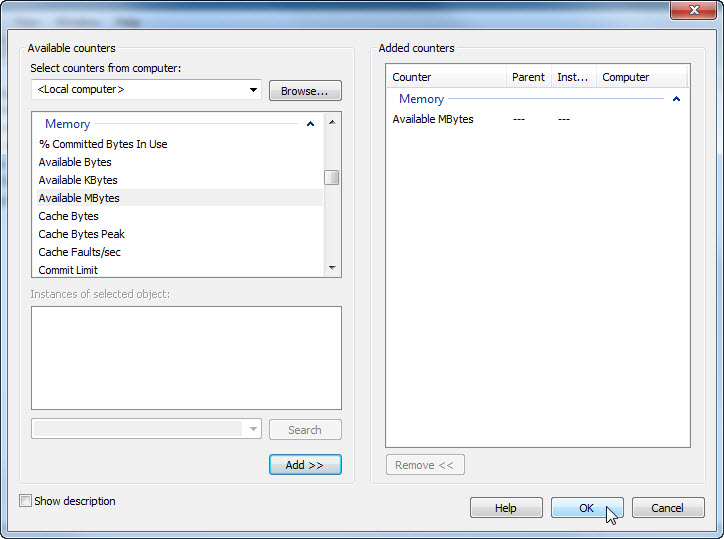
Click Add.
From the list of available counters locate and expand Memory. Select Available MBytes > Add.
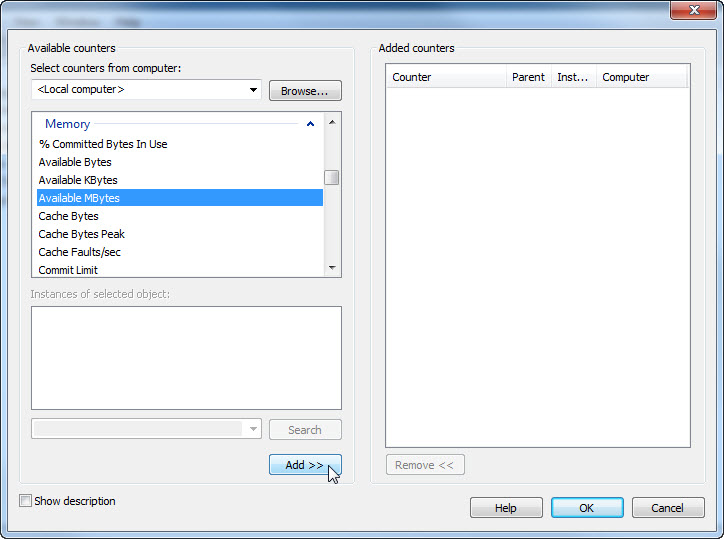
Click OK.
Set the Sample interval field to 4 seconds. Click Next.

Click Browse.

Select drive (C:) > PerfLogs > OK.

The “Create new Data Collector Set” window appears.

Click Next.
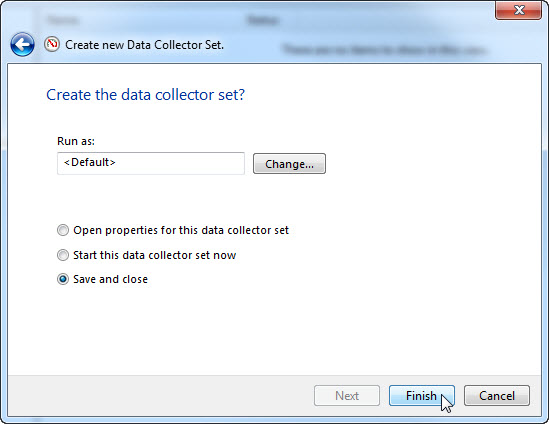
Click Finish.
Step 4
Expand User Defined > select Memory Logs > right-click Data Collector01 > Properties.
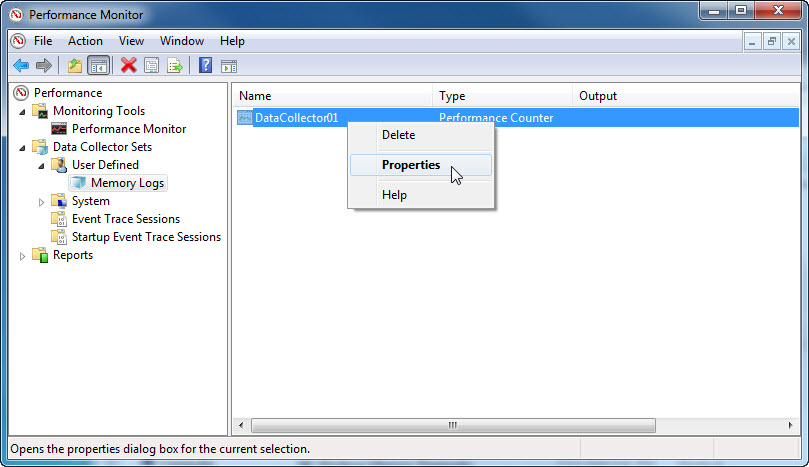
The “DataCollector01 Properties” window appears.
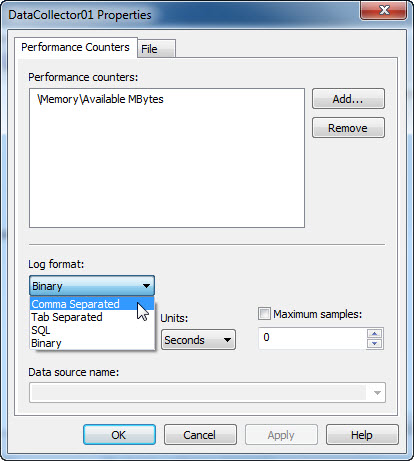
Change the Log format: field to Comma Separated.
Select the File tab.

What is the full path name to the example file name?
Click OK.
Step 5
Select the Memory Logs icon in the left pane of the “Performance Monitor” window.
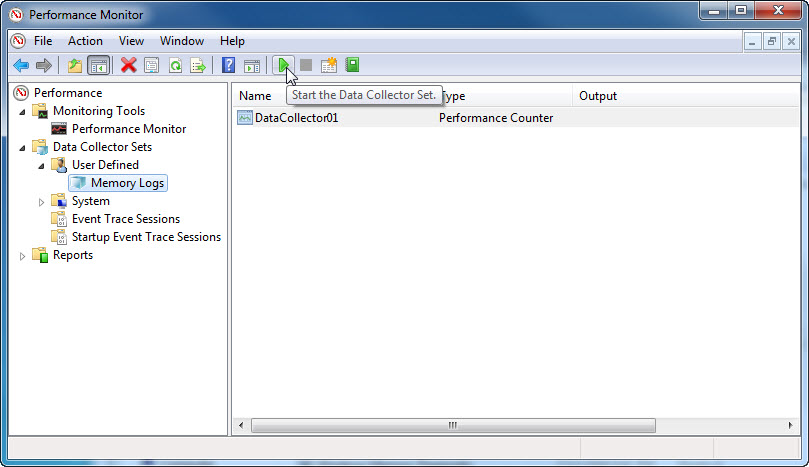
Click the green arrow icon to start the data collection set.
Notice a green arrow is placed on top of the Memory Logs icon.

Step 6
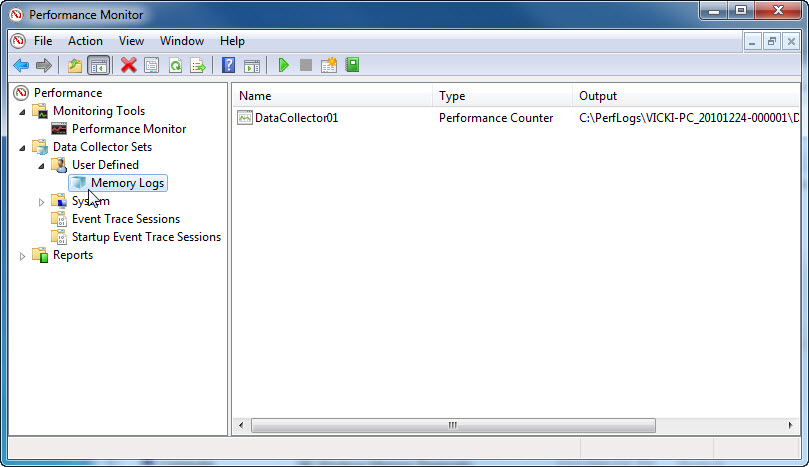
To force the computer to use some of the available memory, open and close a browser.
Click the black box icon to stop the data collection set.

What change do you notice for the Memory Logs icon?
Step 7
Click Start > Computer > double-click drive C: > PerfLogs > Continue > VICKI-PC_20101224-00001 > Continue.

Double-click DataCollector01.csv file.
Note: If “Windows cannot open the file:” message appears select radio button Select a program from a list of installed programs > OK > Notepad > OK.

What does the column farthest to the right show?
Step 8
Close the DataCollector01.csv file and the window with the PerfLogs folder.
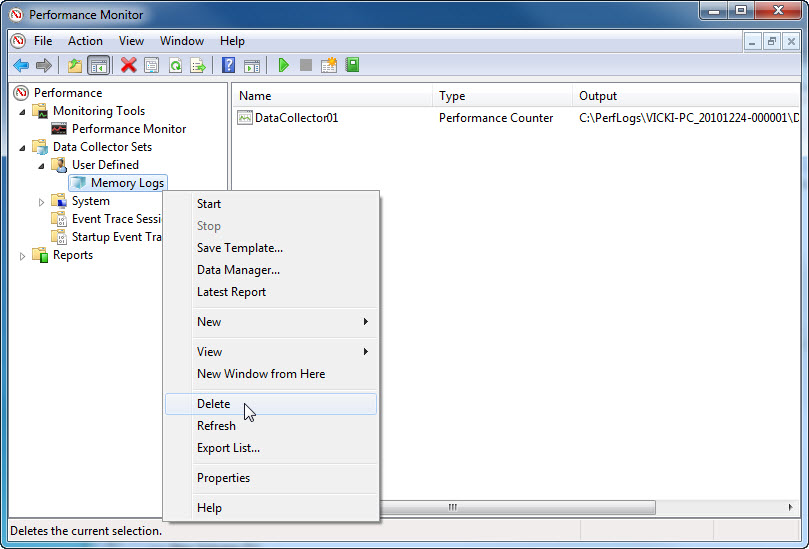
Select the Reliability and Performance Monitor window. Right-click Memory Logs > Delete > Yes.
Open drive C: > PerfLogs folder > right-click VICKI-PC_20101224-000001 > Delete > Yes.
Close all open windows.