

Digital Sculpting with mudbox
.pdfDigital Sculpting with Mudbox
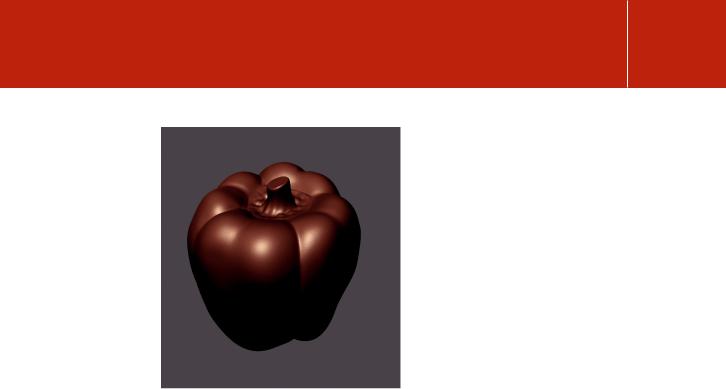
the edges of floret to separate it visually from the body of the pepper, as seen in Figure 2.24. At this point, you should have a recognizable sculpture of a bell pepper.
Adding Texture with a Stencil
Although the skin of a pepper may appear perfectly smooth, if you look closely, it has a slight texture. So, in these last few steps, you will add a texture to the skin of the pepper, using the Sculpt tool along with a Stencil. But first things first, create a new layer and name it Texture. As with the other two layers, adding this layer just for sculpting the texture preserves any work you have done so far and allows you to experiment without worry.
Select the Sculpt tool and set its Size to about 20 and Strength to about 5. Then, from the top row in the Stencils tray, choose the third image to the right by clicking on it once. If you hold the mouse over the stencil images, the file name is displayed; the one you want to choose is named bw_finestonedetail. png. As soon as you select the stencil, it is displayed in the viewport along with a HUD that has instructions on how to manipulate the stencil image. In this case, the stencil should be smaller, so press S + RMB and drag to scale
it down (Figure 2.25). Next, click on the Sculpt tool once more to display its properties in the Properties tray and turn on mirroring across the x axis by selecting X from the Mirror menu. Mirroring allows the Sculpt tool to texture both sides of the pepper at the same time.
Now that everything is ready, start brushing with the Sculpt tool along the surface of the pepper. You should see a texture appear underneath the sculpted area. Rotate the camera so that you can apply the texture on all of the pepper’s skin. Don’t worry if the texture appears very rough; apply the texture to all of the pepper’s skin, but try to avoid the stem and floret (Figure 2.25). Once you
FIG 2.25 Use the Sculpt Tool with a Stencil to Add a Texture to the Pepper’s Skin. When Finished, the Texture Will Appear Very Rough.
36
Introduction to Mudbox
FIG 2.26 Use the Opacity Property of the Texture Layer to Reduce the Skin Roughness.
are finished applying the texture, click on the Off button in the Stencils tray. At this point, the pepper has a very rough skin. To remedy this problem, go to the layer named Texture and in the Opacity field change the value from 100 to 10. You should see the texture become very subtle as in Figure 2.26. The opacity property of the layer may also be changed by using the Opacity slider.
Summary
Congratulations on completing the first sculpting tutorial. By this point, you should be familiar with the Mudbox interface and be able to locate the sculpting tools, the Layers tab, the Properties window, and navigate the scene using the mouse or stylus. In this tutorial, you used many of the sculpting tools and managed layers and subdivision levels to sculpt a bell pepper. That is quite an accomplishment for a beginner. And you have probably figured out that there are many possible ways to sculpt a bell pepper. Becoming proficient with Mudbox requires practice, but the great thing about Mudbox is that it makes practice fun. In the next chapter, you will sculpt a portrait bust. You will take everything you have learned in this chapter and apply it to a more challenging sculpture.
37