

Publishing history - Basic Armouring
.pdfHANDS
Leather Demi Gauntlet
Basket hilts are a good way of protecting the hand. Unfortunately they leave the wrist and back of hand unprotected. A demi gauntlet provides protection for these areas.
1.Cut out the pieces remembering to allow for padding. Note how the hand plate does not go all the way to the bend line of the wrist.
2.Punch holes for rivets in hand plate tabs.
3.Bend tabs to fit inside wrist guard (thinning if necessary).
4.Mark the position of one of the central tab holes, inside the wrist piece, then punch out a hole at this point.
5.Temporally hold the two pieces together with a nut and bolt and mark correct position of holes for rest of tabs.
6.Punch holes then rivet the two pieces together.
7.Stick padding inside
8.Fit and rivet palm strap in place
9.Rivet buckle and strap in place.
10. Pick up sword and trim guard if necessary.
75
HANDS
76
Chapter 14 — Legs
Your legs are the bits that poke out from under your shield and are therefore prime targets. The place you are most likely to get hit is on the outer side of your leading (shield side) leg, unless you meet an opposite handed fighter in which case you will probably be hit on the inner side of this leg (ah the joys of being sinister). The most dangerous place to be hit is on the knee and this should obviously be well protected. Getting hit on an unarmoured lower leg hurts a lot too! While I’m at it I’ll mention the extremities of the legs. At the bottom you will hopefully find some feet, which are best protected by a pair of sturdy boots (with ankle protection) and at the top you will find the groin area which can be protected by a box. The flat Cricket style box is pretty useless for running about in so buy a better shaped martial arts, hockey or contact sports one. Get a decent holder too while you’re at it. Female fighters see advice in Chapter 18.
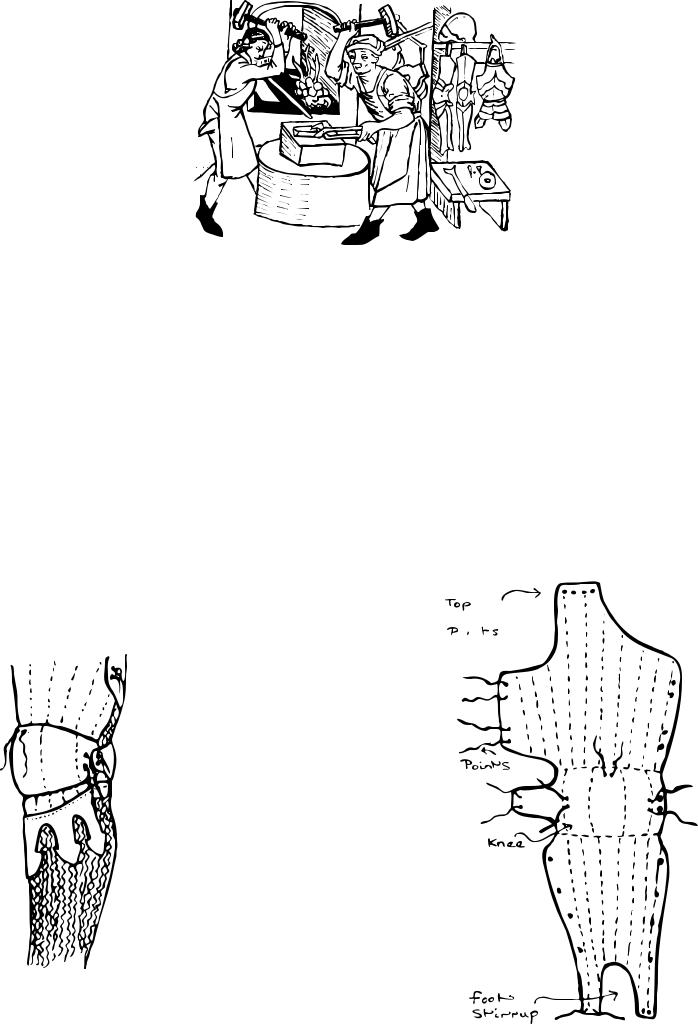
Padded Legs
A style of armour often seen in early 14C illustra- 


 tions worn over mail. A shortened version often had

a decorative border of leather or fabric along the bottom edge. The design is also ideal as hidden armour; see Chapter 18. The padded hose should be made of several layers of heavy canvas or calico stuffed with
cotton or other padding. The cuisse, thigh
covering, should be quilted vertically and
either padded quite thickly or backed with a
rigid material, for example leather or plas-
tic. The area of the knee should be quilted
into 3-5 sections and stuffed quite full of
padding to adsorb the force of any impact on
cop. It is also worth padding the area below
quite well to protect from shots that glance
The padding can be extended all the way down ending in a foot stirrup, or ended about 6
the knee area. The long version is good if
77

LEGS
wear greaves (lower leg armour) the short version better if you want to wear full mail legs. The knee cop is a variation on the floating cop, described below, fastened onto the padding by three sets of arming points. The cop should be fairly large so that it covers the entire knee, even when bent.
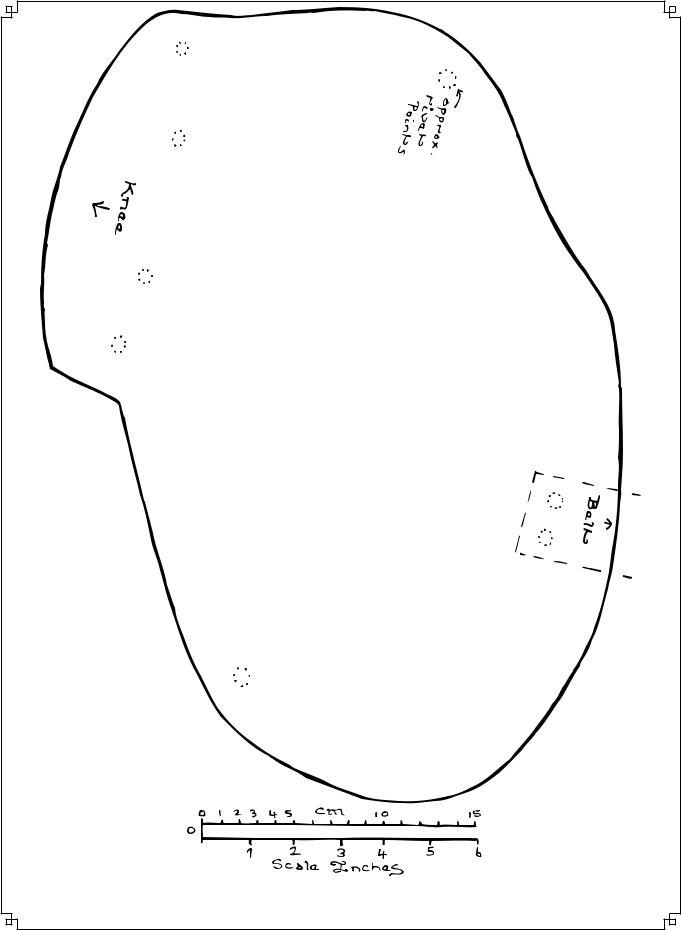
Splinted Upper Legs
These are made in the same fashion as splinted arms, see Chapter 12. Adjust the shape shown to fit your leg then cut from thick hide. Add splints to strengthen. Because most re-enactors fight on foot their armour can come further round the leg (giving more protection) than period examples designed to be used on horseback, where a considerable part of the leg is protected by the saddle/horse. The advantage of a flexible material such as leather is that you can wrap the armour as far around the leg as you like without worrying about how you will take them on and off!
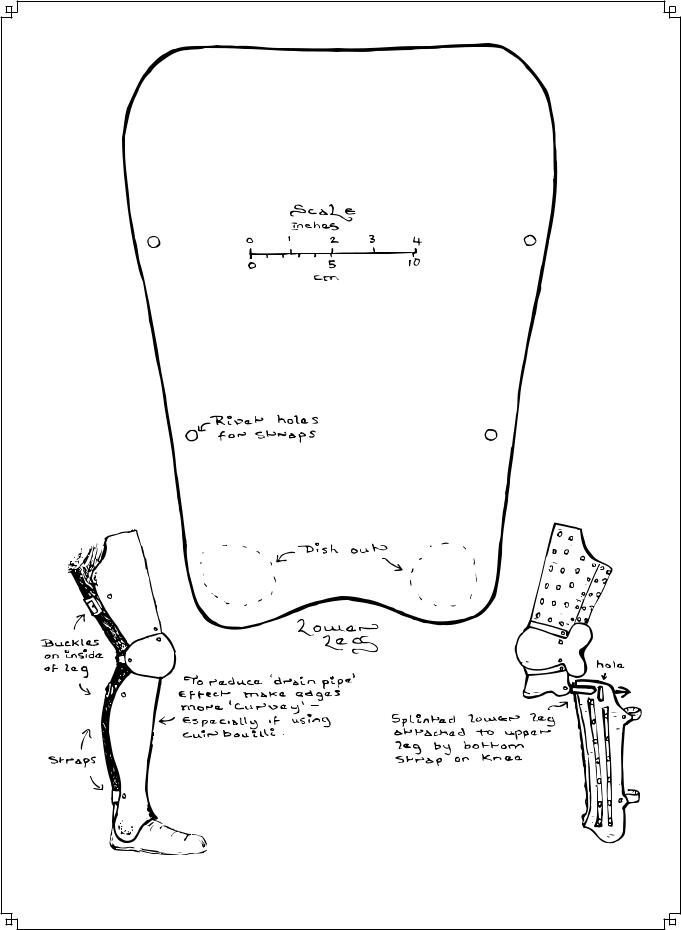
Plate Upper Legs
The pattern can also be used for Cuir Bouilli or thermoplastic; the latter should be covered with leather or cloth or worn as hidden armour. The instructions below are for steel; adapt as necessary. Because these materials are less flexible than the padding and leather types described previously a hinged rear flap is necessary to protect the back of the leg (and still let you get into the armour!).
1.Adjust the pattern changing the length and width to suit your leg. Remember to allow enough gap at the back to enable you to slip it on your leg!
2.Transfer the pattern twice to a piece of steel (you have two legs don’t
you?)
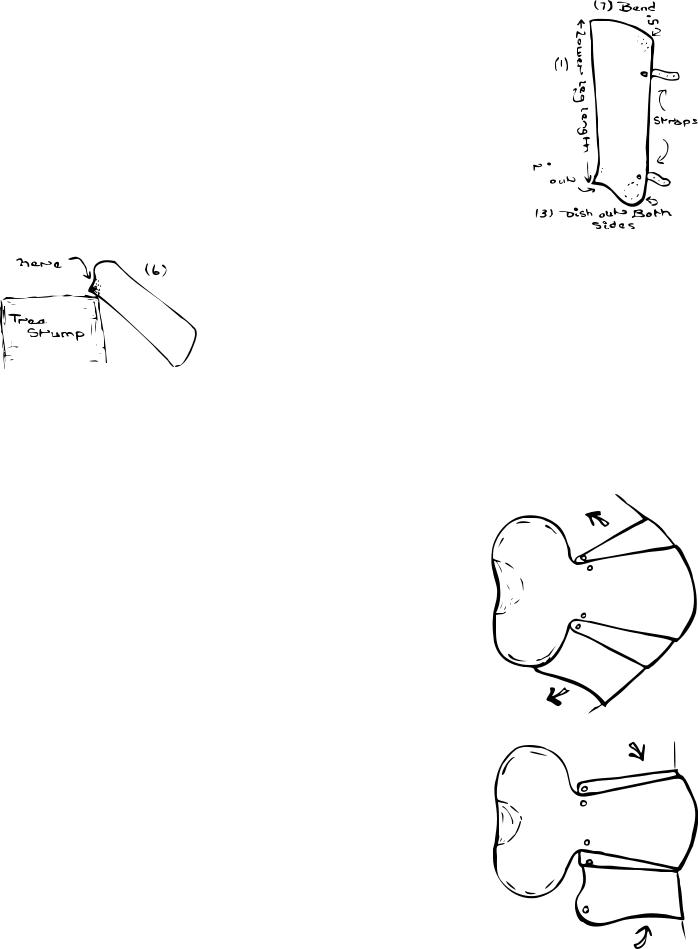
3. Bend the legs into the half cone shapes shown and
then adjust this shaping to fit snugly around your leg with allowance for padding.
4. Cut out the rear flaps bend
into a curve to fit the back
of your leg then file the con-
tact edges to give a smooth
joint with the main piece of
the leg armour
5. Roll the top edge the main piece and side edge
of the flap to give additional strength
6. Join the two pieces, of each leg, with a leather
hinge.
7. The legs are now ready for final assembly as described in last section of this chapter.
78
LEGS
Figure 14-1: Splinted Upper Leg
79

LEGS
Figure 14-2: Leg Armour Patterns
80
LEGS
Figure 14-3: Leg Armour Patterns (cont.)
81
LEGS
Lower Legs
This is armour, often referred to as Greaves, to protect the shins and ankles. The pattern can be used with leather, steel, Cuir Bouilli or thermoplastic; the latter should be covered with leather or cloth or
worn as hidden armour. These instructions are for steel; adapt as necessary!
1. Measure the length of your lower leg and, allowing for upper leg armour, adjust the pattern to fit your leg. The bottom edge,
or lower plate, of your knee cop should rest on the top of your lower leg armour. 


2. Transfer pattern to steel and cut two out (one for each leg).
3. Dish out the two ankle covering areas 

 4. Bend the metal into a tube; the top should be
slightly wider than the bottom.
5. Place the tube over a former and hammer out
the area above the foot. This prevents the edge of the steel from resting on your foot and trying to cut
through your boot; which is painful!
6.Bend out the ankle covers to fit your foot.
7.Bend in the top corners with a rubber/rawhide mallet.
8.Add buckle and straps. The buckle should go to the inside of the leg.
Floating Cop
This is an early style, one piece, protector for the knee. Simply cut out the shape shown then dish to fit around your knee. It can either be laced to your leg padding or hung from the upper leg armour.
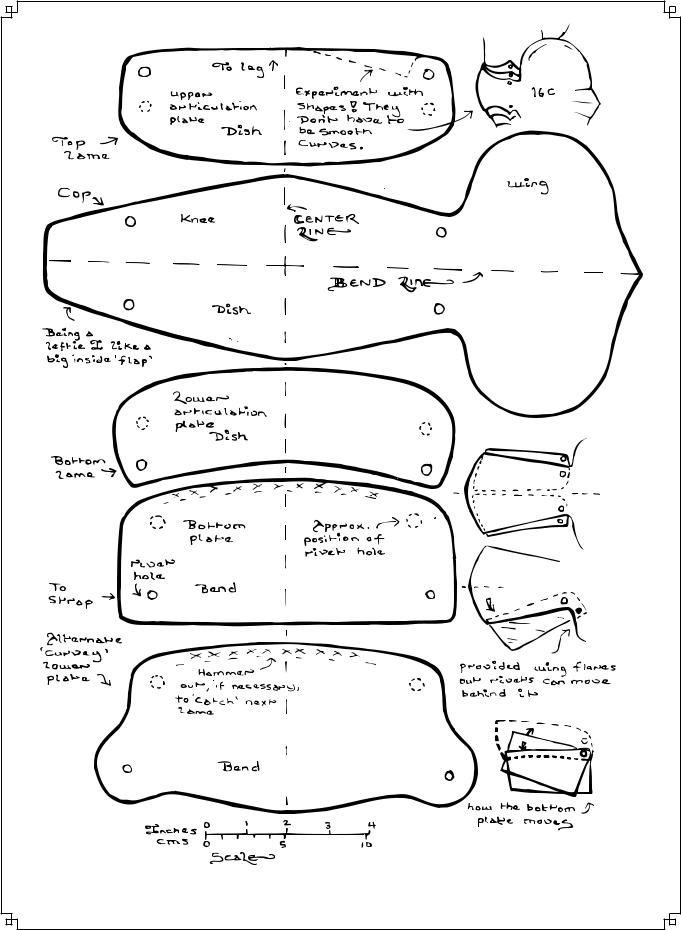
Articulated Cop
This is a later design, which, while being more difficult to make than the floating one, gives far better protection. The articulated cop shown consists of five pieces, the upper and lower articulation plate’s act in the same fashion as those on an elbow and allow you to flex the knee to sit or kneel down. The bottom articulation also allows the knee to flex in the opposite direction. This permits you to fully straighten your leg if, for example, you want to sway back to avoid a blow or put you feet into a stirrup. If you have made an elbow cop then a knee should be no problem—which is why I haven’t gone into huge details below—see Chapter 12
82
LEGS
Figure 14-4: Templates for Knees
83

LEGS
if you have any problems. Remember it is best to bolt everything together until you have got all the plates to work!
1.Cut out the cop and dish it to shape.
2.Cut and shape the upper and lower articulation plates.
3.Cut and shape the bottom articulation. It articulates to the plate above in the normal fashion.
4.Cut and curve the bottom plate to fit around the top of your lower leg armour. This plate needs to articulate forward; you don’t need much movement, just enough to stop it digging in when you straighten
your leg fully. When looking for the articulation points make sure the plate catches when flexed in either direction; or else it will gap when you kneel down or worse still jam
open.
Fan plate
As with elbows the cop can be made with or without a fan plate. The plate illustrated is made as follows:
1. Bend the plate to give a curve along the centre line CL.
2. Dish the area marked A inwards with the ball end of a small hammer. Bending this in will bend
the two wings B out. The curve produced by the A part will help protect the back of the knee.
3.Bend the two wings out a bit further by beating them over a convenient former. Take care not to lose the lengthwise curve whilst doing this.
4.Shape the area marked C to match the side of the cop (or ‘blend it in’ for a open piece cop-fan construction).
5.Check the fit and adjust as necessary. Area A should curve around the back of the knee but not get in the way when you are kneeling down. The two wings should stand proud of the rest of the leg armour without sticking out at a ridiculous angle.
84