

ZAMBAK_IT_ExpressionWeb2
.pdfFill in the layer with text.
You can also add pictures, tables, videos etc.
You can manage the layers and change the properties of the layers by using the Layers task pane.
Select Format>Layers to open the Layers task pane.
You have only one layer for now. You can add layers, however many you want.
Add one layer for each animal, resize, and position them on the page where
you want them them to show. |
A layer |
You can change the properties of the layer such as borders, shading, or positioning.
Right-click the layer and select Borders and Shading or Positioning.
Opening Borders
and Shading
Layers
You can choose border style, color in Borders, and give background color and picture in Shading. You can position the layer exactly where you want on the page and specify its size.
Changing borders and shading |
Positioning the layer |
Improving Interactivity 101
Changing layer visibility
Selecting the
picture
Opening Change
Property
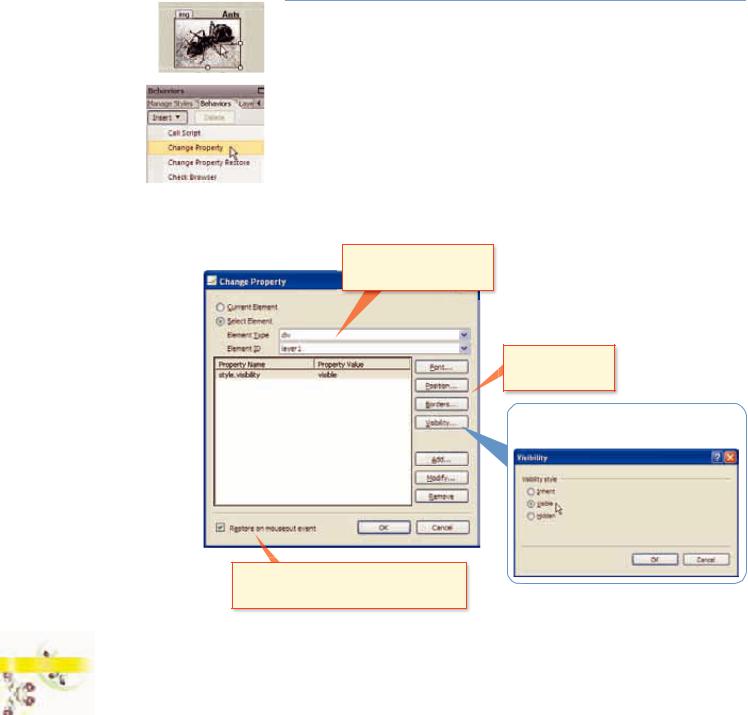
You need to make the layer invisible since it is invisible initially.
Click on the layer visibility to set the Visibility to Hidden.
Now you can apply behaviors to the layer to animate it.
Applying a Behavior to a Layer
When you move the mouse over the picture, the layer appears and when you move the mouse out of the picture, the layer disappears.
Click the picture which will control the layer.
Select Format>Behaviors. The Behaviors task pane opens.
Click Insert and choose Change Property to change the layer property.
You can apply a behavior to a particular HTML tag. You need to apply this behavior to the <div> tag since the layer uses the div tag.
Set the Element Type to div, and then select the layer in the Element ID. You can change other properties of the object if you want.
Click the Visibility button and choose Visible.
(Initially it was invisible, now you are making it visible)
Set the Element Type to div, and then select the layer in the Element ID.
You can change other properties of the object if you want.
Click the Visibility button and choose
Visible.
Click Restore on mouseout event check box to set the previous state of the layer (invisible) when you move the mouse out of the picture.
102Chapter 6
The Behaviors task pane has the following view:
Click the onclick combo box and choose the onmouseover event.
You just specified which action happens for which event. Here you set the Visibility to onmouseover event and the Restore Property to onmouseout event.
Save and preview the page to see how it works.
Some Behaviors Examples
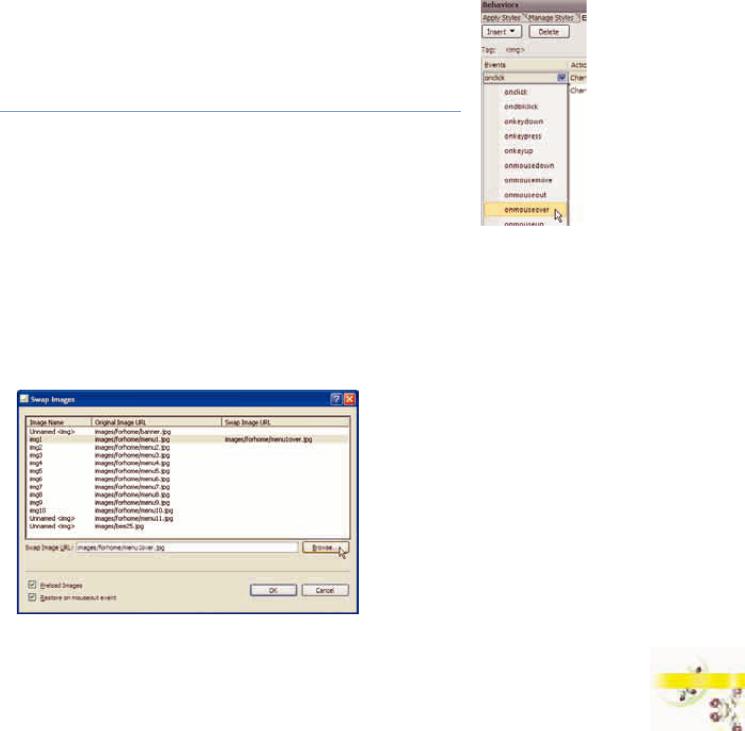
Swap Image
If you want to swap one image for another when a specified event occurs, you can use swap image behavior. Rollover buttons are created by using this behavior. Interactive Buttons also use the Swap Image behavior to implement the interactivity of the button.
A picture changes with another picture when a mouse passes over it. You need
two pictures that should have the same size; otherwise the swap picture is Changing the event resized to fit the area.
Click the picture which you want to swap.
Select Insert>Swap Image on the Behaviors task pane. The Swap Image dialog box opens.
Selecting a swap picture
Improving Interactivity 103
Click the Browse button and find your image that will play.
Click the Restore on mouseout event check box to show the initial picture when you move the mouse pointer out of the picture and click OK to complete.
The following script is added to the Behavior task pane.
Save and preview the page.
Normal view |
Mouseover view |
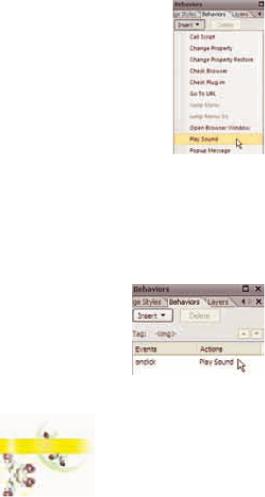
Play Sound
When you click the picture, music plays.
Click the picture to select it.
Select Insert>Play Sound on the Behaviors task pane. The Play Sound dialog box opens.
Click the Browse button and find your sound that will play and click OK.
Opening Play
Sound
Locating the sound file
The following script is added to the Behavior task pane.
When the onclick event occurs, it plays the sound.
Save and preview the page.
Click the picture to listen to the music.
104Chapter 6
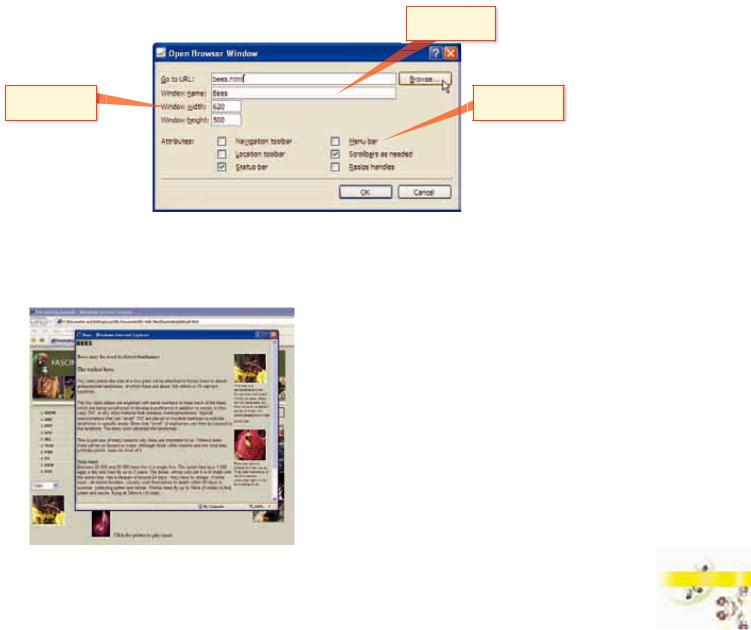
Open Browser Window
When you click the picture, the bees page opens in a window whose size and attributes you can specify.
Click the picture to select it.
Select Insert>Open Browser Window on the Behaviors task pane. The Open Browser Window dialog box opens.
Click the Browse button and find your file that will open in the browser window.
You can give a window name
You can change window size
You can change window attributes
Make desired changes and click OK.
Save and preview the page.
Click the picture and you’ll see that the page opens in a separate and specified window.
Preview - An opened window after click
Improving Interactivity 105
Placing the
cursor
The added menu
Preview - A
jump menu
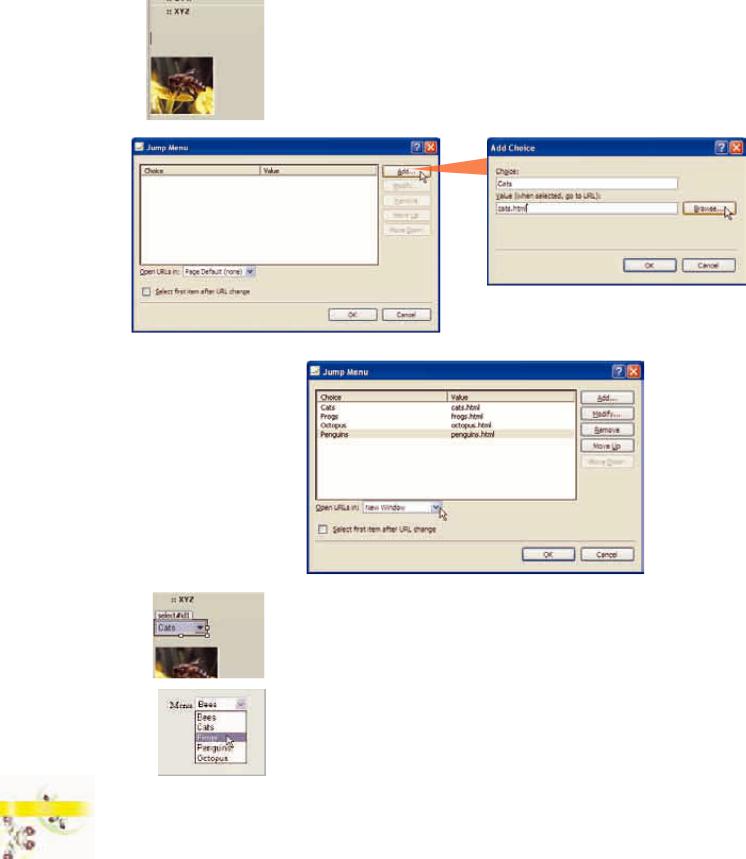
Jump Menu
Place the cursor where you want to add a jump menu.
Select Insert>Jump Menu on the Behaviors task pane. The Jump Menu dialog box opens.
Click Add button to add the pages which your menu will contain.
Adding a menu item
Select New Window from Open URLs in the drop-down list and click OK.
Opening URLs in a new window
If you click the Select first item after URL change check box, the page which you select from the menu will be opened and the first item will be selected automatically.
The menu is added to the page.
Save and preview the page.
Select a page from the menu drop-down list. When you click any page, it opens in a new window.
106Chapter 6
Using Java Script Codes in Expression Web
JavaScript is a scripting language and used to improve the design, validate forms, detect browsers, create cookies and much more.
The easiest way to use JavaScript code in Expression Web is to just copy and paste scripts into the HTML.
You can find and use a lot of free JavaScript examples which are guided on how to add them to your HTML codes on the Internet.
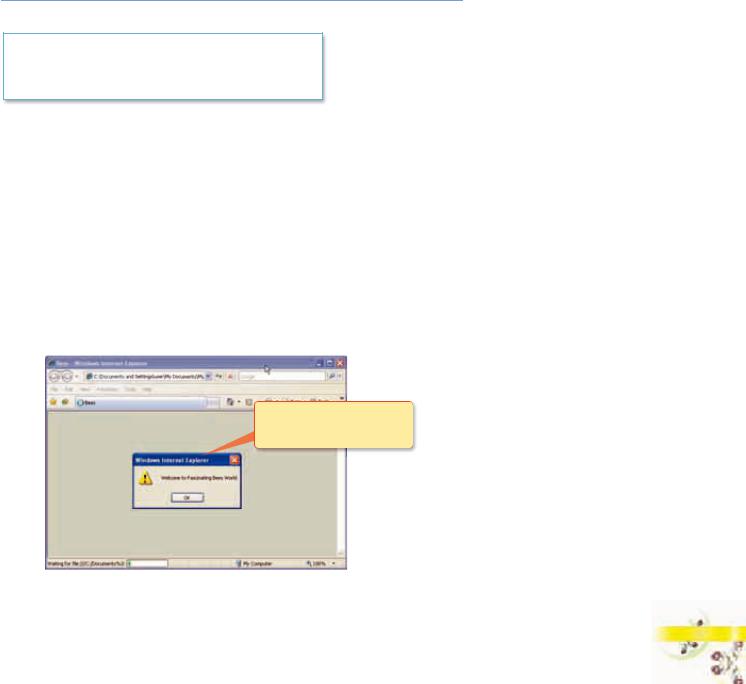
Greetings
A script is used to say welcome to the visitors when they open the page.
<script language=”JavaScript”>
alert(“Welcome to Fascinating Bees World”);
</script>
You are going to add some code inside the HTML codes, so you need to detach the page from the template.
Open the page Bees.html and select Format>Dynamic Web Template>Detach Dynamic Web Template.
Insert the above code anywhere inside the <body> tags.
When the page is loaded, you are first met with “Welcome to Fascinating Bees World” greetings.
Save the page and preview the page.
When the page is loaded,
the greetings appears.
Preview - Greetings
Improving Interactivity 107
Flashing Status Bar
A script is used to display a flashing message in the status bar.
<SCRIPT language=”JavaScript”><!—-
var text = “Welcome to the Fascinating Bees World...”;
var speed = 200;
You can change the text var control = 1; and speed how you want
function flash()
{if (control == 1) {window.status=text; control=0;} else
{window.status=”“; control=1;} setTimeout(“flash();”,speed);}
//—></SCRIPT>
Insert the above code anywhere inside the <body> tags.
Change the <body> tag with <body OnLoad=”flash();”>
Save and preview the page.
When you open the page, you see the flashing message in the status bar.
Preview - Status bar
You can also set a simple text on the status bar by using Insert>Set Text>Set Text of Status Bar.
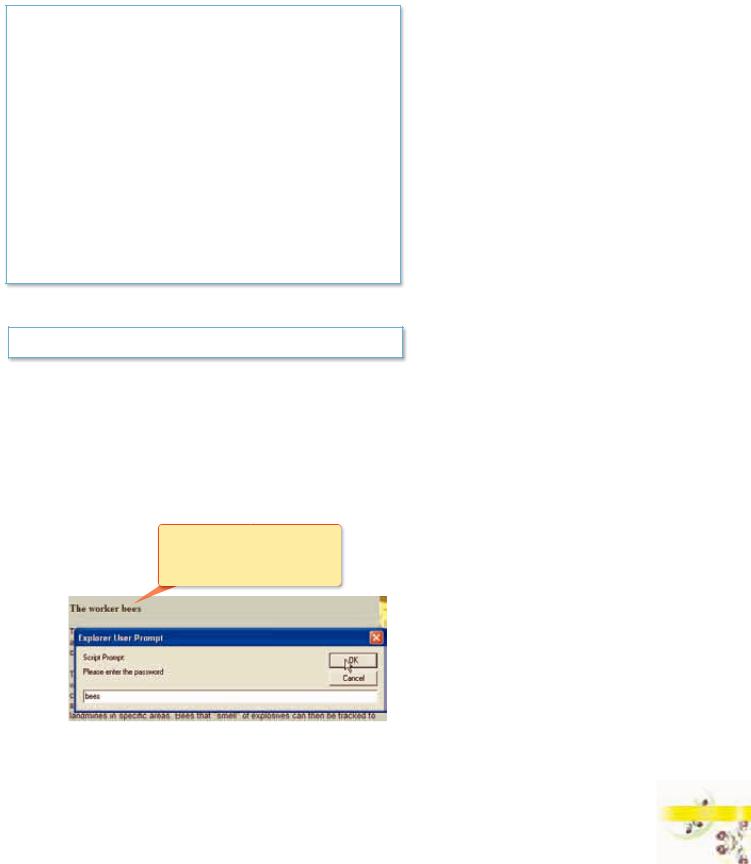
Page Password Protection
A script is used to protect a page with a password.
This script has two sections; one part is put into the head, the other into the body.
Insert the code below anywhere inside the <head> tags.
108Chapter 6
<script language=”Javascript”> <!—
function pass(){
var password = “bees“
var x = prompt(“Please enter the password”,” “) if (x.toLowerCase() == password) {
alert(“Correct password \n \n Click OK to enter the page”) location = “bees2.htm”
}
else {
location = “bees.html“
}
}
//—>
</script>
Insert the code below anywhere inside the <body> tags.
<a href=”Javascript:pass()”>The worker bees</a>
When you click the hyperlink, you are prompted to enter the password. If you enter the correct password “bees”, the bees2.html page opens, otherwise it opens the bees.html page.
Save and preview the page. When you click the hyperlink,
you are prompted to enter the password
When you click the hyperlink,
you are prompted to enter the password
Prompted password window
Improving Interactivity 109
XML
XML stands for Extensible Markup Language. XML and HTML are used with different goals:
HTML was designed to display data, but XML is used to transport and store data.
XML is used to structure, store, and transport information. XML provides an immediate opportunity for database-driven site development.
XML describes what that content is instead of describing how that content should be displayed. You can mark up the contents of a document, describing that content in terms of its relevance as data.
Have a look at the following HTML element:
<h2>Red Oranda</h2>
This example shows the text as a heading in a web browser, but if you want to access those words as data, you can use XML:
<FISH>Red Oranda</FISH>
As you can see, you can choose the tag name that best describes the contents of the element in XML. HTML deals with structuring data, XML deals with defining data.
You can present XML data in a browser by using eXtensible Stylesheet Language (XSL). XSL describes how the XML document should be displayed!
With even very little knowledge of XML, you can easily and effortlessly create data bindings between your XML files and your Web pages. Before you can begin integrating XML data into your Web pages, you must first build the XML file that will contain the data to be offered within the Web pages.
Building an XML file
You are going to create a goldfish catalog, so the root is catalog and under the root the next is fish.
In the fish, you type the fields. Each field gives specific information.
<CATALOG>
<FISH>
<ITEM>7131</ITEM> <NAME>Red Oranda</NAME> <SIZE>2” to 2.5”</SIZE>
<IMAGE>catalog/images/oranda_red_small.jpg</IMAGE> <PRICE>5</PRICE>
<INSTOCK>yes</INSTOCK>
</FISH>
<FISH>
…
</FISH>
…
</CATALOG>
<CATALOG>
<FISH>
</FISH>
</CATALOG>
This structure repeats to how many records you want to include.
110Chapter 6